It's a snowy day, so I'm stealing some time to update the blog.
My first rider (bike that I rode instead of cutting up) came back from the sand-blaster. These folks are local, but I need to find someone cheaper - they charged their minimum ($100) for what should be maybe a $25-50 job.
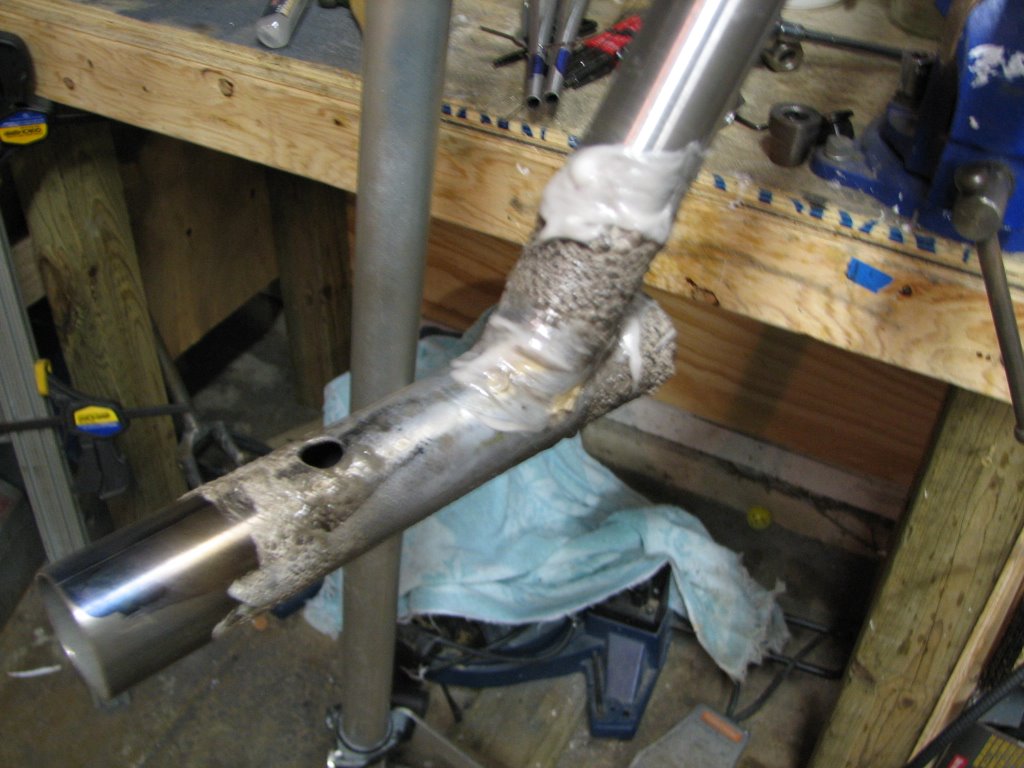
Overall it looks pretty good, but they blew through the edge of one seat-stay cap. Out came the torch. This is a perfect application for Freddy's Filet-Pro. Fill the spot a little high, cool and clean flux, then file it down with a half-round and it's as good as new. Some could do that with 56% silver, but Filet-Pro makes it soo much easier.
Anyhow, over to the Ace to select colors and decided on Colonial Blue (a very soft grey-blue) with white (head-tube and maybe seat-tube). I think it will be subtle but very attractive, and in keeping with the French character of this bike. I gave a test shot of primer to see how it took to the blasted frame. It looks like a course of sandpaper will be in order before priming, to knock down the worst of the texture left behind by the blaster.
There's another new bike in the queue - a track frame based on Colubus SLX tubes and an old lug set that I picked up on EBay. I'll have to post lug pictures soon - they're sort of interesting.
Henry James sent me some of their Gas Flux brass rod and a pound of flux. I'm going to do a little more brass work and see how I like it. I'm moving to the point where: 1) I believe that the heat of brass brazing doesn't hurt tubing - if the brazing is done well; 2) Some parts of the frame benefit from being done in brass. I'll keep you all posted on the progress. An interesting aspect of the Gas Flux rods is that they're 2-3 times as long as Freddy's rods. On the one hand, this could be a lot to handle (unless I cut them up). On the other, it could limit the losses related to the short end that can't be held and flowed at the same time.
I had what was to be my first rolling frame (mentioned in a prior post) that I'll call Old Number 1 or ON1 for short. It turned out that it had a marvelously aligned front triangle and a well aligned rear triangle which weren't in alignment with each other. Hmmm.
The new rear triangle is now fitted for ON1. Grinding out the BB ports was interesting. If you're not careful, the spigots can end up with very thin walls. The key is that its a 3 dimensional puzzle, and one has to keep checking to make sure that excess material is being removed from the right places. The dropouts are HJ stainless, and naturally they had to be thinned to fit into the chain and seat stays. The seat stays fit into ports the seat-cluster - which had to be ground out like the BB. However, as these are considerably smaller in diameter, it required a much smaller rotary file - making for a slower job.
Anyhow, all are fitted and cut to length. All that's left is to clean, flux, and braze - which might happen this weekend. Yea, I miss the torch time.
The storm has brought cold with it, although its actually a little above freezing. Anyway, it's delaying the spray out of Frame 1. If this cold continues, I may accelerate my plans to practice vacuum bagged carbon joints. This will be done in the house anyway - where its warm. With luck, I may even have a prototype frame with bagged joints by January. That would be fun.
Well, that's all for now. See ya soon.
Friday, December 01, 2006
Friday, November 17, 2006
Catching Up Again
Tonight I put the last filler of epoxy into the filets on Linda's bike. After a little sanding, it'll be ready to head to Gordon for paint. Naturally, it wasn't possible to sand tonight, so I spent time on several other projects.
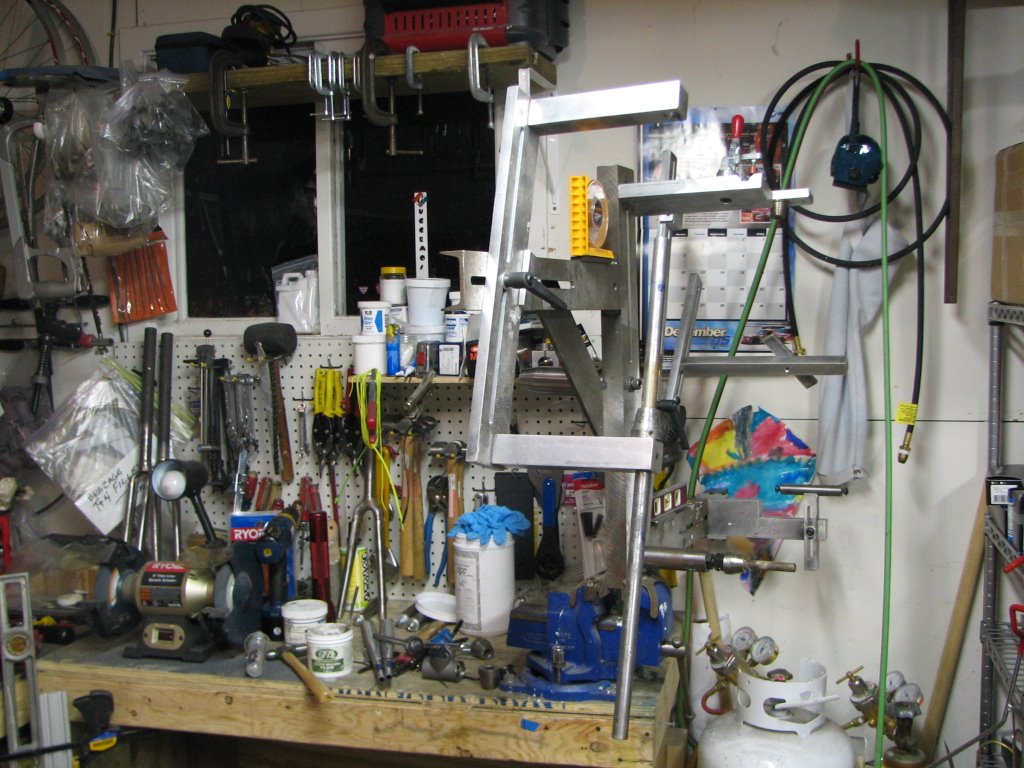
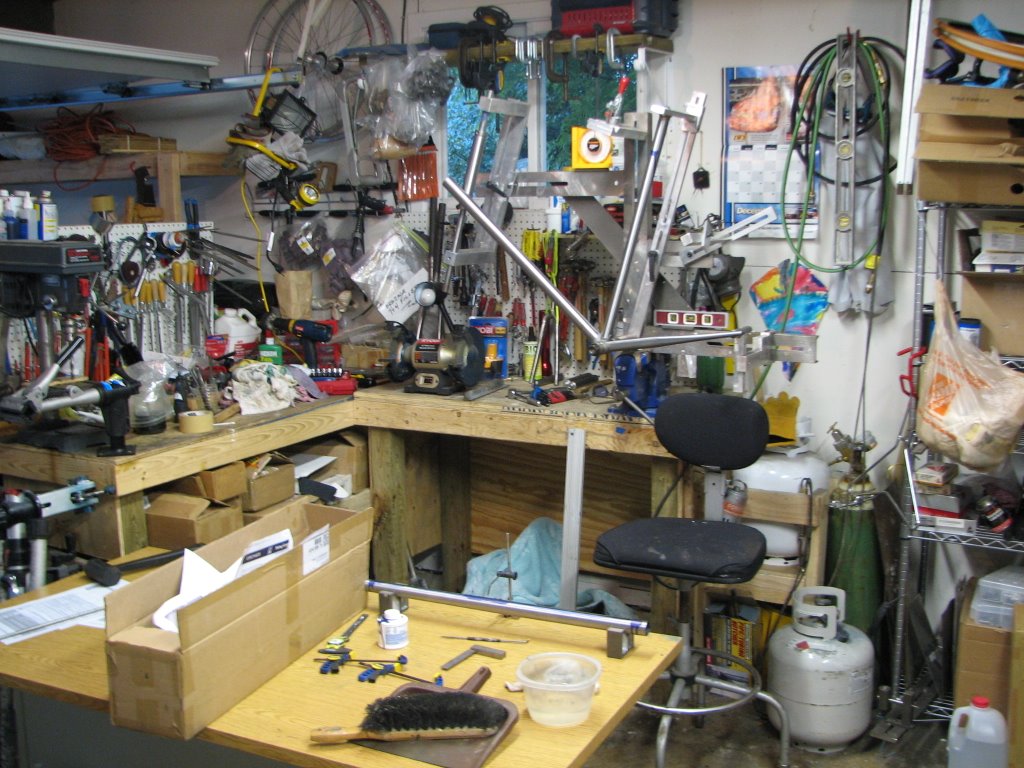
First, I've organized a work space in the basement. It's well lit and has two good-sized work surfaces. This is where I'll do my vacuum bagging. It close to the furnace, and so tends to be warmer than the rest of the house - which is good for curing epoxy. There is a little more organizing of tools and materials to do, but things are just about ready here.
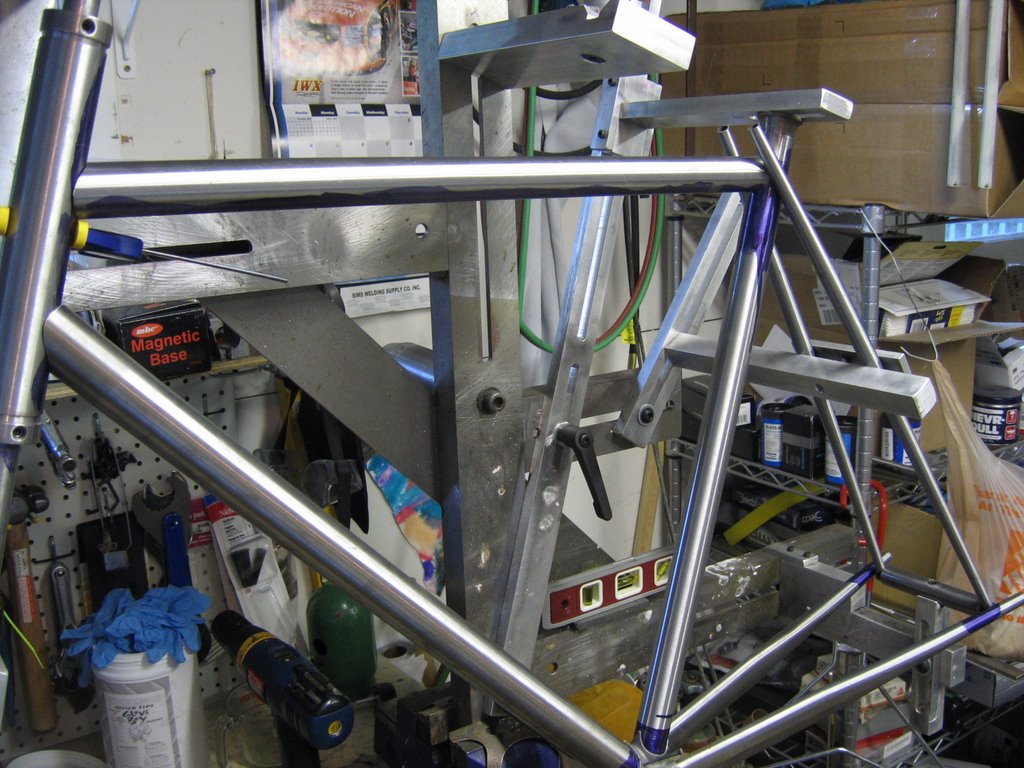
Second, I attacked the first frame that I built with the intention of being painted and built up. After dropping it off, the painter got back to me with the information that the rear triangle was out of alignment - and so its sat in his shop for a couple of years. This fall we arranged to get it back to me. I should note that this frame is the one that convinced me to buy a jig - it was just too hard to build the rear-end without. The funny thing is, knowing what I do now (how to pin or tack joints), a straight, aligned, rear triangle seems quite doable without a jig.
Looking this beast over, the front triangle seems fine. It passed the check on the alignment table - and so is deemed worthy. The rear triangle was beyond repair. Out came the hack saw and I cut each chain stay about 2 inches from the BB. It was pleasing to see that the stays held their alignment even after being cut. Then I cut the first seat stay about half an inch from the seat lug. It too held alignment, so I cut the final seat stay similar to the first.
The seat lug has ports for mounting the seat stays, sort of a fast back style. These stays were cut short because they needed to be ground out of the lug. The chain stay stubs were left longer so that they can be heated and pulled out of the BB.
The now disconnected rear triangle is held together by the brake bridge and the dropouts. And, it looks good and in alignment with itself. Yea. This is now set aside for a while
Third, it was organization time. And this will take some time. To begin with, I inventoried tubing and reorganized its storage to save some space. For the record, I have 4 Metax front triangles, 2 sets of 653 (1 std, 1 OS) w/ 725 rear triangles, 2 full sets of SLX and 1 full set of SL (11 tubes), 1 set of LIFE sized for SL6 lugs, 3-4+ sets work of Deda & True Temper std & OS tubes, 4 pair of Reynolds pre-raked fork blades, 2 pair of Nivachom blades, 4 pair of ZeroTre blades, 2 pair of round track blades, a variety of seat stays (including Metax, Biconical, and normal 14 & 16mm) and chain stays (oval, round, round-oval-round), a bunch of head tubes, and a small supply of steerers. That's a lot more tubing than I realized. Everything is now organzied, labeled, and put away, and many boxes have been collapsed and put in the recycle bin.
With one frame and fork now in the car's trunk (so it can go for blasting), one frame about to be cut up to liberate its carbon tubes for practice joints, and the frame mentioned above in play - there are many fewer stray frames hanging around and in the way.
Next steps include: creating more hanging space for parts and tools, making more holder blocks for small files, and rotary tool items (sanding drums, flap wheels, buffers, grinders, etc.). Then I need a better system for storing (and making accessible) the various sand papers.
One disadvantage of my garage is that it has a very low ceiling. The tracks for the garage door use a special short radius piece so that the door fits. This means that its hard to go up for storage. Therefore, more bicycle parts need to find a place in the basement to free up more space for tools and materials. As you can see, this is going to be an ongoing project for quite some time.
Anyhow, my building priorities have shifted to: a) install the new rear triangle on Bike #1, then paint it (using rattle cans); b) Get the blue bike back from blasting and give it a good paint job; c) Finish Aram's track bike; d) Build a townie bike using some nice Tange lugs I've been hording and a set of SLX, build a Metax roadster - after that the world is too fluid to plan.
It looks like my hands will be full with re-orging the shop, refining my carbon vacuum bag builds, and a bunch of steel bikes. Stay tuned for the fun.
First, I've organized a work space in the basement. It's well lit and has two good-sized work surfaces. This is where I'll do my vacuum bagging. It close to the furnace, and so tends to be warmer than the rest of the house - which is good for curing epoxy. There is a little more organizing of tools and materials to do, but things are just about ready here.
Second, I attacked the first frame that I built with the intention of being painted and built up. After dropping it off, the painter got back to me with the information that the rear triangle was out of alignment - and so its sat in his shop for a couple of years. This fall we arranged to get it back to me. I should note that this frame is the one that convinced me to buy a jig - it was just too hard to build the rear-end without. The funny thing is, knowing what I do now (how to pin or tack joints), a straight, aligned, rear triangle seems quite doable without a jig.
Looking this beast over, the front triangle seems fine. It passed the check on the alignment table - and so is deemed worthy. The rear triangle was beyond repair. Out came the hack saw and I cut each chain stay about 2 inches from the BB. It was pleasing to see that the stays held their alignment even after being cut. Then I cut the first seat stay about half an inch from the seat lug. It too held alignment, so I cut the final seat stay similar to the first.
The seat lug has ports for mounting the seat stays, sort of a fast back style. These stays were cut short because they needed to be ground out of the lug. The chain stay stubs were left longer so that they can be heated and pulled out of the BB.
The now disconnected rear triangle is held together by the brake bridge and the dropouts. And, it looks good and in alignment with itself. Yea. This is now set aside for a while
Third, it was organization time. And this will take some time. To begin with, I inventoried tubing and reorganized its storage to save some space. For the record, I have 4 Metax front triangles, 2 sets of 653 (1 std, 1 OS) w/ 725 rear triangles, 2 full sets of SLX and 1 full set of SL (11 tubes), 1 set of LIFE sized for SL6 lugs, 3-4+ sets work of Deda & True Temper std & OS tubes, 4 pair of Reynolds pre-raked fork blades, 2 pair of Nivachom blades, 4 pair of ZeroTre blades, 2 pair of round track blades, a variety of seat stays (including Metax, Biconical, and normal 14 & 16mm) and chain stays (oval, round, round-oval-round), a bunch of head tubes, and a small supply of steerers. That's a lot more tubing than I realized. Everything is now organzied, labeled, and put away, and many boxes have been collapsed and put in the recycle bin.
With one frame and fork now in the car's trunk (so it can go for blasting), one frame about to be cut up to liberate its carbon tubes for practice joints, and the frame mentioned above in play - there are many fewer stray frames hanging around and in the way.
Next steps include: creating more hanging space for parts and tools, making more holder blocks for small files, and rotary tool items (sanding drums, flap wheels, buffers, grinders, etc.). Then I need a better system for storing (and making accessible) the various sand papers.
One disadvantage of my garage is that it has a very low ceiling. The tracks for the garage door use a special short radius piece so that the door fits. This means that its hard to go up for storage. Therefore, more bicycle parts need to find a place in the basement to free up more space for tools and materials. As you can see, this is going to be an ongoing project for quite some time.
Anyhow, my building priorities have shifted to: a) install the new rear triangle on Bike #1, then paint it (using rattle cans); b) Get the blue bike back from blasting and give it a good paint job; c) Finish Aram's track bike; d) Build a townie bike using some nice Tange lugs I've been hording and a set of SLX, build a Metax roadster - after that the world is too fluid to plan.
It looks like my hands will be full with re-orging the shop, refining my carbon vacuum bag builds, and a bunch of steel bikes. Stay tuned for the fun.
Tuesday, November 14, 2006
Dateline Tuesday December 15
Just a quick update.
Linda's bike is coming along and should get packed off to the painter within two weeks. I'm currently cleaning up joints and spilled epoxy from bonding the front triangle and the chain-stays. Then the seat-stays get fitted, bonded and a little cleanup, and we can ship.
Brigette's bike is held up waiting on a stencile. He name decals weren't opaque enough against the carbon tubes - so Gordon is painting her name. He lays out the name, and has a shop computer-cut a stencil from mylar. But, until the shop gives them up, we're stuck.
I got a couple of packages from FiberGlast today. I've been assembling materials from a number of sources to start practicing vacuum bagged joints on carbon tubes. This should allow me to make a stronger & lighter carbon frame while allowing my more flexibility in frame design compared to using tubes and lugs. I hope to have a production version on display in time for the Chicago Bike Show.
I'm also waiting for some more stainless tubing to arrive. I've assembled three frames worth of Metax tubing, except for the chainstays. And, I may have found a source (which is next to impossible) for one or more sets of single-bend Metax chainstays. At least one set of this tubing will be combined with Richissmo lugs, and hopefully this frame will also be ready for the show. By the time Linda's frame is gone, everything necessary will be in stock and ready to go.
I want to do another stainless frame using Slant 6 lugs and the new Columbus XCr tubing. Unfortunately, they are only offering a 38mm down-tube to start, and the SL6 needs a 35mm. It would be possible to use a Reynolds 953 downtube, but this formulation of stainless is more sensitve to staining in the presence of salt (sweat).
I am definately doing a Slant 6 frame using a set of Columbus Life tubing. This should be pretty light. Its being created to fit a friend who rides a Serrotta Ti frame. Nice bike. But with the right paint job, I think the Slant 6 will look much sexier.
Meanwhile, I've found a blaster to strip my steel road frame. I've decided to fix a couple of cosmetic issues and give it a decent paint job. The blasting is more expensive than I expected (quote of $150) so I may need to find another source long-term. But this will get me going for now. Then I have the first steel frame I ever built with a did a beautifully aligned rear triangle, it just isn't aligned to the front triangle. This was built pre-jig. The front looks good, so the back will come off and a new one will go on in its place. Oh, and Aram's track frame is close to having its filets cleaned up and being ready for paint.
Wow... that's a lot of projects. I better break the log jam and start completing some of them.
More soon.
Thursday, October 26, 2006
BikeCad
I finally broke down and bought BikeCad.
It's earned its keep already. I just did a new DCS frame design. The challenge here is to work within the available lug angles. This covers a pretty broad range of fits, but sometimes finding the right compromise takes a bit of trial and error.
BikeCad can display angles as different variables are fiddled allowing me to quickly zero in on the best lug set for properly fitting a given rider. Cool.
That said, I think a better answer is to develop a system where any angles are feasible at any joint. The theory of how to do this is relatively simple, and involves composite construction techniques that I've used in other contexts. But, the real key is making sure that the joint is stronger than the tubes. After all, no rider wants to find him/herself suddenly riding a pair of unicycles, eh?
From my perspective, the most feasible method is to miter tubes closely, and bond them with epoxy. Then layer additional carbon fiber on layers using a vacuum system with bleeder felt to extract excess epoxy and air.
So, there's a need to test this process to ensure that I get: 1) enough strength; 2) consistent results. Which means that I need some practice tube.
"Fortunately" if you look at Linda's blog, you'll see I had a little problem with a front triangle. So... I'm going to cut out the tubes and make them my first sacrificial "test tubes." After that I'll get some tubes from McLean and try to build myself a frame. So, stay tuned on this front too.
In a different vein, I've found some sources for Metax stainless tubes fro the front triangle. So, some stainless projects are on about to come online very soon.
Expect to see activity starting to pick up again.
Cheers
Wednesday, October 18, 2006
Catching Up
Hey, it's only been a month. A month!!!! Yowza!
Work and the first bug of the year. It's been pretty much 7 days a week for the day job of late. And, the kids shared a virus from school. So I missed the Missouri MS ride and the Apple Cider Century. Boo on that.
Meanwhile the garage has been filling with parts (build kits and one-off treasures from EBay).
Add it all up, and I've been highly unproductive on the framebuilding front. It actually reached the point where I couldn't reach tools and parts in the garage. Ugh!!!
Last weekend I got back on the bike (34 & 32 degrees F on Sat & Sun at 6:30am).
I'm slow but it felt good. Last week I hoped to start reorganizing the garage and basement - but, some out of town clients came into town and it got busy. This week, I've finally got past the o-load and made some progress making space.
Tonight, I got back to work on Linda's frame. More on the other blog about that. The key thing is progress is being met.
One other thing that's taken time has been beginning to form up an organization that (for want of any better name) I'm calling the Lake Michigan Chapter of The Cycle Design Group. The intent is to create professional group that can advance the interests of custom/hand-built framebuilders. To few riders have exposure to what's available. Very few recognize or appreciate the incredible bargains a true custom handbuilt frame represents compared to a manufactured bike. And, there really are some legislative issues that could benefit from our input. So, onward with the LMCTCDG. More on this later.
Hopefully, there will be more pix to post in the next week or two.
Cheers,
Wednesday, September 20, 2006


Sunday, September 17, 2006
Lindas Bike
I'm building a bike for Linda using Deda's DCS carbon lug and tube set. The head-tube is bonded. This is a tricky operation as the headset cups are bonded into the lugs, so its imperative that the lugs be held during the bonding process in a manner that assures that they remain parallel. That is done.
The main triangle will get bonded this week and I'll be posting some pictures.
The main triangle will get bonded this week and I'll be posting some pictures.
Friday, September 01, 2006
Sarah's Completed Bike
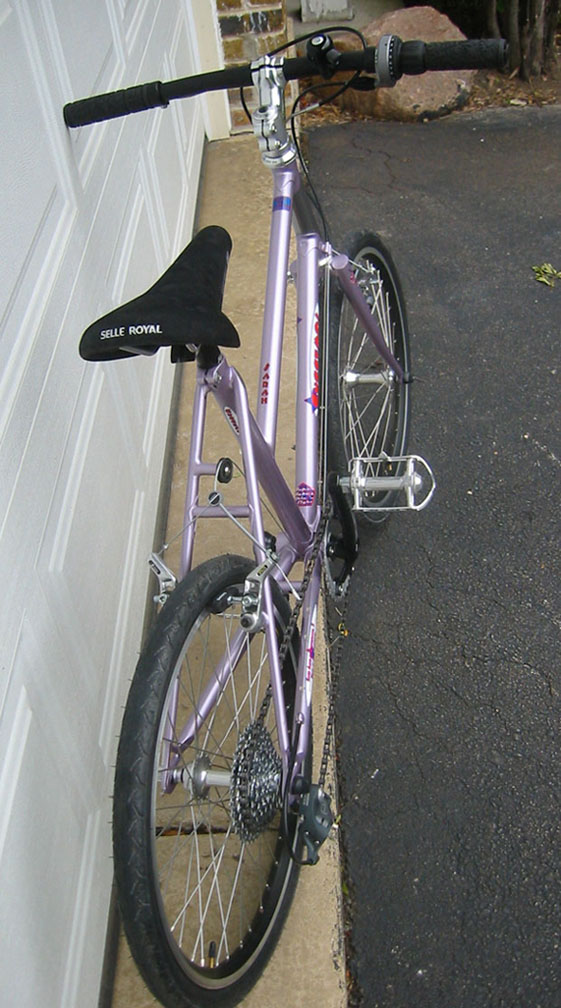
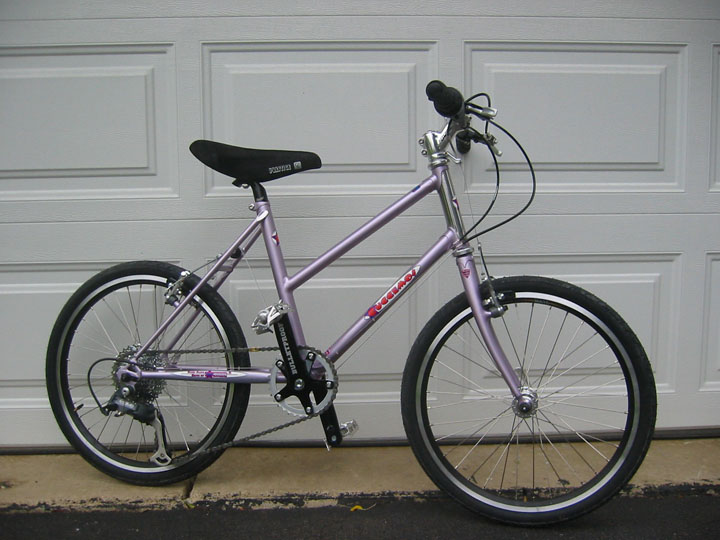
 Here's Sarah's bike - finally complete.
It features the fine paint work of Gordon Lechner.

Thursday, August 31, 2006
Sarah's Bike
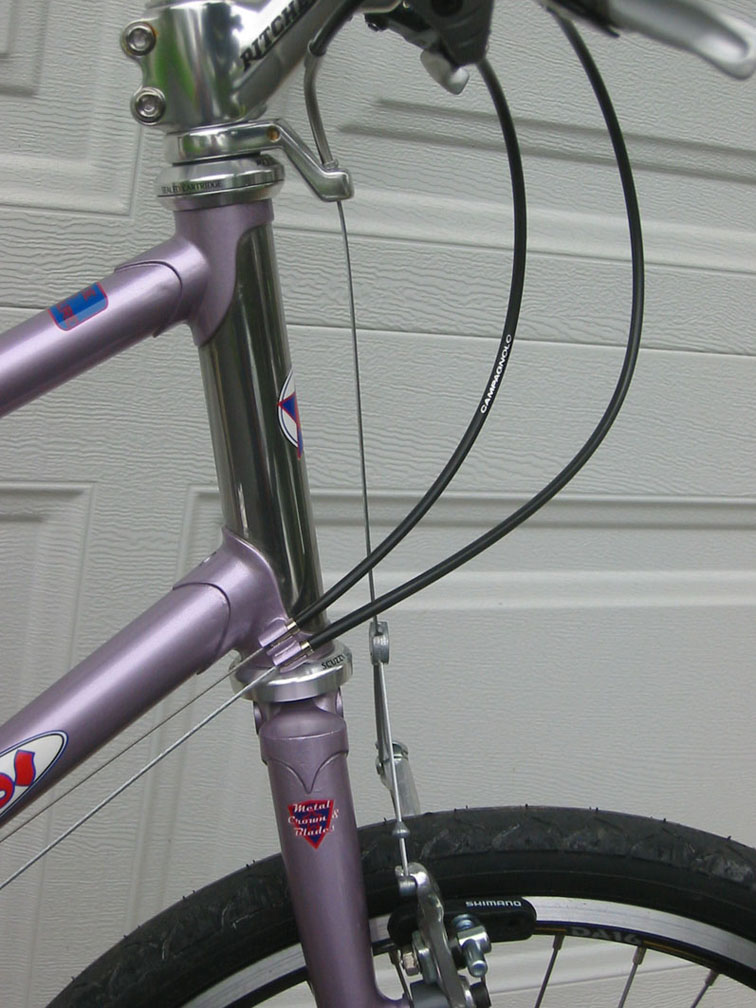
Sarah's bike came back from the painter yesterday. Gordon did his usual good job, and it looks so nice. The light color paint shows off every errant file stroke - but its good for learning what to improve upon.
I don't know who's more excited, Sarah or me. Anyhow, I was up until 11:30PM last night getting it built. Then I took it for a spin. It tracks great and turns easily. With a very short stem, and wide flat bars, it's very easy to turn the front wheel, so the tracking is especially important for a 7 year-old. Despite the fact that my knees would hit the handlebar if I pedaled and turned at the same time, it was a hoot.
This morning I checked the size on Sarah. We need to cut an inch off the seat-post (originally a Mtn-bike post), so we can lower the seat to her proper height. Otherwise, everything checked out.
The build looks like this: Ritchey Scuzzy Logic head-set and Ritchey riser stem, Syncros aluminum flat bar, SRAM 5.0 rear shifter w/Lizard Skin grips, SRAM 12-34 9 speed cassette, SRAM X0.7 rear derailer, HKK 9 chain, Tektro brake-levers, Shimano Altus cantilever brakes, Performance Forte seat-post, Sella Royal (some old brand?) black suede saddle, Shimano 105 hubs, laced straight gauge 2X to Alex rims (BMX size), with 406x1.25" tires.
The net is a strong (easily can carry me at 205 lbs), light bikes that spins easily and fits (subject to seat-post as above) Sarah great and looks very cool IMHO.
Monday, August 21, 2006
General Update
Lots has been going on with little documentation. Let's fix that now.
After making a slight alignment tweek on the chain-stays, I installed the top tube on the track frame. I used a smaller tip on the torch which gave me better control, so these joints went faster than any of my prior filet joints. Also, cleanup of the joint was faster. In various places, different builders have suggested smaller or bigger tips for filet joints. My vote is smaller. Next step is an alignment check, then install seat-stays. After that a brake bridge, cleanup, and off to the painter.
I've been preparing to build a DCS carbon frame. The design is done and approved by the rider. We've figured out the build kit and she's forming her ideas on paint. The build has been held up waiting for the track frame to be done with the jig. I'll probably start the build by next weekend. I anticipate this to go fairly fast.
I've got a new client for another carbon frame. For this, we're going to use a Deda Corsa Nero. After going through the analysis, she fits it beautifully. Again, the build kit is decided on, so I'll be ordering that soon.
I've also ordered a new batch of 20 Cycles Noir decals. This will feature a more traditional design. I've also made the font bigger to take advantage of the real estate available on a carbon frame.
So, September should be a busy month with the delivery of a steel track bike and two carbon road frames. Yea!
After that, I'll get my new steel road frame finished and then move to building myself a steel track frame and see what comes next.
Saturday, August 19, 2006
Sarah's Frame is Almost Done
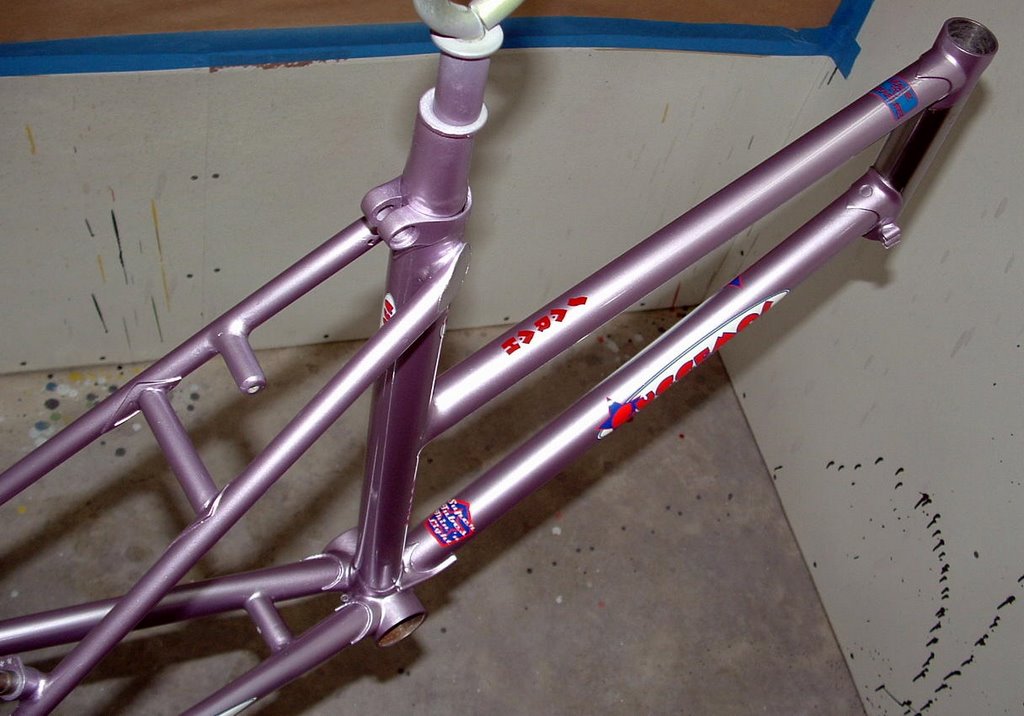


Gordon is almost done with Sarah's frame, and shared some pictures on his flickr site (www.flickr.com/photos/bikedelic). Now they're posted here as well.
You can see his usual outstanding work. I can see a couple of my mistakes, and anticipate seeing a few more when the frame comes back. Still, I think it looks great and I'm sure that Sarah is going to be very proud to ride it.
BTW: Gordon hand painted Sarah's name onthe top-tube.
Thursday, August 17, 2006
Dedacciai
I know I know, I'm late posting pictures. But soooon.
Meanwhile, I have to tell you that I have my first frame based on the new Corsa Nero from Dedacciai. It is a thing of beauty!!! You're going to love it.
Meanwhile, I have to tell you that I have my first frame based on the new Corsa Nero from Dedacciai. It is a thing of beauty!!! You're going to love it.
Wednesday, August 02, 2006
Keel is Laid
I'm on the road rather than in the shop. The last week was a blur, with so many activities that it was hard to keep track what day it was. My hope was to finish Aram's frame and get it off to paint, but there was simply too much else going on.
Still, I stayed up late a few nights and made some progress. First, the chainstays were mounted in the bottom-bracket. The bottom bracket spigots required some grinding to allow for the 120mm rear end. After pinning, alignment was checked with the Bringheli table and looked good, so it was on to brazing. Post brazing, the stays were pulling together a bit. This was probably caused by more heat on the inside of the stays whiling pulling filler around the joints. A little cold set fixed this, along with a final check-out on the table.
Then everything when back into the jig to fit up the front and back ends together. When all looked good, the down-tube and BB where sanded and cleaned with some of Freddy's Al-Tife. Everything got fluxed up, the joint was put back together on the jig, and the pins were set.
Checking this on the alignment table, I began to see the limits of my cheap surface gauge. I'll probably want to get a good height gauge someday.
Anyhow, after a bit of fussing, things looked good, so I hung the assembly from the track-forks and brazed up the joint. This came out looking clean and neat - which is nice because cleaning filler around the bottom bracket is especially difficult.
Onto the table to find that the downtube was drooping by 1/2mm at the end, and that there was a slight twist to the head-tube. Bending a 35mm down-tube takes some work - but in short order the droop was gone.
Joe supplies a nice jack with his table. This was set below the head-tube in line with the axis of the down-tube. Then a long bar was fitted to the head-tube and the twist eliminated.
After re-checking everything we have a complete straight keel. By then it was 2AM, and that was time to quit.
More when we make progress again.
Saturday, July 29, 2006
Bringheli
I made it out to see Joe Bringheli yesterday and he's doing fine.
Joe's really busy. He's been selling (and building) four frame jigs a month, plus assorted other tools and jigs. Likewise, orders for steel tubing keep coming in. Joe says that he's working to train his daughter to help with parts of the business, just so he can keep up with everything. Yea Joe, it's a good problem to have.
Joe showed me the new Corsa Nero frame set from Deda. Very pretty. It has the newly fashionable large check weave in the outer carbon layer. The tube shapes are nice - very aero-profile looking. It is a complete frame. There's no building involved - so there's no customization either. Corsa Nero will be replacing Black Pearl (which continues to be available for a short while), and offers one improvement: Corsa Nero comes in more sizes than Black Pearl. So, for off the peg fitting, it offers more options. I think it should be popular.
Since my last visit Joe has done 4 frame builds. He clearly enjoys this side of the business, but with all of his other work, he finds it hard to fit more framebuilding into his schedule. It's interesting to note, Joe's custom frame and fork packages are priced as a real bargain. He prices to his local market, and doesn't reflect what a custom steel frame and fork would cost across the rest of the country. So, if you're looking for a frame, you're on a limited budget, and have the patience to wait 3-4 months for it to be built, you might try giving Joe a call.
Friday, July 28, 2006
Checking in
Aram's new fork is part way built, but I've run out of O2. I knew it was about due, but haven't had time to refill. Nick going to run over tomorrow and trade the tank in for me.
Already its clear that I'm going to like this fork with a flat crown better than the slopers. The tips are Henry James SS, which will leave some nice looking faces.
It's possible to get tugs for aluminum forks (the name for a rear dropout on a track frame) which should fit over my steel forks with the stainless plates. Nonetheless, I've decided to remove the one plate and just go with plain forks and the standard MKS NJS tugs.
This weekend should see the frame assembled. There's a little work left on the front fork, the removal of one SS plate, and the filing of the tops of seat stays, all of which should be done tomorrow.
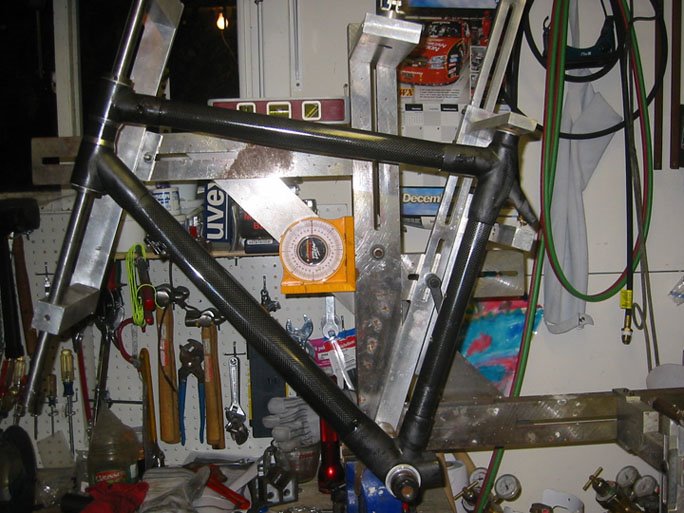
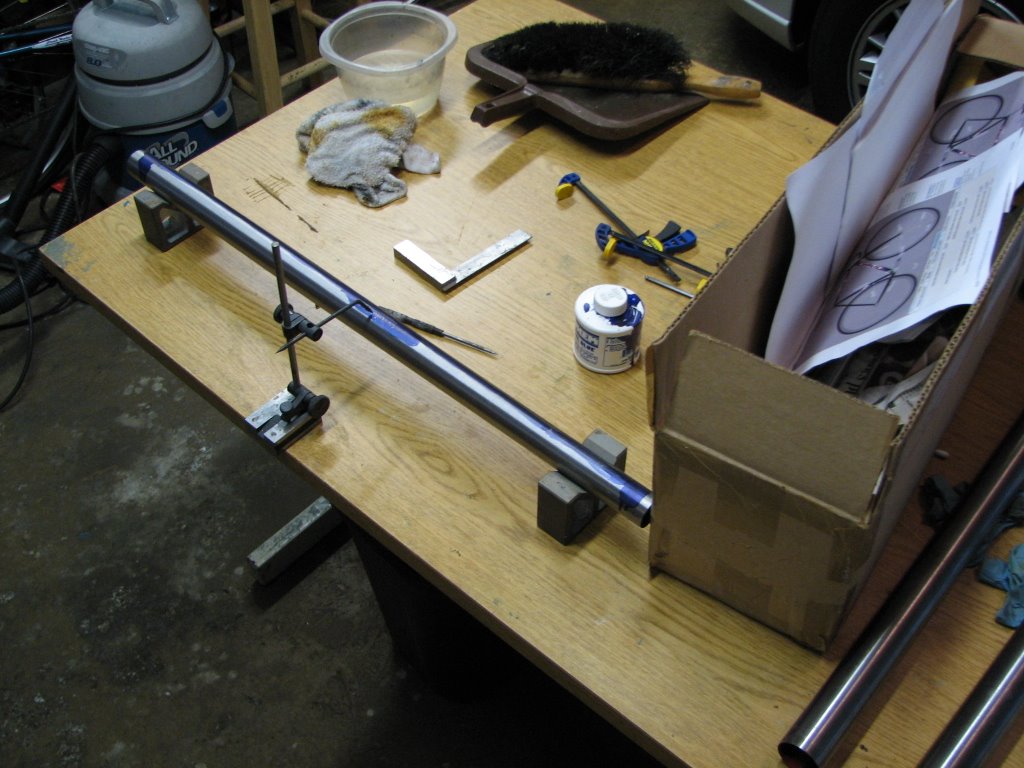
Meanwhile, my Bringheli alignment table just arrived. It looks good, and fits in the shop - which is a big issue for me. If there was more space, I'd probably have just purchased a reject granite counter top - but there's no place to put on. The Bringheli stand is made of heavy angle steel (about 2" x 2") in a configuration and size much like a saw horse. It's very rigid and has holes in the feet to mount it in the floor. Because the table is long and narrow, one has to work one tube at a time. Joe points out to be careful and fully loosen the BB before turning the frame so that the machined face of the BB post doesn't get damaged.
Tomorrow, while I take care of the clean-up tasks, the head photographer will get some pictures of the seat-stays with their plates brazed on, the head-tube/down-tube joint, the seat-post binder, and the new alignment table. We'll post them here for all to see. Then it will be on to brazing up the frame.
More soon.
Already its clear that I'm going to like this fork with a flat crown better than the slopers. The tips are Henry James SS, which will leave some nice looking faces.
It's possible to get tugs for aluminum forks (the name for a rear dropout on a track frame) which should fit over my steel forks with the stainless plates. Nonetheless, I've decided to remove the one plate and just go with plain forks and the standard MKS NJS tugs.
This weekend should see the frame assembled. There's a little work left on the front fork, the removal of one SS plate, and the filing of the tops of seat stays, all of which should be done tomorrow.
Meanwhile, my Bringheli alignment table just arrived. It looks good, and fits in the shop - which is a big issue for me. If there was more space, I'd probably have just purchased a reject granite counter top - but there's no place to put on. The Bringheli stand is made of heavy angle steel (about 2" x 2") in a configuration and size much like a saw horse. It's very rigid and has holes in the feet to mount it in the floor. Because the table is long and narrow, one has to work one tube at a time. Joe points out to be careful and fully loosen the BB before turning the frame so that the machined face of the BB post doesn't get damaged.
Tomorrow, while I take care of the clean-up tasks, the head photographer will get some pictures of the seat-stays with their plates brazed on, the head-tube/down-tube joint, the seat-post binder, and the new alignment table. We'll post them here for all to see. Then it will be on to brazing up the frame.
More soon.
Tuesday, July 25, 2006
Overdue reporting
Life's getting busy again....
Pictures soon, but here's a status update.
The first joint is faired in and looks nice. The fit and angle are on the money. The seat-post binder is mounted on the seat-tube. The seat-tube, down-tube, and chain-stays are mitered to the BB. The bottom bracket itself needs cleanup. In particular the edges of the spigots need to be squared up and the chain-stay sockets adjusted to accommodate the 120mm rear spacing of a track bike. The rear forks (aka dropouts on a road bike) are installed on the chain-stays and cleaned up. The top-tube is rough fitted, but needs a few more file strokes prior to brazing. I've installed concave plates at the top of the seat-stays and just need to do the final filing of the edges to flow smoothly into the tube. So.... we're almost ready to braze things up.
But first, I decided to install stainless plates on the sides of the rear forks. The idea is to avoid paint here where it will get damaged from installing and removing wheels.
In fitting things up, a couple of issues came up: a) the plate isn't as long as the slot; b) the end of the plate sticks out beyond the top and bottom of the fork at its rear end; c) the axle tug (MKS) fits on the fork, but has no room to accommodate the plate. So, I figured to shorten the plates just a bit so the tug can fit on the end of the fork. Also, to trim the end of the plate to echo the curves of the rear fork. Then, another problem came up: if the inside plate is installed, then the tug won't work. The piece that goes around the axle has a guide that rests on the side of the fork. The rear of the tug fits snuggly on the rear of the rear fork, and won't twist to allow this guide to ride along a plate installed on the inside of the fork.
I decided to try mounting the outside plate only. Not ideal, but at least everyone passing by doesn't need to see paint damaged by axle nuts. Using three small clamps to hold the plate in place, it was time to braze.
Looking at the results, it doesn't look all that good. While others have found ways to use these stainless plates, I find them problematic. It seems like the best solution is a stainless rear fork.
In the meantime, I have to decide whether to remove the one plate, or build a new chain-stay. While I think about that, I'm going to concentrate on building a new fork. It's got a flat crown that will look much better than either of the sloping crown forks that I made. The crown has been fitted to the steerer, and the brake mounting has mostly removed. I've started fitting blades. Their sockets in the crown need to be opened up a bit.
This piece needs a good edit, but no time for that now. So let me summarize: The BB shell needs to be cleaned up and fitted for the chain-stays. I need to finish a new fork. The tops of the seat-stays need to be finished, and the right chain-stay needs to be resolved w/o stainless. Then everything can be brazed up, cleaned up, and shipped to Gordon for paint.
Monday, July 17, 2006
Lower Head Tube
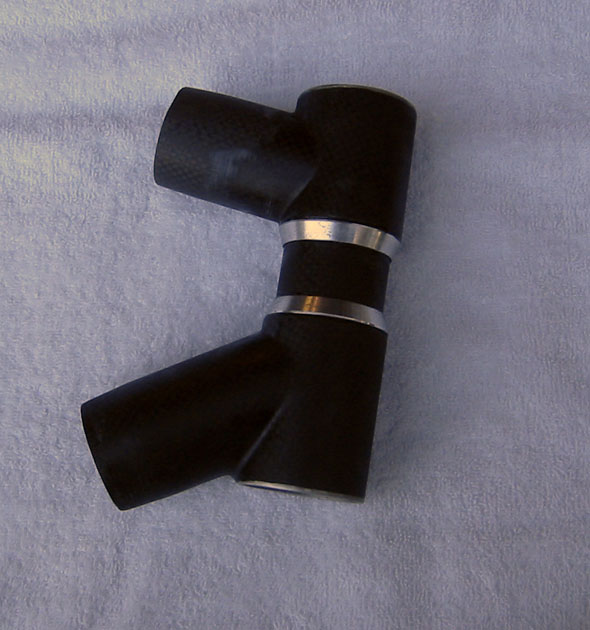
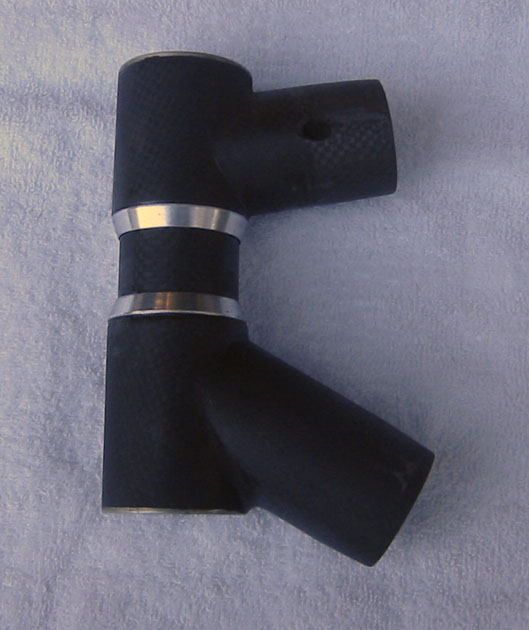
Blogger isn't wysiwyg, so it's not clear the order in which you'll see these images. The first should show the jig, after removing the combined head-tube/down-tube. My vice can swivel, which is great. In this position, it's easy to put tacks on both sides of the joint.

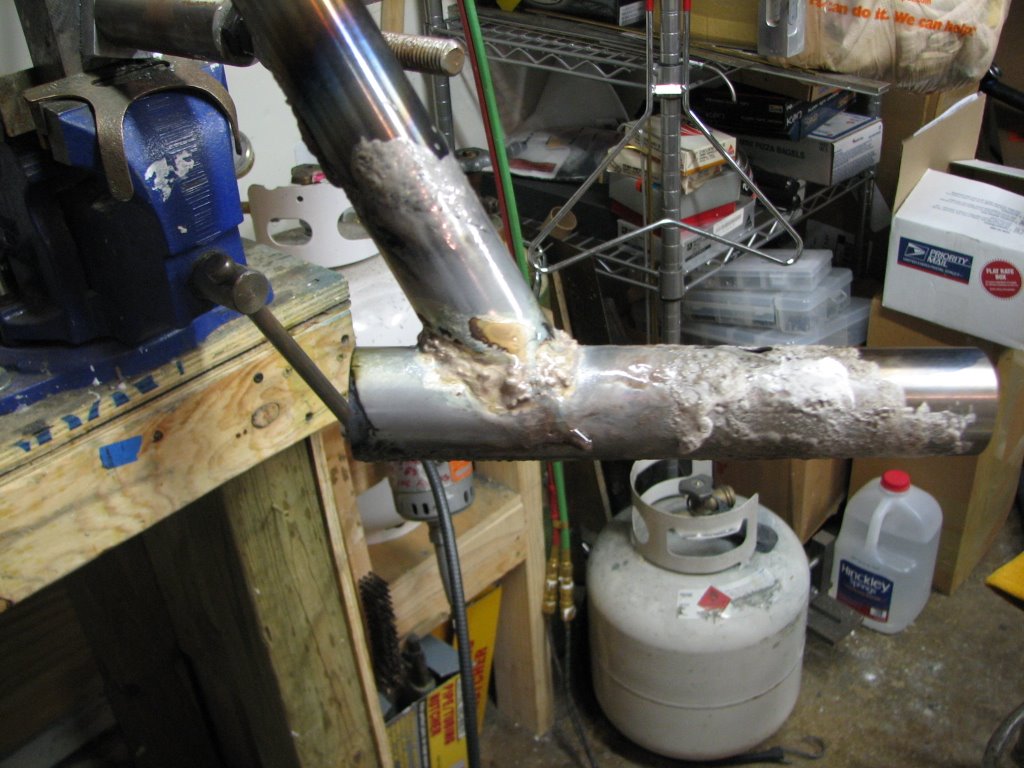
The next two shots show the tacked joint. Sorry, should've taken the pic before beginning to smear more flux on. In any case, there is a tack on each side, and one at the top.
After cooling, The angle and fit of the joint were double checked. All looked good, so it was on to more flux. The joint is held upside down because it seems to be easier to control the flow of filler, plus the flux inside the joint tends to stay at the joint instead of sliding away from it.
The last pic is post-braze. I'm using Fred Parr's Fillet pro. It's a little lumpier than I'd like - but I find it sands down easily to a smooth filet.
Because the down-tube is about 0.8mm thick at the joint, and the head tube is closer to 1mm, the direction of the torch is critical. Instead of pointing straight into the line of the joint, I point the flame a little towards the head-tube to balance the heat between the two tubes. Experience has show that failing to to this causes scorching of the flux on the down-tube.
That's all for tonight.
Sunday, July 16, 2006
More Pix
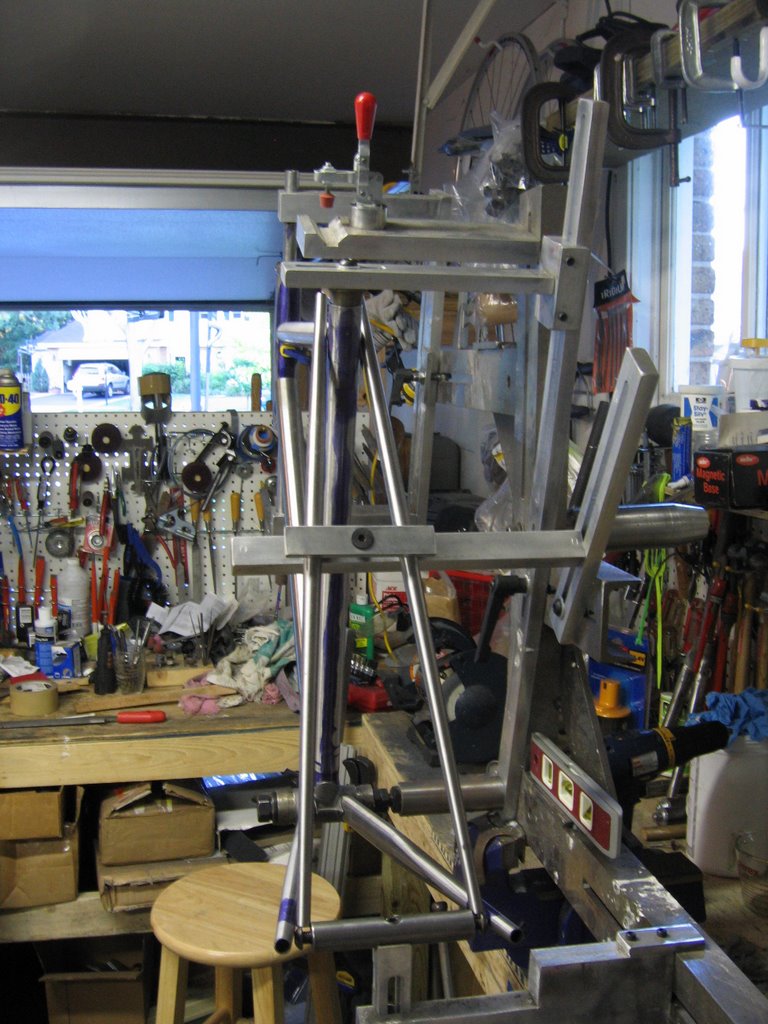
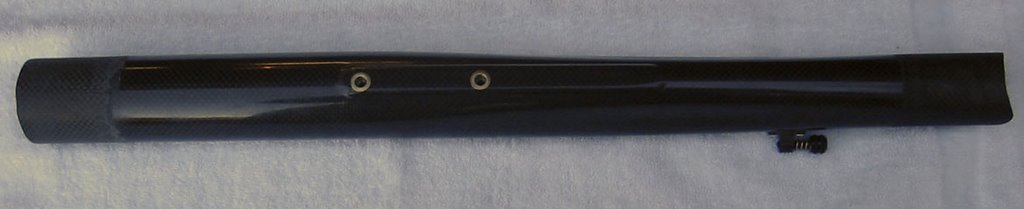
 The down tube is fitted (one of the pins is located in the BB to hold it in place). The top tube is mitered - final filing to be done after the rest of the front triangle is brazed up. The seat tube is cut to length and mitered on the bottom. The chain stays are mitered and marked for length. The seat stays are just sitting there to see how I like the look of them - they're a narrow biconical stay. The downtube is 35mm .8/.5/.8. The headtube is 35.5mm. Top tube is a conical 31.7mm front, 28.6mm rear with a .7/.5/.7 profile. The seat tube is a standard 28.6mm with an external butt (1.2mm wall thickness) at the top to avoid ovalizing from heat. Chainstays are oval w/ .9 wall thickness for stiffness. The Walter bottom bracket has a built-in chain stay bridge.
 Angles are 74.5 head tube, 74 seat tube. Bottom Bracket drop is 60mm (our local velodrome is relatively flat).
Apart from the lugged bottom bracket, joints will be filet - most being with silver. The bottom bracket has loose fits so will be joined with brass, as will the connection of the track forks to the chain stays. The stays will have stainless faces brazed on - but the ends will be bare to fit the tugs (MKS njs).


Wednesday, July 12, 2006


Tuesday, July 11, 2006
What's new?
Now that Sarah's bike is off for painting - I can turn my attention to some other projects.
I'm building a carbon frame won by one of the top 150 fundraisers at the 2006 MS150 Tour de Farms. This process has its own blog - so if your curious, look at: www.LindasNewBike.blogspot.com.
Meanwhile, I'm getting serious about Aram's new track bike. The frame will be of silver filet construction except for a lugged bottom bracket. At first, it looked like the BB angles wouldn't work out with the limited (60mm) drop on this frame. Closer examination revealed that it has brass clearances - giving me a number of degrees of wiggle room for both the down-tube and chain-stays. None of the tubes are super light, so I'm not to concerned about using brass in the BB.
The tubing is large diameter steel. The down-tube is 35mm, the head-tube is 36.5mm with a 1.2mm wall thickness, the top-tube is conical being 31.7mm diam in front and 28.6mm in back, and the seat-tube is 28.6 with an external buldge at the top (to help prevent heat distortion when connecting the top-tube and seat-stays). Oh yeah, the chainstays are ovalized for good clearances - so they'll probably get a bridge to stiffen things up. And for the seat stay bridge, I'm considering a polished stainless 3/8" tube. Do I really want to go through that polishing thing again? Hmm...
The jig is up and I've been working on its fit. The overall design was refined on Martin Manning's design spreadsheet - good stuff, especially if one wants to be precise. This is a fast handling track bike. It's not a single speeder for the road. Aram is a serious and competitive racer, so we want to be very precise to avoid handling anomolies.
Related to this, I'm going to deviate from my usual building sequence. The goal here is to create a strong and well aligned keel connecting the head-tube to the rear wheels. The first build will be chain-stays and then connecting them to the bottom bracket. This will be done with very careful attention to alignment. Then the head-tube/seat-tube will be put together, again with a critical eye on alignment. Finally, these two assemblies will be connected - with much fitting and testing to make sure that the head-tube is in a vertical plain aligned with the track of the bike, and that the track forks (the proper name for "drop outs" on a track bike) are perfectly parallel (on two axes), and equal distances from the ground and from the frame's center line. Once all this comes together, we're over the hard part.
After fitting the jig, it was time to start working on tube prep. So far, I've washed out the insides of the head, top, and down tubes. This is necessary pre-brazing, but also makes it easier to read the butts inside the tubes. By looking through the tube at a light, and moving it around, one can see where the butts transition. By so doing, it possible to make sure that the ends of the tube were marked correctly (one end usually has a longer butt and this is the end from which to trim excess length).
Then I set up some v-blocks on my reference surface along with a surface guage. If you're not familiar, a surface guage is a precision base with a post rising from it. A spindle is atached to the post and can be adjusted up/down & in/out. The post has a hinge at the bottom and a screw that delicately angles the top out or back. By adjusting the spindle close to an object, and then fine tuning with the post's screw, its possible to index a precise height from an object sitting on the same reference surface as the surface guage. By moving the guage around on the surface, one can compare heights from spot to spot.
We're using this a little differently here. A tube is set in the blocks, and the surface guage is adjusted to the highest point in the tube at a location midway between the ends. Then the tube is rolled in the v-blocks to detect if and how much bend there may be in its length.
The head-tube measured out fine, but its short so that's to be expected. Both the top-tube and down-tube have very slight bows. Not enough to be a problem, but enough that its important to be concious of the bows in order to insure the alignment of the finished product. For both of these tubes, the concave side of the bow will face down.
Then it was time to refine the position of the head-tube. With most jigging systems, this is he most complicated part. Most jigs don't provide a way to fit fork into place, as a means of locating the head-tube. Often, the head tube is difficult to remove and replace to the same location. It will be on the same axis, but may have moved up or down along the axis.
I go about positioning the head-tube from several different basis points so as to find any errors in my methods. The first method involves locating the top of the seat-tube and with a long level determining where the top of the head tube should be. The raw head-tube is too long, so there should be some extra sticking up above this point; this can be removed later.
A second basis is to measure up from the datum line on the jig to it's front horizontal frame member. Then, it' possible to determine where the bottom of the head-tube should be relative to this new datum line, based on the design produced in Martin's spreadsheet. Using a vertical measure and a small level horizontally, it's possible to put a guage mark on the head-tube. From there, it's possible to measure up from the mark, parallel to the head-tube axis, to a fixed point on the frame holding the head-tube assembly. This point becomes a new datum point, and the measure is retained as a basis for where the lower head-tube should end. Again, there should be a little extra tube below this point.
After adjusting the height of the tube, and double checking the measures for each end, it's possible to hold up the fork, parallel with the tube to the appropriate point. With a little help, a long straight edge, level, and a tape measure - its possible to compare the axle height to the rear axle height and then confirm that the drop to the center of the BB is correct.
Once all of this is done, we're part way there. From this point, we need to establish where the head and down tubes intersect. In some degree, this can be done visually, but we're trying to be precise here. So we employ a protractor to check the angle between the down and seat tubes. when this is correct, we check the angle between the head and down tubes. If these comply with our design, and the spacing between the down-tube and planned bottom of the head-tube look good, we should be a go.
So far, I've reached this point - but not marked anything. Next time around, I'll begin by confirming the basic measures as above. Then I'll add one more check. Holding the fork in place, I'll check the front center (that's the distance from the front axle center to the bottom bracket center. If all is good, I'll mark the vertical center of where the head and down tubes meet. I'll then do the same for the top-tube and head-tube. These will be aligned on a vertical line on the head-tube creating the point at which the breather holes will be drilled.
As I said, locating the head-tube is one of the more complicated bits of preparing to braze a frame.
Tuesday, July 04, 2006
What's New
It's been a busy few weeks.
Gordon is back, so Sarah's bike will be shipped this week. She's anxious to see it finished. Fair enough.
So, that's freed up a little room in the shop for frame next. This is the track frame for my neighbor Aram. He's a strong rider. The frame will feature a 1.125" steerer at his request. Consequently, it has continental oval fork legs. I don't think this will hurt anything, but for traditions sake, round legs would have been nice. The blades are straight gauge 0.9mm.
I've finished two forks: a) one with an internal sloping crown; b) one with an external sloping crown. The first has a 35mm rake and is planned the normal fork. The other has 41mm of rake and is to experiment and with a short (50mm) trail. Anyhow, now that they are done, and lengths are confirmed, I can lock in the rest of the geometry and start cutting tubes.
One question that is about to be resolved is whether I can use a lugged bottom bracket or not. If not, I'll probably use one with chainstay lugs. Then, I'll probably drill it for the downtube. This way I can braze the joint through the interference fit between the tube and BB - probably using 56 silver. Then I'll build a filet around the tube using Filet Pro.
Stay tuned for fork pictures soon.
Tuesday, June 27, 2006
Post MS150
We did the MS 150 this weekend. It was a great time. Every year I say "This is the best organized ride ever!" and every year it gets better.
My sponsors raised over $2,000, my team raised raised over $80,000 and the ride overall has raised over $1.7mm. Not bad, but this is just the beginning of our fight against this devestating disease.
Day 1, I only did the 35 mile route. I had my old Burley Samba tandem with the kiddie cranks, and my twins (7 years old) took turns in the stoker seat. They did great and we all had a good time. At this age, they don't provide a lot of movtive power, but the course was fairly flat. The bike probably weighs 60+ pounds by the time its ready to ride, and with 50-60 pounds of stoker, it gave me a reasonable workout.
Day 2 started with rain - so Mom decided to take the kids home. I got out my Randonneur bike with fenders. BTW, one other person, with a Breezer, had fenders. As it turned out, the rain stopped before we began and the roads dried out. As long time readers know, this bike is built for comfort. With the rack, and a partially full bag (spares, tools, energy bars, rain cape, etc. I may be up to 30 pounds.
Getting the kids packed and off delayed my start, so I was the 2nd to last wave to leave (8:25am) . Within a mile of the start, I cut a sidewall on my front tire and the tube went out with a loud pop. I don't generally carry cuffing material. Unfortunately, with the late start, all the mechanical support had moved forward, so I needed a SAG to the first rest stop (which was only 8 miles up the road). On the other hand, Doug Pence (official sweeper) was cool to met - he does the moto-pacing at our local velodrome.
This is a well organized ride with 18 SAG vans operating, but because I was so far behind, it took forever to get a ride to the first stop. It took until 10:15 AM to get back on the road. Shortly before making the turn for the 75 mile route, a pair of young fellows passed, making me the Caboose. Part of my strategy with this bike is to spend less time in rest stops - and this strategy worked to good advantage here. I'd stop long enough to wipe my face with a wet towel, and then put it around my neck, refill my water bottles, eat 1-2 small snacks, drink a small bottle of water, and push off. In this way, along with steady pedalling, I was catching and passing people by the third stop. This continued throughout the rest of the ride, assuring a mid-pack finish.
Since then, work has begun on the track frame for Aram. The steerer and fork crown are attached, and the brake boss is removed from the crown to provide a more track-like look. The crown is a Long Shen with built in rake. It's a hollow sloping crown with triangular cutouts on the sides. Fitting things up in the jig, it looks like the fork will come out at 360mm in length. This is as planned, allowing a little extra room for an oversized (more than 22mm) tire. The fork will have 41mm rake giving 50mm trail. The trail is on the short side of stable - so it should be fine, but quick handling.
There's a little more polishing to do on Sarah's head tube, but its looking pretty good. It'll be done this week.
And that's about it from here.
The bike rode well. On the road, one doesn't feel its weight. Its a nimble handler, but steady enough that I'm comfortable putting my elbows on the brake hoods and clasping my hands together in front to tuck on the downhills at speeds in the mid-twenty miles per hour. Between the 28mm tires and the sprung saddle, I didn't have the usual day 2 sore butt.
Sunday, June 18, 2006
MS150
This coming weekend I'll be riding the MS150. Most of us know someone with MS, but many of us aren't aware that we do.
Your help can go a long way towards finding solutions for MS. If you can spare a few bucks, just link (on the right) to my MS site and sign up.
Thanks.
PS: the function that displays progress and donations seems to be corrupted on the MS site - don't pay attention to what it says. Alternately its showing only 2 donations, or combining all of this year's and last year's donations.
Saturday, June 17, 2006
Polishing
Never estimate something you've never done before. Sarah's bike hasn't made it to the painter yet.
There is progress. The plates on the the top of the seat-stays are now polished, and look pretty good. The edges of the plates aren't as sharp as on stays that I've done without polishing. It looks like there's something more to learn about polishing to the edges without rolling them.
The seat-tube is reamed and honed, and a seat post tested in it. The keyhole on the back is cut out too. Rather than use several hacksaw blades taped together, I cut the slot with a Dremel metal-cutting wheel. The wheel has sort of a bayonet mount on its shaft for quick changes. This also allows it to flex on it's shaft - so be careful and don't force it. Anyway, it produces a nice clean, quick cut. Recommended.
The head-tube is milled and faced. The bottom bracket is chased and faced. And, generally, everything is done but polishing the head-tube.
I started by trying to sand the larger surfaces of the tube using a palm sander, hoping that the random sanding pattern would avoid scratchs and make subsequent grits easier to do. Instead, the pattern left by the sander hid any blemishes in the surface of the tube.
Practice shows that parallel strokes leave a surface that's easier to read for blemishes. Working through a grit, I use several directions of sanding before finishing with strokes parallel to the axis of the tube.
Even with this trick, it can be hard to recognize deeper scratches in the surface until one gets to a level of grit that can in no way take it out. So, I've been starting with 120 grit and working my way through 220, 320, 400, 600, 1000 and 1500. Except everytime I go down 2-3 grits, I find a scratch that forces me to move backwards through the grit.
Having done that several times now, I tried buffing the surface using a Dremel mop in the flex-shaft tool. The problem is that the mop is too small and its possible for the chuck to touch the tube. Ouch! Back to the 120 grit.
So, my challenge now is to find a bigger mop and get the tube polished. And on to the next project.
Wednesday, June 07, 2006
Sarah's Bike
OK, here are some pictures of Sarah's bike, pre-paint. It's mostly ready to go - the stainless still needs to be polished. Now that these are being posted, I see that only the short fork got photographed. There's a longer one as well to try different front end geometries.


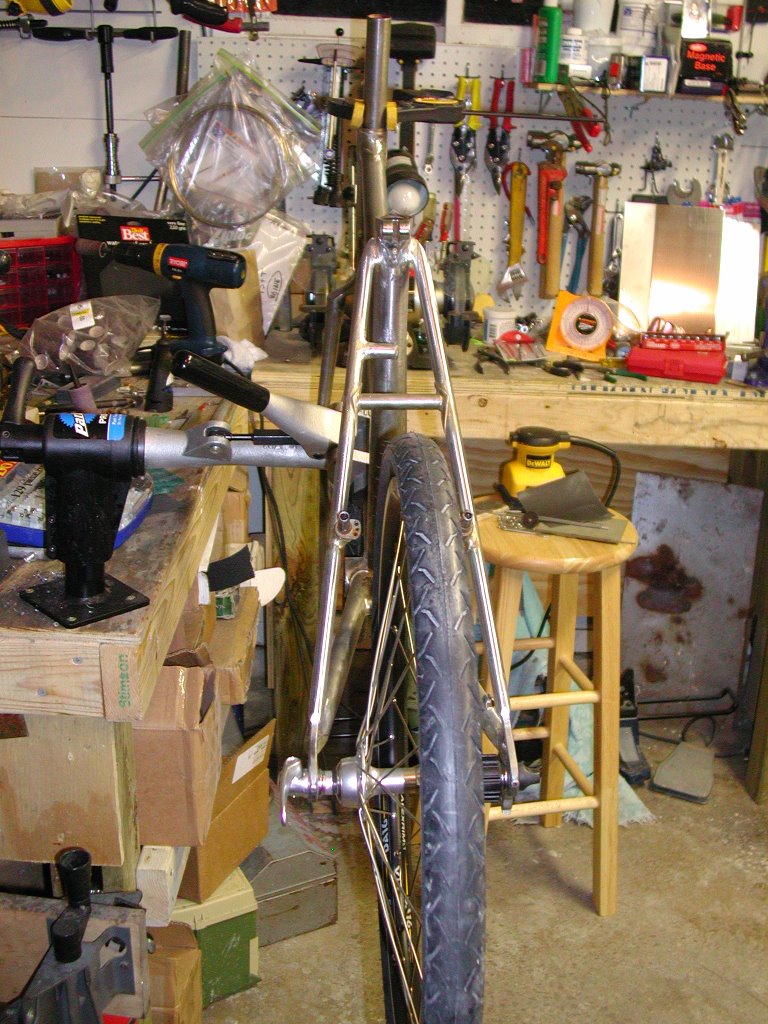
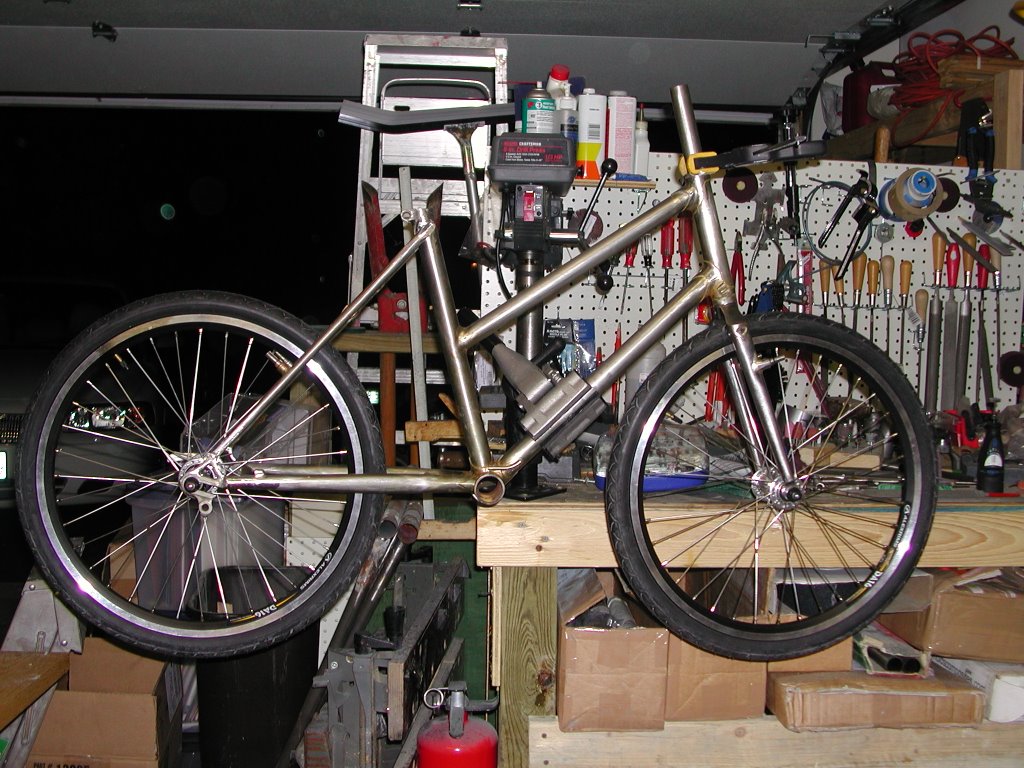

Monday, June 05, 2006
Quickie Update
Things have been slow on the framebuilding front.
Sarah's fork is now ready for paint. The return spring holes for the cantilevers were drilled last night. The brakes fit and look good. Overall, the finish looks fine.
Work on finishing the frame continues. Lug edges look good as do the filets and edges of most braze-ons. The exception is the stud for mounting the rear-brake cable pulley. There are a few file marks, scrapes and scratches that need cleaning up. Also, the stainless needs polishing.
The headtube is coming along, but there are a few deep scratches (source unclear) - but these are mostly cleared out now. Sanding near the lugs takes a bit of extra work. I don't mind if a little filler shows through here, as long as it appears to be flat with the surface of the tube.
It looks like another 4-5 hours of sanding and I can pack this off to Gordon. Then it's off to a track frame.
Oh, I did some photos last week, but they just weren't clear enough. I'll try again this week.
Cheers,
Sunday, May 28, 2006
Trip to the Velodrome
This is a little late, but hopefully no one will care.
Thursday was a trip to the Velodrome for the season opener. My neighbor has moved up to the Pro/1/2 category and was riding in the first race plus I wanted to park my carbon bike out front to see what interest it might pull.
Last first to get it out of the way. Lots of folks stopped and asked questions. A couple may yet come back to order one. And there were many compliments. This is a pretty bike savvy crowd, so this felt like a real accomplishment.
Its always fun to see all the pretty bikes, and some not so pretty. One young fellow, lean as a rail, probably about 14 (give or take a year) had an old red Olmo. It's paint was all chipped up - in some places there were large patches of finish coat missing. He was there with what I assume were his parents. The father was big and barrel coasted. He could have been a defensive lineman, or a one-man towtruck. Despite his bulk, he was graceful and clearly used to physical activity. He and the mother both spoken heavily accented English, but I could sort out the accent.
I spotted the father first, hustling out to the parking lot with this rusty old bike on his shoulder and a broken chain draping from it. Ten minutes later, he was back with everything squared away. I next saw them in the stands just before the racing began. Mom was sitting in her spot, Dad was moving around nervously finding tasks to fret about. They took turns giving the son coaching and encouragement. It was clear that the son loved racing and that supporting him was a big issue in their lives. I wished I could of stuck around to see him race, but the program began late due to weather and I had to get home to put one of the kids to bed.
But before leaving, my buddy (Aram) took 3rd in the first race. Talking to him later, he was particularly happy because the two (young) fellows who beat him had each won national championships. How's that for a start of the season?
Anyhow, getting back into the racing milieu amped my interest in getting Aram's frame built. So much so that I'm thinking of doing a trial horse to make sure that we've got the fit and handling nailed before doing the real race bike. Seeing Aram race, however, was the real kicker. He's good (which I knew) and it will be fun to build him a great frame on which to win some races.
The idea of a trial horse is cool too, because it lets me play with more colors. My current thought for the race bike is all gloss black except stainless steel faces on the fork tips, track forks (dropouts on a road bike), and maybe stainless plates at the top of the seat-stays. The idea is to have it look like a serious instrument.
With a second bike, its possible to have some more fun. Maybe do something really bright. Possibly a fluorescent color, or maybe two colors with strong contrast. I can think of lots of ideas, but haven't settled on anything yet.
So, there's lots to work on (including pictures of Sarah's frame). I better get to work, eh?
Saturday, May 27, 2006
Wait let's talk Weight
So, the carbon bike is pretty well sorted out. The Campy front derailer works like a charm - and seems to be lighter than the Deda clamp/FSA derailer combo. The bike as shown in the pictures has a 56cm actual seat-tube and a 58cm virtual seat-tube. So its no small bike.
As shown in the pictures, including the 2 water bottle cages and the heavy old look pedals, it weighs in at 17.8 lbs. I've obtained a mounted a new set of Ksyrium SSC SL3s w/ Deda RS Corsa Open Tubulars and Michelin Airlite butyl tubes. Then a set of Look Carbon Keo pedals with CrMO axles. And, finally a lightweight (mfg claim is 142 grams) cassette (the Ti record was too expensive at $400+).
The net weight on a digital scale of the complete bike was 16.44 lbs. This compares favorably to my neighbors Colnago C50 which is similarly (not exactly) equipped. He was impressed.
I continue to be impressed by the ride and handling. In the pack, mid-corner corrections are great. It was possible to ride to the outside entering a corner, keep speed up and going straight longer, then dive around nearly squaring the corner without much braking. Easy way to pass people without much effort - but only with nimble and trustworthy handling. I'm definitely starting to respect carbon more - and the basic design of this frame is spot on.
More later.
Water Bottle Cages
Extremely light H2O cages have always worried me. To the point, that I couldn't see wanting to spend $50-100 per for carbon cages, and of being even more suspicious of cheaper carbon cages.
It seemed like prior generation light-weights might be better sorted out, and at up to twice the weight of carbon, more likely to last. And, of course their pricing makes an experiment more palatable.
I settled on Tacx Tao based on looks - comparable cages seemed to cost and weigh the same without clear (to me) engineering advantages. Certainly user ratings of the Tao and similar cages indicated that some folks had problems within a year.
Regardless of weight or material, it seems to me that the interface between the loop(s) around the bottle and the base is a potential hinge. With out bulk, even the strongest material would be at some disadvantage to the G forces that a full bottle could sustain - side to side. It also seems difficult to overcome this by creating a wider base against the tubes. Tubes come in a variety of diameters and cross-sections - a broader base would not contact some of these, and would have interference against others.
Net, I've been a little suspicious of all the lightweights. The world may prove me wrong, and I'm not suggesting that they can't/don't work. But I'm leery.
Anyhow, I rode the circuit with my buddies last Saturday, and a bolt came loose on the cage with a bottle. I caught it in time, stopped and tightened it down. Back in the shop, all the bolts got re-torqued. On the circuit this morning, reaching for my bottle and the cage shifted. The top bolt was missing - causing me to swing it around 180 degrees after shifting the bottle to the other cage. By the time we got home, the second cage was coming loose.
Today's fix was simple, some blue thread locker. Hopefully this will do the job. But, I can't help but wonder if there is something in the design of the base of these cages that causing this problem, or if the bolts just aren't getting good engagement on the bottle bosses.
The Tao looks really cool, isn't too expensive, and appears well made. Hopefully this will be the limit of problems with them. If so, then they'll become the standard Carbon Noir cage.
Wednesday, May 24, 2006
Clean Up
I'm trying to get Sarah's bike cleaned up for shipping to the painter.
As a starting point, I tried Freddy's new product Altife. Altife is a cleaner and rust converter/preventitive. Altife Prep is applied sparingly to remove surface oxidation. It can be used as a brazing prep, but its also nice for cleaning up afterwards. Altife Pro goes on after the Prep which will prevent oxidation before and after brazing.
Anyhow, after multiple brazes and soaks, there was lots of rust and some spots had a build up of crud that just wasn't responding to efforts to clean it up. An example was on the dropouts. The edge/corner between the face and the body of the dropout had something black built up. I couldn't get this out with a file, sandpaper, or a burr.
I used a flux brush to apply the Altife Prep, although Freddy recommends a cotton ball and I may try this next time. Working a little area at a time, the Altife went on and then was attacked by a combination of a stainless steel brush and a stainless brush wheel in a drill. I'm going to order a small (little bigger than a toothbrush) stainless brush for hard to reach areas.
How does it work? Well, in cleaner sections of the tubing, it just cleaned things up by itself. Sort of an apply and wipe off drill. Dirtier spots required the brush, but not for long. It took about an hour to get a clean silvery frame and fork, including working around the bottom bracket, cantilever mounts and other complicated areas.
Now that its clean, there are a few areas that need touchup with a file. Then its on to sanding, and for the stainless bits, polishing.
Altife has my recommendation.
Saturday, May 20, 2006
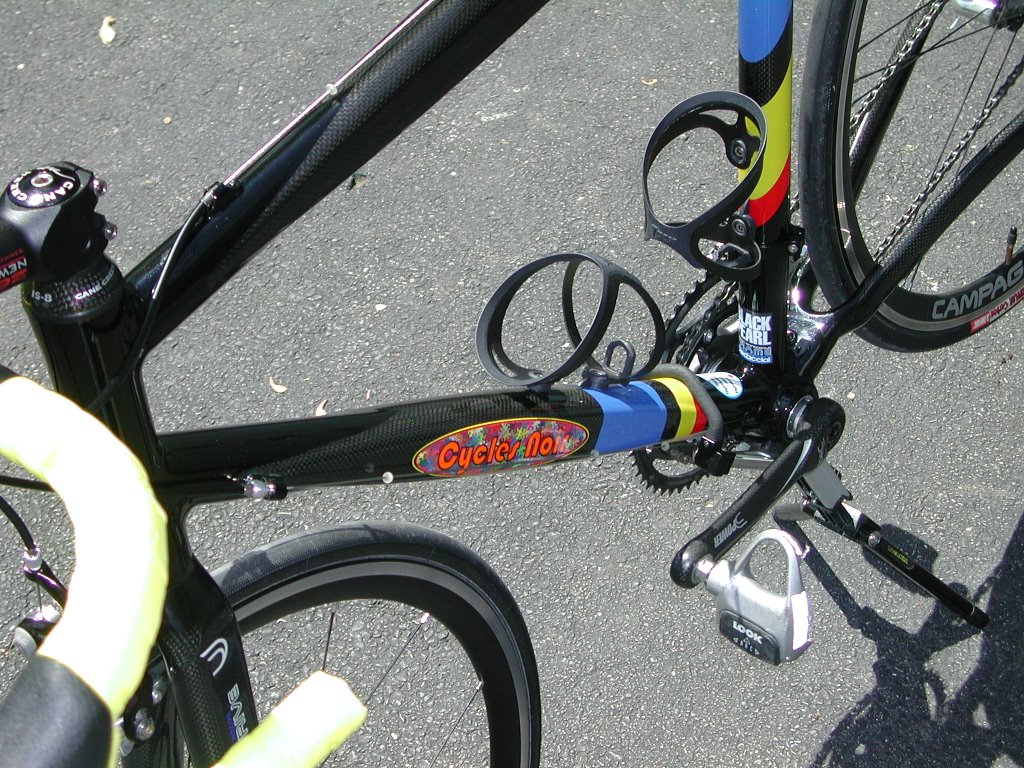
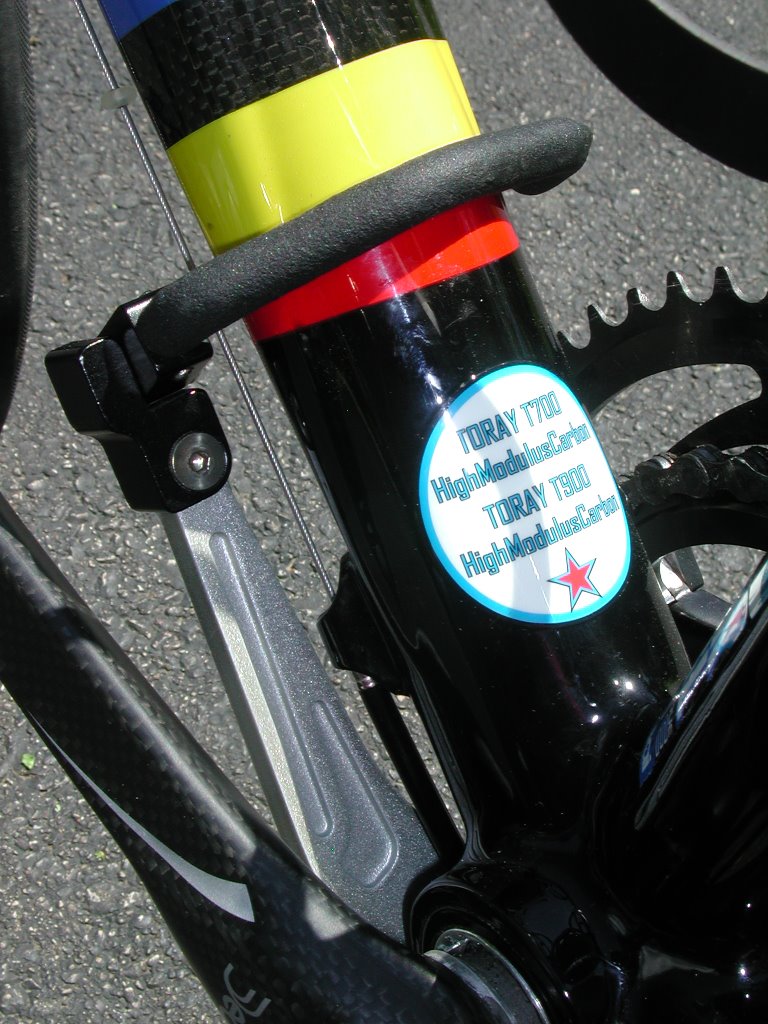
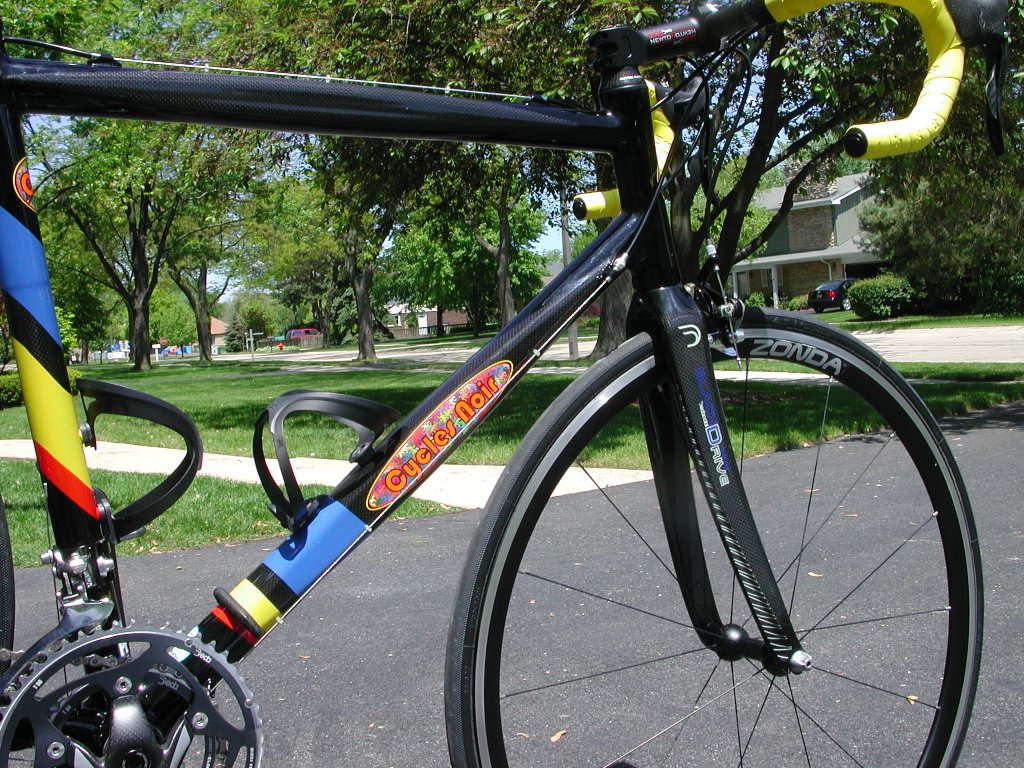
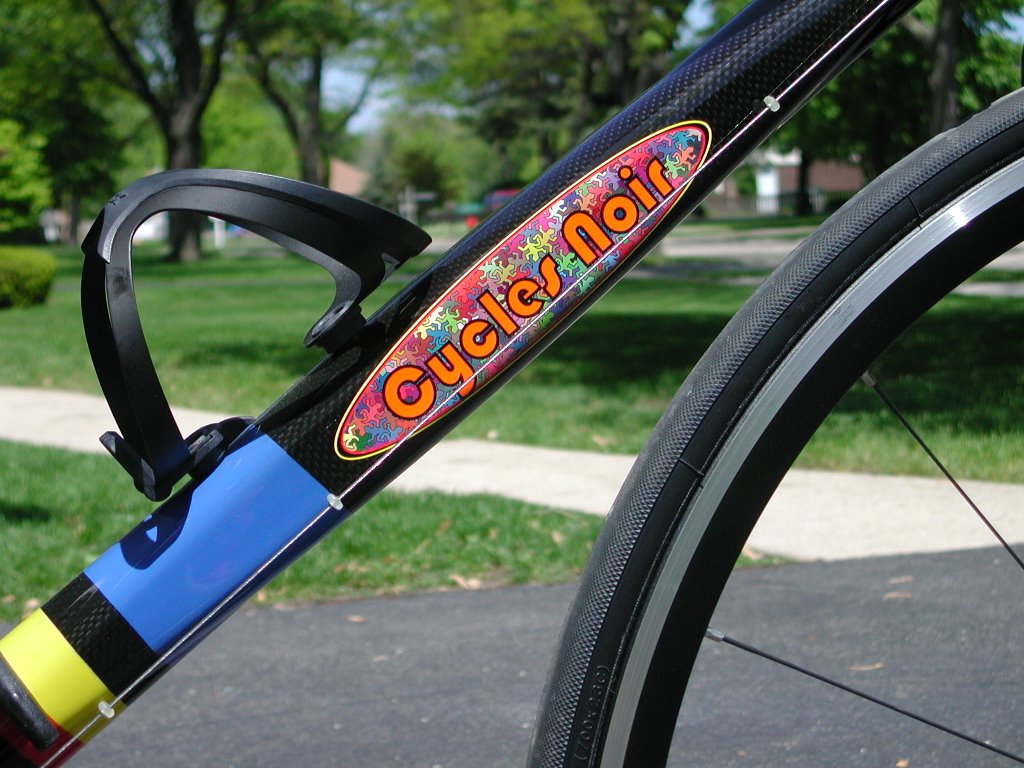
Pictures of Carbon Project

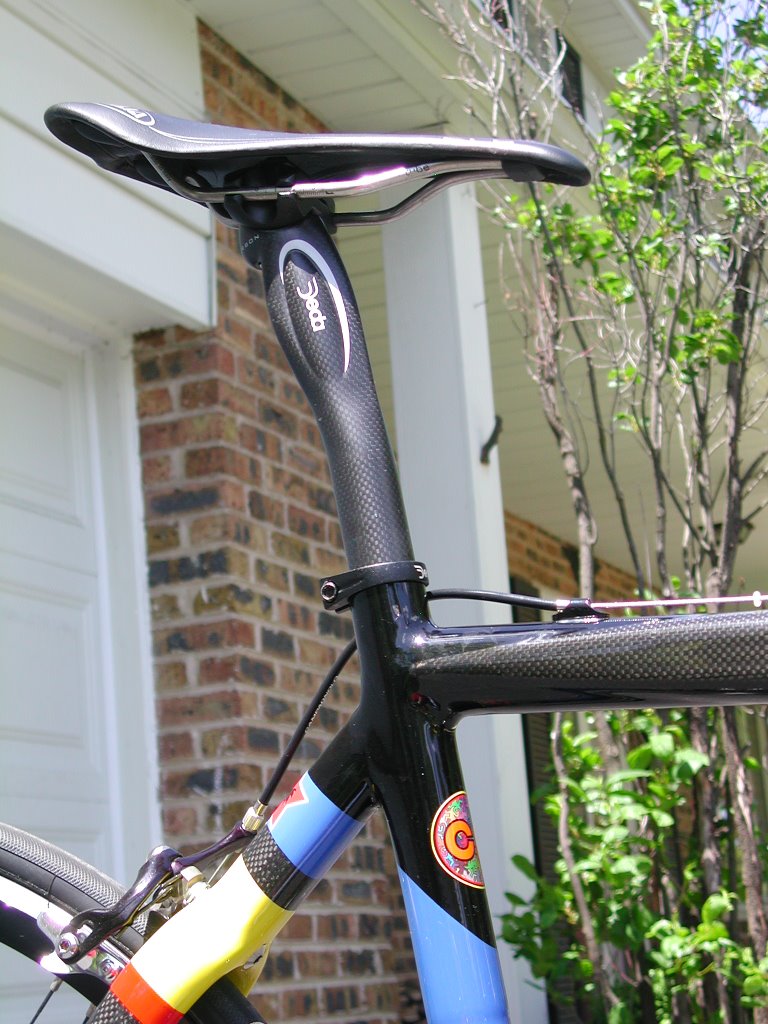
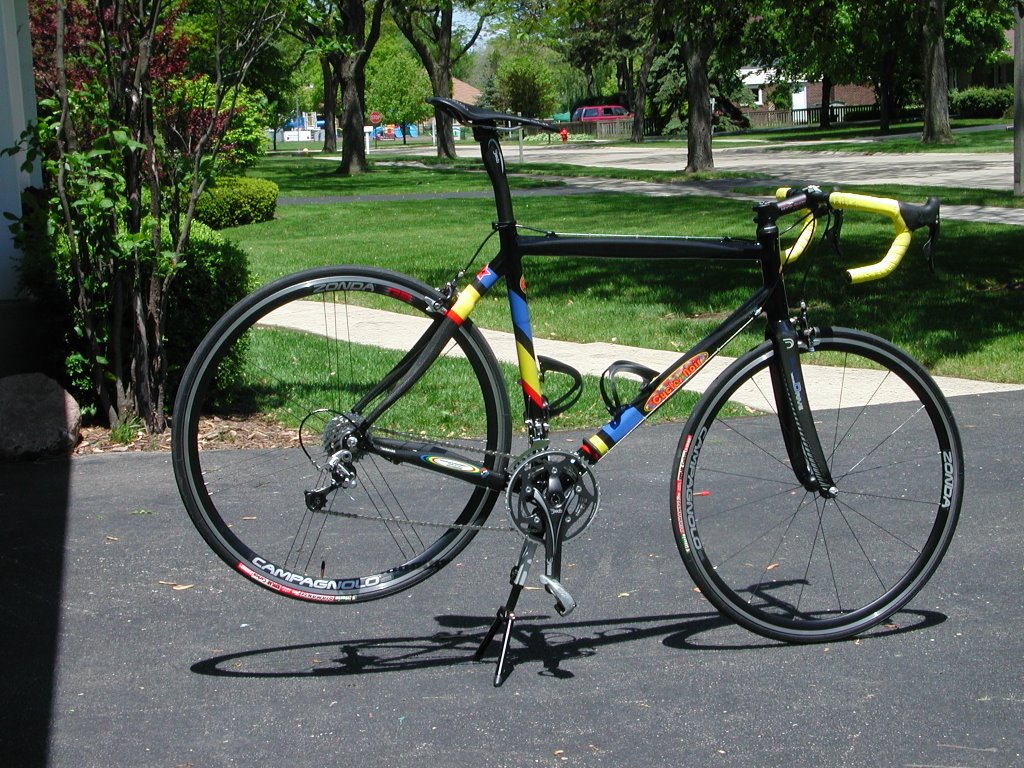

Here are some side views. Someone asked me why the brake cable is mounted on top. I had to reply "Just Because" The next one will be on the bottom. Likewise the shifter cables will move under the down-tube.
Carbon Pix
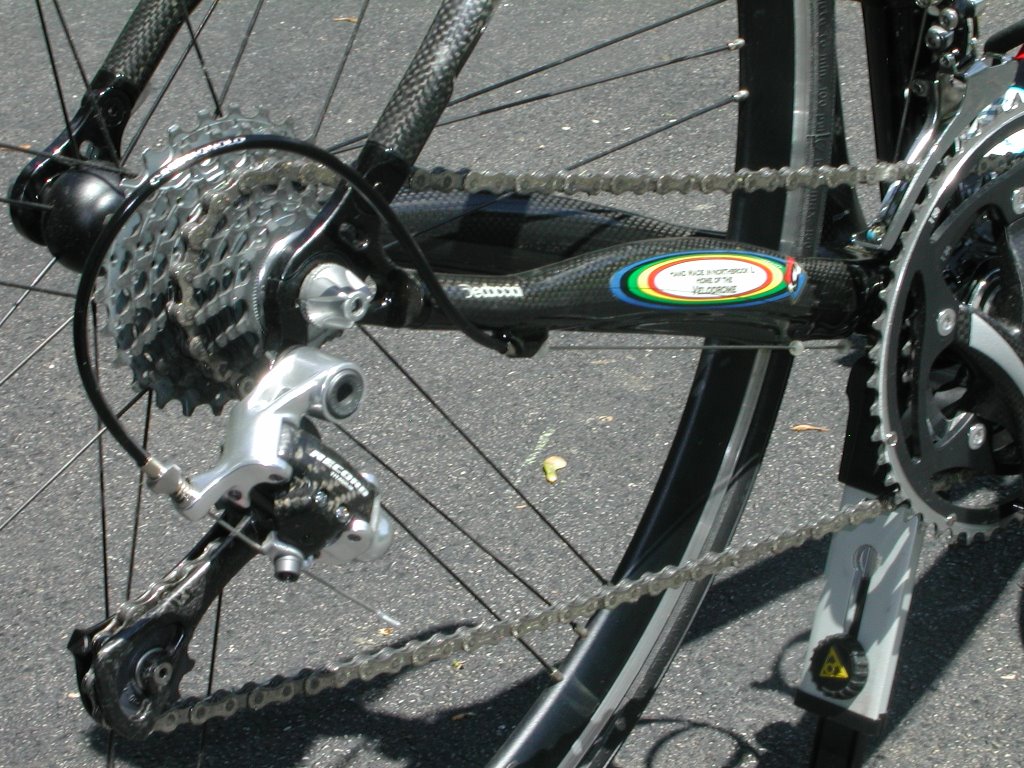

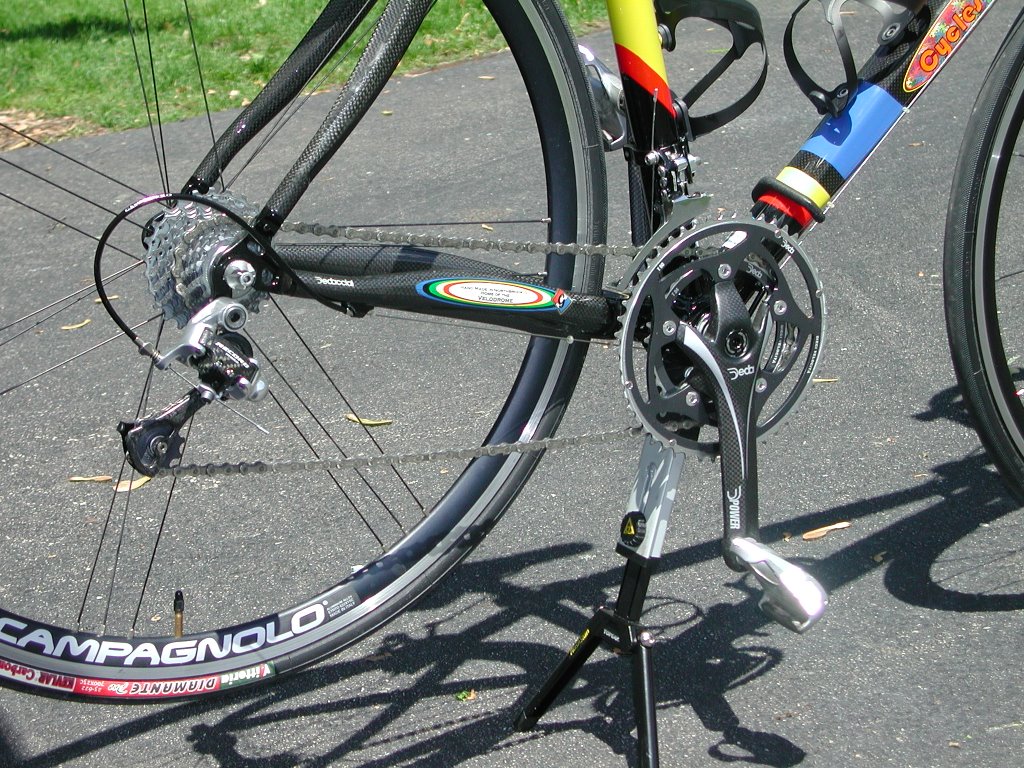

Rear End and Drive Train. I've since swapped out the FSA derailer - it doesn't seem to be Campy Compatible.
Subscribe to:
Posts (Atom)

