Slow but Expensive - that's my new motto.
SLOW:
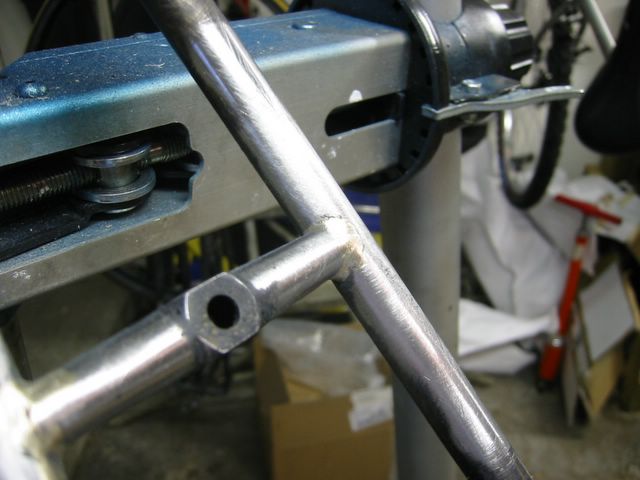
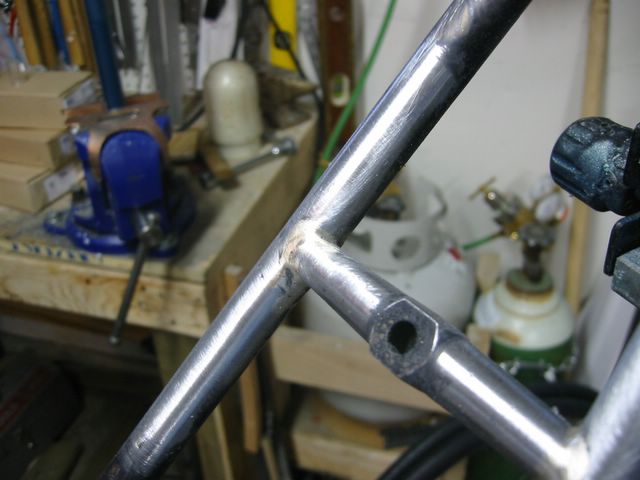
Frame 090105 still isn't complete. Two issues are at hand: fitting a stem and re-painting the white panels. The latter can wait, but the former keeps the frame unrideable.
Right now, the crank and derailers are installed. Interesting, for all the calculating done in advance, the hanger is a bit low. The derailer fits OK, but its at the top of the hangers slot. Have to remember that for next time.
The headset is installed and working nicely. The seat-tube needs another reaming but that's small potatoes.
So what's the holdup you ask?
STEM: Nowhere have I heard of or read about reaming out the steerer to fit a stem. Now using a traditional stem in a threadless steerer might be stretching things a bit. But, I did expect it would slide in. No go. Went back to my books, and finally found something in the Proteus Guide to Framebuilding about reaming out a stem. OK, now I feel better about that solution - I just have to order a reamer. Meanwhile, I could finish my external stem (and will) but the shop is just to disorganized right now. My shop space is about 12'X10''. Lately, my wife has been parking her car further over so it may be more like 12'X9'. Anyhow, sometimes I move task to task without cleaning everything up. And after a while the accumulation gets in the way. So, my next task needs to be clean up - but first I need to plan some improvements in how to stash everything. Hence, procrastination. Just in case, I ordered a threadless stem which ought to be here by the weekend.
PAINT: The white layers on thick no matter what I do. As a consequence, masking the decals leads to a distinct edge (cliff) when the tape is pulled. I haven't found a way to soften this without discoloring the white paint. It looks like I need to do a full white panel and re-apply decals. Not a biggie, except that I don't have any more. URG. A compromise solution: ordered some laser decal paper. I'll print my own. They may not last forever - but will probably last long enough for a test mule.
Enough of slow.
Expensive:
I seem to spend when I can't build. Compared to pro, my material expenditures are probably miniscule, but they add up for me. I ordered a tube set for my Newvex lugs. It's Zero (aka SAT 16.5 I think). Nice thin wall tubing. Following the lead a serious builder, I'll be using Zero Uno (s/b COM 12.5) for the rear triangle. Right now I'm thinking of a black paint scheme with polished stainless lugs. The choice of decals is less clear at the point - probably have to build it and paint it first. This frame is probably 3-4 frames out, so not until sometime next year.
Along with this I ordered some additional rear-end materials a BB and some castings. Then, there have been a few nabobs and such (like the stem mentioned above), some various minor frame-building bits. And, I need the new reamer and some allen sockets to put on the torque wrench to finish tightening down the crank arm.
Add to all this my recent purchase of a set of SL, a BB and some track DOs from Kirk (his track DOs have a lot more style than just about anybody else's), some crowns on order from HJ, plus a couple of BBs and some small cast bits. Pretty soon it all adds up.
Then there are decals. I've finally got two sets of decal designs firmed up w/ AJ and Victory Graphix. Have I mentioned that they do really good work? So, I ordered 40 sets (20 of each design). Am I nuts or what? That's probably a lifetime supply. Granted the price comes down with quantity, but its still not cheap. On the other hand, I think his prices for a one-off set are really reasonable and I'm not complaining about his volume prices - AJ earns what he charges in my book.
So, I have to stop spending and get back to building. Better go start cleaning out the shop. Then maybe do a couple of house projects. And, fit in a couple of rides.
Oh, one last thing, I'm very pleased with how my external quill stem works. To rehash, I'm using 1.125" tubing connected with a seat lug. The ears get ground off, and the gaps filled with silver to leave a nice looking lug. The top will get a stainless disk to set things off. Low on the quill, two clamps get brazed on. Because the tubing thickness is 0.58", it telescopes nicely over the steerer and clamps tightly.
Below the stem goes a BTF Headset Adjuster from Calhoun Cycle in Minneapolis. This is basically two pieces which thread together. Turning them back and forth cause their overall length to grow or shrink. There is a lock screw to hold the adjustment. So. The external quill is clamped onto the steerer at the desired height with the BTF H/A (and as necessary a spacer), and the BTF H/A adjusts the slack in the headset.
The only problem with this solution is that the stem tubes are thick and heavy. But, at least they'll be strong. If I were to do this in volume, I'd look at getting a custom lug made and having the tubes turned down to a lighter diameter. But, for a one off, its fine. Pictures when I have the handlebar clamp attached. :)
Tuesday, September 27, 2005
Saturday, September 24, 2005
Paint - Urg!
I've managed to exceed my talents as a painter!
The attempt at lug-lines with a paint-pen was a failure because it left way too thick a line. This was my first example of not leaving well enough alone.
Before doing anymore painting, I reamed and faced the headtube (cyclus tool - cuts great). Then I gave a 1st ream to the seat tube and cut it's slot. The first ream was to 27.0mm, but after cutting the slot, a 27.2 post went in a way. I clamped the post over night, and now it's snug on the 27.2. So, I'll ream it to full diameter soon. As a side note, I bought an adjustable reamer (size I?) that goes from about 27.0 to 30.0mm from Enco. It's made in India (they have to eat too, but I'd feel better about buying American), so it only cost $16.95 (which is why I could buy one now). It takes some fiddling to set to the right diameter - but it cuts great! I couldn't be happier with it as a tool - which is not my usual reaction when using cheap tools from Asia. Along with my cheap India files, its on my keeper list.
My second example of not leaving well enough alone was to try correcting the too thick lug lines by spraying over them. It hadn't occurred to me that the clear coat would be a problem, but removing the masking tape lifted some of the clear coat and damaged the paint underneath. In retrospect, I probably should have scuffed the paint before applying clear coat for a better bond. And, I probably should have tried to sand down the clearcoat before masking and spraying.
Anyhow, I've done some very selective touch up since then. Now I'm sanding down the edges of layers where peeling occurred. Once these are smooth I can try finishing with clear coat and be done with it. If this doesn't work, I'll probably have to try having the frame bead-blasted and repainting from scratch (which might end up looking pretty good if I chose not to repeat the mistakes from this go around). I have my fingers crossed.
In a related note, he Rustoleum clear needed to go on thick to dry down smooth. However, it was very sensitive to the distance between can and surface. So, on a round tube, the face would dry smooth, but the edges would feel rough. This was true even if one worked up and down around the tube so it was all wet at once - the last stroke would be smooth in the middle and rough on the edges.
When the store was out of Rustoleum clear I tried some Ace Hardware clear. This goes on thinner (and the can creates a finer mist), but seems to dry smooth all the way around. I'm a convert.
That's it for now. Hope to be on the road soon.
Wednesday, September 21, 2005
Here's a sneak peek
I took a few pictures this morning, but they didn't come out real well. They're be more when I have the bike finished. At present, it seems likely that I'll be ready to assemble the everything this weekend.
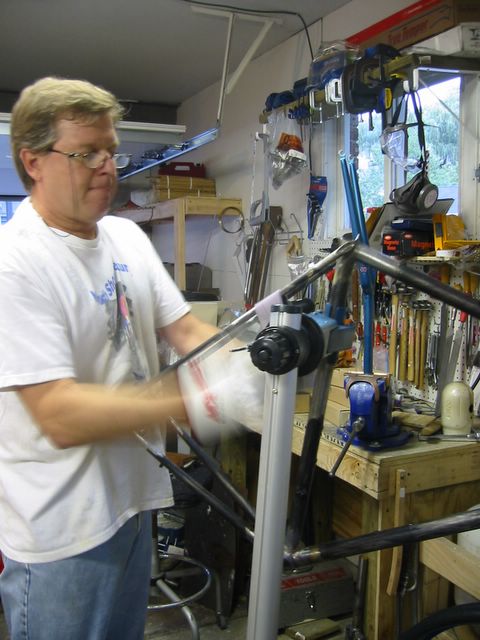
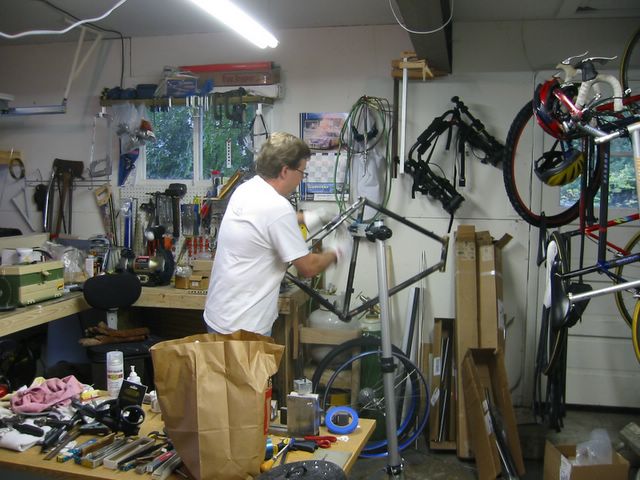
Recent Sighting!
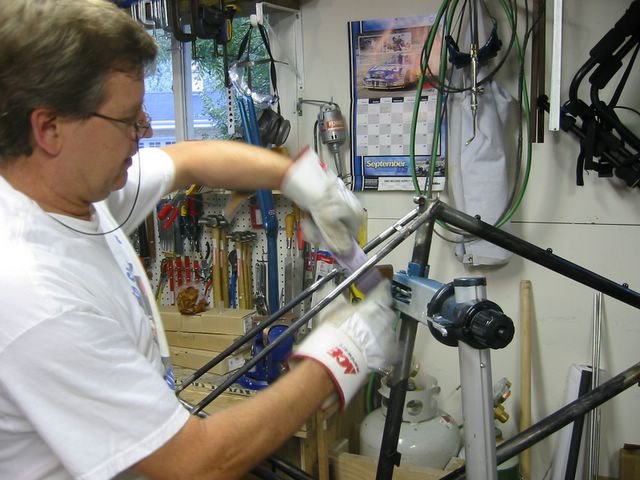
 Our Spy Cameras have been hard at work! Here's an unconfirmed sighting of frame #090105. Looks like it's close to ready for the road. We'll share more info when we get it.
Can you tell who the builder is?
This was to be a one-time set of decals, but I like them well enough that I may have AJ print up some more.
Not done yet
Seat and Head Tube still need to be machined. Headtube resprayed, and clearcoat sanded smooth.

Monday, September 19, 2005
Nothing like the smell of VOCs
The fork is almost done....just need to polish the SS tips. I've used a set of proof decals for which I haven't asked AJ to make a production version. This is because the colors worked the best with the paint I chose. Maybe someday I'll have him make me up a set of these. BTW..... I love AJ's decals. They look beautiful. And, they seem tough and stable. Not to complain, but some (especially old ones) seem to tear easily - that's not a problem with AJ's. Plus he's nice to work with. Highly recommended.
I got the frame sprayed out since the last post. It looked pretty good, with a white headtube and white panel on the seat tube. I also probably made every possible painting mistake in the book. So, it was a learning experience.
One thing that I tried was outlining the lugs using a paint pen. It seemed like a good idea in theory - being a bit easier to control a stiff tip than the flexible tip of a brush. In reality - it laid down thick lines which got thicker after they setup. Ugh! Meanwhile, I have a coat of clearcoat on most of the frame and it looks pretty good - even in daylight.
As a result, I resprayed the head and set lugs. After things cure well, I'll go mask the headtube again and respray it white.
The paint I've been using is Rustoleum. The base is a metallic finish. It and the clearcoat share some characteristics. 1) They have to go on wet to end up with a smooth surface. 2) They tend to resist runs, and even when there are runs - they often smooth out as they dry. 3) The can atomizes pretty well and has a well defined spray pattern. The white paint is very different. 1) It seems to come out wetter - it needs to be held farther back to avoid runs (which in places like the underside of the seat cluster could be tough). 2) It doesn't seem to atomize well - parts of the spray are a mist and parts are drops of paint. 3) The spray pattern is very broad. As a result, using the white adds significantly to the complexity of completing the job.
Other things I've learned.... 1) With any of the paints (metallic, white, clear) there is a distinct physical line at the point of any masking. Be prepared to sand it away. 2) It's easier to work on the white (touch up, apply decals, etc) even after a couple of days of curing if a coat of clear is put on top and allowed to sit for a day. 3) The angle of the spray and distance to the work seem to determine how "visible" the metal flakes are in the metallic paint. If one isn't consistent, its possible to have places that look more silvery and others that look more like the base color. If this happens where there was masking, or a partial respray, there can even be a distracting boarder between these colors. 4) Blue 3M masking tape works like a charm - sealing well and pulling off easily. 5) My breathing filter (from Fred Parr) takes all of the odor out of my work. It's probably not even close to as healthy as using a fresh air supply, but its doing something.
Beyond paint, I've trimmed the head tube down to the lugs. I started with a rotary file, moved to 12" bastard, then a 10" 2nd cut. Everything looks read to face and ream. I ordered an adjustable reamer from Enco for use on the seat tube. It's cheap ($16.95) so probably won't last long - but I want to see how it does. Now that the BB is chased, I'll take the rotary file and remove excess silver from the bottom in the area between the threads. Then I'll chase out the paint and final face the BB. I still have to cut the slit in the seat tube, and polish up the dropout faces - but, we're getting close to mounting parts - I'd say within a week.
Cheers,
Friday, September 16, 2005
Let's Get Forked!
Now you have a dribble of pictures of recent bits.
I've started painting my first fork (which is imperfect but aligned). It looks much better with paint on - despite being straight legged.
I used a different method to apply the rust converter than with my frame. Converter was applied to a terry cloth which was used to rub down the fork. This ended up with a nice, thin, even coat after it was done converting and dried off. Yahoo!
A light sanding followed by wipe-down with a degreaser/thinner. Then a couple of coats of grey primer. At first, the primer was close enough in color to the bare fork that it was hard to see. Time for a lighting adjustment. Ahhhh!
Wait 30 mins. Then a light sanding with some Scotch Brite (equivalent to about a 0 grade steel wool). Wiped this with a tack cloth. Wiped with degreaser/thinner. Sprayed the blue (more on this in prior post). Things are definitely starting to look better.
Yesterday I lightly wet sanded the fork with 600 grit. Wiped it down with the tack cloth. Then started to spray clear over. So far, it has two coats. So far, the clear needs to go on liquid even more than the color, but its also more likely to run. I have one small run on the crown. Next will be to sand that out, clean and try to build up a couple more coats (I can still fill the edge of the decals). Then it'll be a 1500 grit cleanup.
Already, the clear coat is doing its thing and really sets things off. I wouldn't have believed it if I hadn't seen it, but I'm getting a nice finish with a rattle can. Very cool. Bet you can't tell I'm excited.
Meanwhile, most of the excess converter has been sanded off of the frame. Two thin coats of converter have been applied. Tonight, I hope to prime the frame out.
Yesterday, I tried to chase the BB Threads. The left side wouldn't go. UGH! Way too much excess silver on that side. I had to heat things up and get the silver out of the way. After it all cooled down, the left side cut clean. BTW, I'm very pleased with my Cyclus tools.
That's about it for now. I may be riding soon.
Cheers,
Rick


Thursday, September 15, 2005
In living color
Pictures soon, in living color!
I selected some blue metallic paint for frame #1. I'd probably call it Teal, its not turquoise, but it has a bit of green in it.
Last night I cleaned fork #1 (straight legs, 62mm rake) and shot a couple of coats of primer and then a couple of coats of color. Generally, it was easier than I expected (it's been a long time since I've sprayed paint - the product is improved). As it set up, the color turned out to be very close to that of my first good bike, a '71 PX10E. Maybe that was Freudian, eh?
It takes a wet coat to get a smooth surface and good color (not having the metallic flakes stand out too much on the surface).
The can indicated full cure in 30 minutes - which didn't seem reasonable. After an hour, I tried placing my first fork decal. Two lessons: 1) let the paint set at least overnight; 2) trim close to the decal before applying. The cover sheet has an adhesive backing. If this touches paint that isn't completely (all the way through) cured, lifting the backing will lift the paint too. It appears that this adhesive doesn't go over the decal itself - so by trimming close to the decal, there is much less adhesive to grab the paint.
Net, I have one leg with a well applied decal and one where the decal is alright but the paint near one side is bad. Hopefully, if allowed to sit, I can sand out the booger, mask the decal and respray to good results.
This is a rattle can job, so I'm not going to be compulsive about it, but would like to minimize the dodos.
Anyhow, I'll get some pictures of some joints on the frame and some of the painted fork and get them posted soon.
Cheers,
Saturday, September 10, 2005
A little nip here and a little tuck there...
It's been a busy week, just not in the shop or on the bike.
Got a little shop time today, and then out on the bike for 2.5 hours.
I've decided that I'm not going to have the current frame painted - I'll just rattle can it.
This frame is loads better than the first, and I would have it painted, but, in aligning the rear and getting the drop outs in phase, the right chainstay developed a slight bend towards the end. A lot of people might not notice it, but a framebuilder would see it straight away.
So, this bike will be a test mule for my retro-french inspired geometry. I'll ride it and evaluate the handling with two different forks of differing rakes.
Towards these ends, much of the frame is now sanded and filed. There's still work to do, however, and its been humid lately. So, I decided to apply a rust converter to the finished areas. Mind you, I like Picklex - but it costs about $100 a gallon so something useable and cheaper seemed in order. Well, after brushing out the converter this morning, the first thing that was obvious is that there were a few thin spots. The second thing that become obvious is that as the rust (that I couldn't see) and the converter reacted, much of the coating became thick. Hmmm, I can't seem to apply it thinner and get coverage, but it's too thick to paint over without sanding. And, if I sand it, the converter won't protect against rust under the paint. Urgh!!! Maybe $100 a gall0n isn't so bad. :)
I finished filing my first fork (the straight legged one). Even though I don't think that straight legs look good, I decided to thin the outer edges of the crown. There's something that I find statisfying about using a sharp, fine, file. It feels almost like a good plane going through wood. You can almost feel the action and control the cut without looking (well for a moment anyway). The faces of the tips need to be polished (stainless steel you know), and the converter sanded, and then I can spray out the primer.
I've broken down and ordered a Bringheli frame jig (did I mention this already?). And I ordered a 1" diameter Cyclus front end kit. I couldn't afford any other brand, but have been very satisfied with my other Cyclus tools. Included are the crown-race cutter, head tube reamer facer, crown race setter, head cup setter, crown race remover, head cup remover. Not bad for $379, eh? Once the paint job is done, I'll be ready to face and chase and get everything assembled.
Speaking of everything, I was having some problems double checking the fork alignment with my new wheel. It read differently depending on which way it was faced in the fork. So, I tried one off my current road bike - which looked great in the fork from both directions. So, the new wheel went off to the shop to have its dish checked.
By next weekend I hope to be priming. another week or so and I can be test riding. Yeah. By the end of October I should have my new jig - so I'll be able to make nice straight rear-triangles. And then I'll start my first frame that will go to the frame painter. Maybe by Christmas? Of course, all the time spent trying to work the rear without a jig really added up. Maybe by Thanksgiving? Hmmm.
I made a few other purchases in the last week. These were my first from Kirk Pacenti. He was very nice on the phone, and the PO delivered today (2 days later). I wanted one of his BB's to try with my Nevex lugs. Also, I like his track dropouts which have a triangular hole in them like a traditional horizontal DO. Most of the track DOs (at least those cut from plate) are without the hole and look less graceful not to mention heavy. So, now I have some nice ones to work with. I'll put some SS faces on them before assembly - they'll dress up nicely.
Kirk recently offered some NOS Columbus tubing. I thought about it at the time and passed, but then he posted that some customers hadn't come through with the money to close. So, I bought a set of SL size A (which I guess stands for small). This is a full set, incluidng steerer and pre-raked fork blades. It comes in the original box, which I'm going to save even thought the end flaps are long missing. Meanwhile, I ordered some SL decals from eBay (the originals were also long missing from the set). Then I'll use this set to make a frame for my wife, who in no way will tax SL.
Cool huh? More later!
Tuesday, September 06, 2005
Good Weekend
The holiday weekend is over - it was a good one. I got in a couple of nice rides - we had great weather. We had some family fun (closed the cul-de-sac so all the little kids could practice riding in circles, played mini-golf, etc.). And I got some more work done on the frame.
A while back I purchased 100 Simonds and Grobe files on eBay. At the time I figured to cherry pick and then resell the remaining on eBay. It turned out that there were a variety of neat and unusual files in the mix. Knowing how files go dull, and how useful these files could be for framebuilding, I decided to keep the lot. This weekend was the opportunity to start using them.
The pump peg now seems to be properly positioned with a nice filet around it. I cleaned up the filets around the chainstay bridge and the brake bridge. On side of each only needed to be sanded (I'll have to add some pictures soon) because the filets were spot on. Then it was on to the bottom bracket for some file work on the edges of the spigots. Finally, I filed down the plate on my the top of my left seat stay. It's a pretty close match to the right seatstay. I also filed the filets on both sides to better match each other.
Overall things are looking good. However, I'm not happy with my left chainstay. I cold set it and now it has a slight bend to it. I suspect that this is only a cosmetic issue, but I don't like how it looks. So, now I have to decide whether to replace it or not. Hmmm.
Cheers.
Subscribe to:
Posts (Atom)

