Monday, December 13, 2010

Techy Stuff

"In order to find the best compromise between performance and cost, the round tube may be sized such that its bending stiffness is identical to that of a square tube with the same wall thickness.  Using the first order findings of Eq. 2.12 and setting equal results in:  

wrd = cuberoot(16/3*Pi) * wsq 

Plugging the diameter wrd found in Eq. 2.18 into Eq 2.13, the torsional stiffness of a round tube can be found to be larger by a factor of 4/3 (33%) while being lighter by 7%."  

I may never become a commercial success at frame-building (or perhaps any pursuit) because of my resolute tendency to cry BS at anything that tickles me as marketing tekno-babble rather than real engineering.  And today, in any successful commercial endeavor, there there seems to be a lot of marketing tekno-babble.  No where is this more true today, than in the bicycle industry; where so much that is discussed, advertised, and written regarding design and bicycle attributes is just so much nonsense.  

Recently, I was perusing: Principles of Rapid Machine Design by Eberhard Bamberg, M.Sc., Advanced Manufacturing Systems Brunel University, 1993 Dipl.-Ing, Maschinenbau Universität Stuttgart, 1996  SUBMITTED TO THE DEPARTMENT OF MECHANICAL ENGINEERING IN PARTIAL FULFILLMENT OF THE DEGREE OF DOCTOR OF PHILOSOPHY at the MASSACHUSETTS INSTITUTE OF TECHNOLOGY, June 2000 © 2000 Massachusetts Institute of Technology All rights reserved.  This is the source of the opening quote.

Let's begin by acknowledging that my academic career stayed far away from the hard sciences and engineering, thus making my tastes in light reading that much more unusual.  And no, the goal of this read was not to learn anything about designing or building bicycles.  However, while I've known for quite some time that a round shape is the most efficient shape of tubing for resisting both bending and torsional forces; I haven't had a scholarly reference or mathematical formula to back up this understanding.  So, running across this quote, in the midst of a larger discussion of analyzing the properties of tubes, seemed like a bit of an early holiday present.

All of the large bike brands make much of the shapes of their tubes, suggesting that that they have found miraculous new ways to: 1) improve stiffness; 2) reduce weight; 3) improve ride qualities.  I'm calling BS right here, right now.  Stiffness is increased by increasing the diameter of tubes and/or increasing the wall thickness.  Weight is reduced by cutting down the amount of material in the tubes, either by using smaller diameter tubes, and/or decreased wall thickness.  Ride comfort, however, is a different question - and it is difficult to argue that tubing diameter or wall thickness is directly related to ride comfort.

Among stock phrases appearing in bicycle reviews, "... greater lateral stiffness combined with improved vertical compliance..." is probably the one most often ridiculed by the cognoscenti of bicycle design and building.  And this ridicule is truly well earned.  The side-view of a bike frame is essentially based on a Warren Truss, which is a very efficient structure for resisting the weight carried by a bridge.  In other words, it focuses on resisting vertical forces.

Viewed from the front, however, there is no structure to resist lateral forces except the form of the tubes themselves. 

Both the shape of a tube, and the form of a Warren Truss service to harness the opposing forces of tension and compression.  Both also gain stiffness by physically separating those opposing forces as far apart as possible (hence the greater stiffness of a larger diameter tube).  But the distances within tubes and between tubes vary by greater than an order of magnitude.  So while a round tube's inherent stiffness is equal in the vertical and horizontal planes, the Warren Turss does not offer this direction-independent equality of stiffness.

What does this mean?  A bicycle frame is more apt to bend laterally than vertically, regardless of what magazine writers or marketing specialists say. 

So maybe that's true, but how about a top tube that is flattened?  Surely its shape allows more vertical compliance and lateral stiffness than a round tube, because most of the material is oriented horizontally, right?  And this beneficially tunes ride characteristics?  Wrong Kemosabi!

Think of an I-beam: there is a vertical web connecting two horizontal plates.  Fundamentally, its the plates doing the hard work.  Why is this?  Well, the greater effective distance a portion of a beam is stretched or compressed, the more work that portion of the beam does in terms of preventing bending.  Get a compass, and draw three concentric circles.  The inner represents the bending of the lower plate of the I-beam, the middle circle represents the bending of the web, and the the outer circle represents the bending of the upper plate.  Clearly, the lower plate is compressed relative to the web and upper plate.  The upper plate is stretched relative to the web and lower plate.  And the web is merely bent.  Now this is a slight generalization of the forces are work, but it makes the point. 

A tube is more like a box beam, where there are two webs, one on each side, and two plates.  A beam is made more stiff by increasing the distance between the plates - thus increasing the differential between the compression and tension.  That squashed top tube causes the sides of the tube to be further apart from each other, and the top/bottom to be closer together.  So.... while it appears as if it should be stiffer laterally, and more flexible vertically, it is in fact the opposite. 

It's hard to beat round tubes for a bicycle frame.  Where there is a benefit to ovalizing them, it is generally to give a larger area with which to bond (using a weld/braze/glue/carbon wrap/or structural lug) to the adjoining tube - and not to tune the ride or stiffness.  And, that's the way it is.

Having beaten this point to death, my hope is that a few more folks will now recognize that: a) shaped tubing is just a marketing gimmick; b) frames flex laterally (or in torsion) rather than vertically.  And thereby they will be better informed consumers.

Cheers

Tuesday, November 09, 2010

Progetto Cycles

Progetto Cycles is now Smoked Out.  Interesting story, check it out.

Thursday, October 28, 2010

Vacuuming a Bike

OK, its been too long.  Its also hard to get good pictures in the middle of a very messy and time-sensitive process that requires at least both hands.  Whatever....

Here are some pix of the process:

I like to make my 'pre-pregs'  The CF and epoxy get wet out together in between layers of wax paper.  Key to this process is working the epoxy through the fabric, and pushing out as much air as possible.  Here is the last of the small reinforcements.


And here is a large reinforcement (made of a 4ply material)


The bag starts with a piece of bagging film as long as my table and 2x as wide.  This is then eyeballed to determine where I'll lay down the sealing tape.


Sealing tape is laid down to form a perimeter, with the protective cover remaining on the backside.  The bag material is folded over this and the process of creating the bag begins.  Releasing a bit of the tape cover at a time, the material is sealed down on the tape.  The stick in the picture allows me to better control things inside the bag - sort of a third hand.  You can also see the breather felt at the end.  This will help transport air to the vacuum pumps, and soak up excess epoxy to keep it out of the pumps.  Part of the bag itself has been treated with a mold release to keep it from sticking to the epoxy.  Finally, you can see that there are two spigots attached to the bag and connected to the vacuum pumps.


The reinforcement is in place in the next picture.  Much effort has gone into smoothing it out while ensuring that it is in full contact with the underlying surface.  Also, there is a layer of perforated release material on top, held in place by some flash tape.  Unfortunately, the release material doesn't stretch like the bag, so it has various cuts and tucks and pieces, all with the intent of keeping it smooth with the CF, so we don't create many creases in the epoxy.


This now goes into the bag, which is sealed on its last side.  Then the pumps can go to work.  Here is the small one which pulls about 11 inches of mercury:


And here is the large one which pulls about 28 inches of mercury.


These are connected through a manifold so that neither, either, or both can run at any given time.

Once the vacuum starts things start to tighten right up.  Here we can see some issues with around the curves of the joints,  so I'll cut back the big pump and work the bag around here to smooth things out and make sure there is no air trapped.


And here is a frontal shot after resuming the vacuum:


Finally a shot of the rear triangle - you can see why I install a dummy axle during the bagging process.


Stick around, there are more pictures to come.

Townsend Cycles is officially Smoked Out

Check our Townsend Cycles at Smoked Out in the Velocipede Salon!

Saturday, October 16, 2010

Dornbox

OK, new builder thread is outed at Smoked Out: Dornbox Bicycles

If you're interested in custom bikes... Check him out!

Saturday, October 02, 2010

More on Carbon Fiber

Knowing that CF works best under tension, and in a straight line, it isn't a big step to accept that it doesn't liked to be 'crimped' into a woven fabric.  It's not that this can't be done, it's just that the zigzag nature of the path of the individual fibers doesn't fully leverage their strength.  This is not to say that a woven fabric of CF doesn't offer strength, just that it doesn't maximize the strength to weight ratio.

Similarly, a random felt of fibers usually have similar issues of crimping, as well as a large percentage of fibers that are bent, rather than straight.

This takes us back to uni-directional fibers as a usable, but not the only, way to wrap joints.  It's possible to wrap a thick thread of CF fibers (called tow) around and around the joint.  If properly impregnated with epoxy, and pulled very tightly, the resulting joint can effectively hold tubes together.  Implied in this is some thought to how much this nest of fiber must overlap each tube in the joint, and which directions are best for wrapping in order to control the vectors of force encountered by the joint.  In a tow wrapped joint, there is minimal crimping, and limited (as much as possible in a joint) bending of the fibers.  Probably the biggest difficulty is squeezing tightly enough to extract excess epoxy, and achieving a balanced spread of fiber around the joint.  There may be the temptation to sand to shape, but this risks breaking the fibers up into shorter segments which may be less strong due to less overlap between fibers that control sheer forces in the joint.

Sheer forces?  Think of a salami sandwich, with a stack of salami slices.  Try pulling a slice free - essentially the force between that slice and those adjacent is sheer.  Of course, most folks don't use wrapped tow joints, so we don't have to worry about this on bikes, right?  Wrong.

Individual layers of uni-directional fibers experience sheer stresses too!  And this can be the most destructive forces in the joints between tubes.  There are several ways to control sheer forces.  These include: having sufficient overlap between layers to ensure the joint's integrity; bonding all layers simultaneously so that there is a chemical bond between the epoxy of each of the layers; using some fibers/materials that pierce layers and act to tie them together.  All of these methods can and may be used in the manufacture of a CF bicycle frame.

If you've read this far, you're probably aware that CF is often available as pre-preg.  This means that the builder obtains CF with epoxy already impregnated in the fabric.  The epoxy has some degree of stability in its un-cured state (often maintained by refrigeration), and some means of causing it to cure (often through heat).

At a minimum, working with pre-preg requires the builder to have some form of refrigerator or freezer, and some kind of oven.  Naturally, this drives a significant investment, which requires some minimum level of sales to support same.  On the other hand, pre-pregs off some stability in handling compared to dry CF fabrics.  The epoxy in the pre-preg can hold the fibers in position while the material is wrapped around a joint.  With a dry CF, something (usually glue or a matrix of fine fibers) have to be bonded to one side to hold the CF fibers in alignment until wet epoxy is applied, and the fabric is wrapped around the joint.

Pre-preg is also a bit easier to layer up prior to curing.   For one thing, curing doesn't begin until heated, whereas wet epoxy starts the curing process as soon as its mixed up.  Depending on the blend, the builder has more or less time until the curing reaches a point where further handling is unproductive.

Also, wet epoxy acts a bit like lubricant between layers of CF.  And the layers of uni CF tend to be stiff and unwilling to bend around 3D shapes.  Trying to hold the layers in place, without wrinkling, while placing others on top, quickly becomes a six-handed puzzle.  If one hasn't strategized  the operation adequately, it can turn into a very frustrating experience, with epoxy and fiber ending up everywhere except where it needs to be.

I don't do the volume of work to justify the equipment necessary for pre-pregs.  But, fortunately there are a few fabric producers out there who have come up with some very workable solutions to these problems.  These are in the form of fabrics which have multiple layers of uni CF, oriented along different axises, which are held together by some loose stitching through the whole of the cloth, and occasionally very light layers of scrim bonded to the adjacent CF layers.  Even with the scrim, these fabrics drape easily over complex shapes. With a somewhat higher weight to strength ratio are knit fabrics which have lesser crimping than woven fabrics, while allowing for easy draping over three dimensions.

This is a picture of a knit tape applied to the backside of the head tube, top tube and down tube.  You can see how gracefully it follows the contours.


Prior to the main reinforcement of the joint, I use this knit fabric to establish basic strength of the join and help ensure that nothing about the vacuum bagging process changes alignment of the joint.  This tape is held in place during the cure with reversed electrical tape (sticky side out), which is stretched tightly around the joint.  The resulting pressure forces any excess epoxy out through holes that I punch in the tape.

From here I move to working with two specialty fabrics, made with fibers from Toray and Hexcel.  The first is a two-ply uni-CF with the plies aligned at +/- 45 degrees from the axis of the fiber.


Along the edge you can see the two plys.  This cloth has no scrim layer so only the loose white stitching holds it together.  You can see how easily the edge comes undone, and even how the individual bundles of CF are ready to quickly unravel.


The second one is a nine-ply uni-CF with the plies aligned 0, 90 & +/- 45 degrees.  You can see the not just the stitching on this, but also the scrim layer.  It's hard to see, much less count the 9 layers.


And where the scrim has been pulled away from the edge, you can see how quickly this fabric also unravels.


Along with these, I make selective use of traditional single-ply uni-CF tapes.  Between these fabrics, I can create layup schedules for each of the joints that have sufficient material (strength), and the proper directions of plys (to handle the vectors of force) to make great joints.  And because I am effectively working with fewer layers, of material more easily shaped to the joint, its possible to avoid the six-handed frustration of wet-wrapping joints.

Let's digress for a moment.  I have good sources for my materials, but I wouldn't call them robust.  My sources for state-of-the-art materials don't cater to small volume buyers, and the folks that do tend to do so as a favor.  So don't ask me where I buy my CF and I'll tell you no lies.  Also, don't ask me my specific lamination schedules.  I can't assure that your methods will be identical to mine, and I don't want any responsibility for the success of your joints.  Go get your own materials, practice, test, refine, repeat, until you have a working solution.  OK?  Great!

Fitting fabric to a joint is complicated.  I start with rough paper patterns.  Because paper doesn't adapt over 3D like my fabrics, these can only be rough.  But these give me a starting point, from which I can trim material until I have good coverage of a joint, including overlapping the material on itself (so that the tubes are wrapped through 360 degrees plus).  Then epoxy can be painted on the joint, and for thinner layers painted on the fabric, which is then applied to the joint.  Because multiple layers will be applied, I don't attempt to force the material to adhere to the tubing until the last layer is applied.  Special flashing tape helps to hold materials in position.  A release layer of some type is applied next.  Guess what: this stuff doesn't like to work in 3D.  Therefore there is cutting and fitting to make it conform to shape of the joint.  This too can benefit from flash tape.  Outside of this goes a layer of batting which serves as a conduit for the vacuum and acts to soak up any excess epoxy pulled out during the vacuum process.

We'll speak more about vacuum bagging at some future date, I'm sure.  But for now, this gives you an overview what I use, and how it goes together to make a CF bike frame.

So I'm done here for now (well, except for possible editting).  Hope you've found this informative.  Don't hesitate to ask questions.

Cheers,

Thursday, September 30, 2010

A pic to make you happy

Catching Up

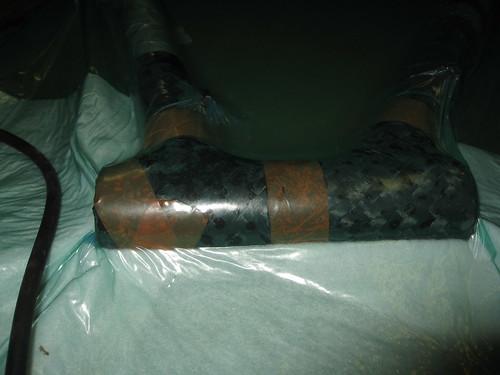
The 'day' job has been getting in the way of real work.  Then I discovered I was a bit short on some supplies, which are now on order. Consequently, there hasn't been much work done on the carbon frame, nor posts associated with same.

Perhaps now would be a good time talk some theory, to fill in the time-gap and maybe make you better informed consumers.

There is a lot of misinformation out there about frame-building, frame materials, and frame design.  I'm not going to try to address all of that here.  But all of these topics will be touched on, at least a little.

Carbon fiber is a great material for building frames because it can be formed into light strong structures that fit (literally size-wise) into the requirements for a bicycle frame. Of course, Aluminum, Steel, and Titanium all fit this brief too.  As far as I'm concerned, there is no hierarchy of good, better, best among these materials.  They all work.

I don't work with Aluminum or Titanium because I don't know how to Tig weld, and don't have a Tig welder (quite an expensive setup).   If the facts were otherwise, I'd consider working with both of these materials.  However, they're not, and I don't have time to change the facts, so I stick to Steel and Carbon Fiber.

Carbon builds up to a low-weight frame easily.  A very-low-weight frame takes a bit more work.  But a simple question, that is worth asking, is: How low a weight do we need?  It might be fun to build yourself a bike that is too light to race (legally).  But how practical is that?  The simple answer is: Not very.  Very light is expensive, less durable, and at some point loses functionality.  A well made and designed bike, that falls between 15 and 17 pounds, is capable of winning in the Pro Tour.  And we can pretty easily build to this weight at a price that many riders are willing to pay.

Nonetheless, some riders want to be nearer to 15 (or less) than 17 pounds.  And they don't want to achieve their goal by using $6000 wheel-sets.  Carbon can help us meet that requirement more easily than does steel.  While I enjoy the aesthetic of steel frames, I've come to also appreciate the aesthetic of carbon frames.  It's a different flavor, not necessarily better or worse.  And as a builder, I'm learning how to leverage it to create a beautiful bike.

In the press, you will find all sorts of claims about special forms of carbon fiber and uniquely shaped tubes.  Also there is discussion of tube to tube (T2T) versus monocoque versus lugged, and frankly it gets tedious to read after a while.  As a rider, it doesn't really matter if your bike is T2T, monocoque or lugged.  Each method works well, and produces competitive frames.  The palmares of each of these frame types is extensive and up to date.

As a side note, the term monocoque is probably misused in this application.  Arguably, any tubular bike frame is a monocoque structure.  In the case of carbon frames, the term is generally used to indicate that a frame is laid up and cured as one piece.  Generally this isn't how carbon frames are made.  Instead, most of the so-called monocoque frames are build a triangle at a time.

Further, there frames, such as Trek, that look otherwise, but are essentially lugged frames.  Individual parts are made, with male/female joints on the end, and the parts are then glued together.  Careful paintwork and decaling helps to hide the joints.

But what about the types of carbon fiber?  Here too, it's hard to decipher the importance of this information for a rider.  Everyone claims that they use 'high-modulus' carbon fiber. Via that term, they are implying that they have selected  form of carbon fiber that is particularly stiff.  And we all know that stiff bikes are good, right?

Actually, its not clear how stiff a bike needs to be to efficiently transmit your power to the rear wheel.  It's also not entirely clear where the stiffness is needed (except in so far as it protects the frame from fatigue failure).  Many will quarrel about this point, but after researching the issue, I'm convinced that there is a material divergence of opinion in the scientific and engineering communities regarding this point.  So I'm not willing to say that 'stiffer is better'.

But lets say we don't want a noodle (while remembering that Alan bikes were noodles that also won all sorts of championships).  All else being equal, a bike made of fiber with a higher modulus of elasticity will be stiffer.

Unfortunately, terms such as 'high modulus' aren't very precise descriptors.  From what I can tell, most carbon fiber used in bicycle frames varies between what could loosely be called the high end of low modulus (LM) and the middle range of intermediate modulus (IM).  I hope that folks don't find that to be too disturbing an observation - it doesn't change how CF bikes perform.

You may wonder why builders aren't all using very high modulus CF?  After all, we want to make our bikes stiff, don't we?  Generally, the answer is 'yes' the manufacturers are trying to make their bikes stiff.  They are also trying to make them strong.  And for many families of carbon fiber there is nearly an inverse relationship between strength and stiffness.  If the fiber is too stiff, it is less strong and may also be more brittle (so it doesn't hold up well to shocks).  A bike frame needs to be made of a material that is strong and can handle shocks, so a number of HM carbons just aren't appropriate.

This is the first way in which manufacturer claims, should be taken with a grain of salt, regarding HM carbon fiber.

Consider also, these claims almost never specify how much of the CF in a frame is HM.  And now we have two ways by which the term High Modulus carbon fiber is misleading in various marketing and editorial material.

There are a couple of ways that a material can be made to act more stiff, regardless of it's Young's Modulus.  First of all we can use more material.  The wall thickness can be increased, making the tube stiffer and stronger.  When we're trying to reduce weight, this may not seem desirable.  But consider that we need enough material to provide the required strength for a job, and this volume of material may prove to offer sufficient stiffness for the job at hand.

In the case of bicycle tubes, we can also increase their diameter, further leveraging the stiffness imparted from their being a monocoque.  Naturally, this approach has limits determined by the physical space available. Probably the biggest limit, for tubing diameter, however, is that a certain minimum wall-thickness is necessary to maintain the integrity of the tube.  This is true regardless of the material which we use.  And in my experience, light frames, of any material, explore the limits of wall thickness of that material.  In other words, we may not be able to get enough strength, in a tubular form, with an amount of material that merely offers sufficient stiffness for our goals.

I remember a reading a review where the manufacturer proudly described how his tubes could be squeezed by hand, suggesting that this was proof of how they would absorb shock.  My personal reaction was that there was minimal wall strength causing me concerns about the durability of such a frame.  BTW, I haven't heard that manufacturer continue to make such claims, leading me to believe that they may have backed away from this approach.

If you do a search online for carbon fiber, there are a number of sources from which to purchase small quantities of CF.  Heck, there are a number of sellers on ebae alone.  Rarely, however, do these sources reveal much about the characteristics of the materials that they are selling.  Sometimes claims are offered regarding commercial or aerospace grades.  Often there is a description of the weave, which is merely a matter of style.  Generally the the weight per square yard and dimensions are provided.  The weight is interesting because it speaks directly to how much of this stuff there is - which leads right into the question of strength.  But, even sources supplying experimental aircraft builders don't provide the modulus of elasticity, the modulus of strength, much less the manufacturer and model code of the actual carbon fiber.

When you go to any lumber yard, its possible to specify your materials by a number of variables that indicate its suitability/strength for your use.  But most of the CF sources, selling in lots of less than 100s of yards, don't offer this basic service.  Leaving their users to either overbuild for safety, or limit their use of CF to cosmetic purposes.

After a long period of time, I've found some sources which allow me to spec CF materials properly.  They either provide the technical specs, or provide manufacturer and model info so I can confirm these myself.  This is important, and anyone who wants to experiment with CF building needs to have this information if they want to achieve repeatable results.

Back in the archives are posts about some of the fabrics I use.  I'm going to repeat some of that here, because traffic is up and many folks may never search back that far through the archives.

Uni, uni, uni, uni, uni-directional carbon fiber.  Many we hear the term a lot.  Everyone reading this probably knows that the strength of CF is along the length of the individual threads.  Moreover, that it is very much stronger in tension than compression.  And that the proper orientation of the fiber is necessary to give strength in the direction of forces in any one area of a bike frame.

If things were a simple as this, CF bike frames wouldn't work.   The frame and its tubes are made of layers of CF.  Generally a layer is made of uni-directional CF, that is, CF where the fibers run in parallel.  But the main part of a tube may only have 5-6 layers of CF, with the majority running either + or - 45 degrees from the axis of the tube, and a little running parallel to the axis.  I can guarantee that the forces faced by the tube don't all align with these three directions.

Think of a sailboat tacking into the wind.  A force pushing in one direction can move an object to ultimately move in the opposite direction.  Similarly, the various directions (vectors) of force encountered by the tube can be channeled into the fibers going in multiple directions, and successfully resisted - allowing for the creation of tubes with a very limited set of alignments of CF.  If we had to have fibers arranged for all the forces experience, we would need many more layers of CF, and therefore much more weight.

Within joints, things get a little more complicated, but one of the complications is that the physical shape of the joint can interfere with placing fibers in the desired orientation.  For example: It might be nice to run a fiber across the top of the BB, and then up either the seat tube or down tube.  But this generally leads the CF around a sharp corner, even if a fillet has been built up in that corner.   CF doesn't like sharp corners, and doesn't provide good strength around them.  Much better is to run the CF at an angle across the BB, and then wrap the respective tube in a spiral.  This reduces the bend in the fibers, and essentially requires another layer in the reverse direction.  Then the two together resist the forces that led us to want the fiber to go straight up the tube.  And, these spiraled layers also resist torque or twisting movements in the tube and joint.  Cool, huh?

Next time someone talks about their proprietary layups, or trade secrets, take it with a grain of salt. It isn't all rocket-science.

In a similar vein, how about those seat/down tubes that flare out to the full width of the BB?  Having never cut one of those apart (other riders are very sensitive, it seems, about my experiments), I can only guess.  But my guess is that the cup or cylinder in which the BB is affixed, has an internal fillet which allows the fibers to shift directions to parallel the axis of the BB axle.

Now the extra width is supposed to make this junction stronger and stiffer.  Does it?  Again, I can only speculate, but suspect that the impact is this design is minimal.  For any form of bending, there is a question as to where the bending occurs.  If the bottom bracket is made sufficiently rigid, it is likely that bending forces move up the respective tubes to a less rigid location.  A chain is only as strong as it's weakest link, eh?  And without further reinforcing the tubes away from the joint, reinforcing the joint is apt to offer minimal gains.

This is shaping up into a pretty good rant, and there's more ground to cover, including some discussion of the materials that I use.  Given the length of the post, combined with the fact that Comcast is acting up today and the inter-tubes aren't acting happy for me, we're going to stop here and finish in another post soon.

Until next time.

Portland

As long as I'm outing builders today, check out Argonaut Cycles - they're part of the strong and growing Portland community of frame-builders. 

It's Phantastic!

There's a new builder thread at Smoked OutIt's Phantasm Cycle Works.  Check it out!

Thursday, September 23, 2010

Villin Cycles

Hey,

Check out Villin Cycles, the latest in Smoked Out.  Now I'm going to fix the side bar so you can also click from there.

Saw this on my ride today

Road down to the city, turned around at Edgebrook.  Spotted a traditional coffee shop, and this was what they had in the window.


Click the pic to enlarge, and read the sign.

Wednesday, September 22, 2010

Just Grooving Along

Did you know that there are two (2) frame-builders with "groove" in their name?  Peacock Groove Cycles and Groovy Cycleworks are two very cool builders - but very distinct from each other.  Please don't confuse one with the other.  What's the best way to avoid confusion?  Learn more about each of them.  Where do you do that?  At Smoked Out, naturally.  So head over to the bar on the right on click on each of their links.  That way you can be a more informed cyclist and a more discerning connoisseur of custom bicycles.

Ciao and tell 'em Rick sent ya!

Tuesday, September 21, 2010

Dirt Bikes

If I was looking for a dirt bike, whether an mt. bike, cruiser, or expedition style, my goto builder would be Steve Garro at Coconino Cycles.  Check him out now, click on his entry in the Smoked Out list on the right.

Sunday, September 19, 2010

Style

Yipsan is a framebuilder with a nice sense of aesthetic.  Click on his link near the bottom of the Smoked Out list on the right!

A few more pictures

Progress continues with reinforcing and faring joints.  It seems like a few more pix might be in order, as getting this done right tends to make the vacuum bagging process go more quickly.


This is a good example of shaping a joint.  In this case, the initial reinforcing goes under the faring.


This is an example of a joint that is nearly ready.  A little additional sanding is left, especially to ensure that the head-tube shape is round, not a series of random planes.


Here is an example of how nicely this knit fabric drapes.  Without much excess epoxy, the fabric hugs the shape of the joint.  Now it will be wrapped with tape to compress it down and squeeze the excess epoxy out through little holes.

Also note how the pattern of the knit looks very different from the pattern of the woven cosmetic layer on the tube.


Here's is a wrapped joint, and you can see the beads of epoxy oozing through the holes in the tape.

And here's what the joint above looks like after unwrapping.


See you later...

Friday, September 17, 2010

New Frame Builder in Town

Actually, a new Builder is listed in Smoked Out, by the name of Huckleberry Cycles.

Check it out!

Thursday, September 16, 2010

Filling Joints

The current step of the carbon bike build is probably the ugliest.  It involves glopping a special epoxy mixture onto the joints, trying to form it to a shape, waiting for it to harden, then filing and sanding it smooth.  It doesn't usually go down in one fell swoop, and involves lots of clean up between efforts.

There aren't pictures for each step in the process, but here are some mid-stream:


The joint above has been filled, filed, and sanded.  Now a lighter layer of filler is applied.  When dry, it will be sanded down to a smooth transition between the tubes.


Here's the lower head-joint at about the same point.  As the epoxy tacks up, a rag with acetone is used to clean the excess from the tubes away from the joint itself - which saves on sanding later.


The bottom of the BB is done, and a woven reinforcement has been applied.  The upper between the tubes is almost finished, and filler still needs to be built up between the seat-tube and chain-stay.

More soon....

The Dean of Custom Carbon Bikes

Have you checked out the Dean of Custom Carbon Fiber Bikes?  That would be Nick Crumpton, just click on Crumpton Cycles in the Smoked Out list on the right.

Wednesday, September 15, 2010

Carbon Builders

Hey,

If you're interested in custom carbon frames, you ought to check out Kevin at Polytube Cycles.  Just click on Polytube Cycles in the Smoked Out list on the right.

Tell him Rick sent ya,

Ciao

Monday, September 13, 2010

Wade Patton

Hey gang, it's Wade Patton's turn to get Smoked Out over at the VelocipedeSalon.  He's a very interesting new builder with a fascinating story.  So take a peek.

Just go over to the Smoked Out alumni list on the right and click on Wade Patton!

Cheers,

Rick

Saturday, September 11, 2010

Getting Ready for Wrapping

As pictured below, the frame now holds together as a unit, even out of the jig.


Therefore it's time for an alignment check, and it all looks good.  Here's a picture of the rear alignment test.


The height gauge is a nice antique Starrett that I picked up on e-bay for less than $50.  It has decimal inches on one side and mm/cm on the other.  Even came in a nice leather covered case:


All of this led to the largest task of the evening; marking joints and masking the rest of the frame.  It's the voice of experience talking when I say you should always mask the frame before wrapping joints.


Stay tuned....

Thursday, September 09, 2010

Glue it up!

My 6061 Alu tubing arrived this week.  I cut off a piece and turned it down in the lathe to fit the inside of hte steering tube.  It's hard to read the scale in this picture, but it reads 5 grams, so the pre-joining weight of this frame comes out to 995 grams.

It's also hard to see that I turned this offset, so the wall that will be tapped is thicker than the one opposite.


Here you can see the reinforcement through the mounting hole for the front derailer hanger, and a shot mid-way through tapping the hole.


I'm pleased with how this detail is working out.


Next is putting everything together in the jig and checking alignments one more time, then cleaning and gluing the joints.  You can see the high-tech methods used to hold the top-tube in position during the curing of the glue.  The bike will cure in the jig at least 24 hours before moving on to other steps.  In this case, it will probably sit until Sunday.


Then came a detour to service a few bikes that have been waiting.  Mostly just cleaning, and changing an inner-tube.

The later is interesting.  I did a 45 mile ride Sunday, most of which was off-road.  So I took my rough-rider with the Cross tires.  UCI legal, BTW, with a 32mm width.  Getting home from the day-job on Monday, it's clear that the front tire is flat.  After pulling the tire tonight, and inspecting the inside, there is no evidence of a hole.  Looking at the tube reveals a different story with a 1.5" long split in a seam.  I'm guessing it let go with a bang when no one was around to pay any attention.

It's import to work to a sequence and schedule when building frames.  By this I mean that there is no room for impatience - which could lead to shortcuts (never work), or expecting materials to be ready before they are. 

Besides the service work above, there's another important task prior working further on this frame: I need a place to vacuum bag!  If you've been paying attention, my shop is very small, and very full.  To wrap the joints requires space to mix epoxy and wet out the carbon fiber, as well as a big flat space for the bag itself.  Fortunately, there's a table in the shop dedicated to this function.  But when not wrapping and vacuuming, it gets re-purposed.  Consequently, the last task for the evening was cleaning up this space.

Tasks still remaining include building and shaping the fillets around the joints, and laying down a special reinforcing layer of knit CF that will be applied and cured  before doing the main laminating of the joints.

More soon.

Tuesday, September 07, 2010

Couldn't weight.

Still need to install the reinforcing for the front derailer, but I was curious about the pre-wrap weight of this frame.

Monday, September 06, 2010

Working on Details Cont'd

Got a to work on a few more details today - including the first round of polishing for some bits that go on two frames, one steel and the other carbon.

To begin with, I'm installing a 'braze-on' front derailer mount on the carbon bike.  Because we can't braze carbon fiber, a different method of mounting is required.  This mount will be bonded with epoxy, but that's not enough for the stresses on the front derailer.  Moreover, I'd like to have the option to use band style derailers.  The seat-tube should be plenty strong, but it makes sense to add a little reinforcement for a long-term bike.  My supplier ran a day behind schedule, before a 3 day weekend.  So the inner aluminum sleeve is still at UPS, it'll get bonded in Thursday (check-in then for pix).  The sleeve will also provide a threaded base for a mounting M5 screw that will fix the derailer mount.  For now, the screw is threaded into the carbon tube.


More pictures later, once I've finished polishing the mount.

The brake cable stops are now installed on the top tube.


These are bonded and riveted in place, and then the backsides of the rivets are bonded.  The holes are drilled for the derailer cable stops, but problems with the rivet tool have delayed their installation.  Should be done by Thursday.  So at this point, things are ready to clean up and start wrapping joints.  Which means that its time for me to start cleaning and organizing the space for wrapping and vacuum bagging - which will probably occur next week.

On Nick's bike (steel), we have a pump mounted to the left seat-stay.  At the bottom (drop-out), feet on the pump head sit on the chain and seat stays.  To prevent the feet from wearing out the paint, I've brazed on stainless plates.  There's a little filing left to do around the edges of the plates, and a little more polishing to be done on the plates, but they're coming along and beginning to look nice.
The curve of the pump handle necessitates a long plate on the seat-stay.

The small plate


The big plate.

And that's about it for now.

Saturday, September 04, 2010

Gaulzetti

If you haven't heard of Gaulzetti bikes, and there is a good chance that you haven't, then you probably ought to check in at Smoked Out and get up to speed.

Thursday, September 02, 2010

Putting Together More Details

This is getting close to ready for wrapping joints, just a few details left.  Here's an overall shot:


There's lots of work getting to here.  You can see a bit of white on the front of the chain stays.  That's paint so my marks will better show up for mitering.  There's also which on the seat tube under where the seat stays join, again to show off marks and measures.

The head tube fit up is good:


The top tube is sitting a little low from it's final spot, but the fit is fine.

Water bottle mounts go in before bonding things together.  This allows me to coat the backsides (inside the tubes) with a heavy epoxy to better reinforce the hole and mount.  I'll also be mounting front derailer hanger, but haven't got that done today.


The rear triangle seems to be fitting nicely too!  As always, a bit needs to be trimmed from the backside of the seat tube miter to clear the box section of the chainstays.


It I get any more done tonight, I'll update this post.

Sorry, nothing more to show.  Decided to use stainless front derailer hanger, and I spent time sanding on it.   hope to get it polished.  I'm afraid it will be quite the little time sink.

Drew

Check out Drew and Engin Cycles

Tuesday, August 31, 2010

An oldie but a goodie

Here's an old picture that I'm posting just because I like it.

Monday, August 30, 2010

Next Step

It's time to move onto the next step with this carbon frame (feel free to click pictures to enlarge).

First I bonded the threaded Ti shell into the CF BB sleeve.  To keep epoxy off the threads, I coated them with heave anti-seize grease.  Then I cleaned the outside of the shell with acetone.  After applying epoxy to the sleeve and the shell, the two get pressed together, sliding the non-drive side of the shell into the drive side of the sleeve.  When the drive side of the shell is even with the drive side of the sleeve, we're good.  Then I wipe off the excess epoxy from either end, and clean off the outside of the sleeve with a paper towel and acetone.  Once this has set up, I trim the non-drive side of the sleeve, and sand it down even with the non-drive side of the shell.  The last step is to clean the grease out of the threads and try fitting a BB - like this:


You can see that I've clearly marked the drive-side, so that I don't mount it backwards into the frame.  Don't laugh, it's easy to do.


From here, I work from the Bible for this frame, which is the printouts from BikeCad for the design.  This includes a picture with the measurements that are key for me to setup (and double check) the jig, and pages of details ranging from measurements to colors.  It looks something like this:


Next it's time to start setting up the jig.  The BB drop is the same as the last frame I did, but I double check this to make sure.  Then I make sure that the BB is the correct width:


Looking good, so I center it on the jig:


215mm is the center-line on my jig, indicating that everything is fine.

The next step is checking to make sure that the jig is level so that tube angles can be set accurately:


The seat-tube comes first:
This will be fine tuned with a machinists protractor - in this case at 73 degrees.  

Then the head-tube gets set - which is a little fussier on this jig - so I go right to the protractor.

Part of the fussiness here is that we have to simultaneously set the angle and top-tube length. And changing one changes the other.  Getting the head-tube right is the hardest part - because it's height above the BB must also be set, but that's a separate operation.

Here's an example of the fit between the seat-tube and BB.
And here's the same joint with the down-tube in place:
That's all for tonight - hope you're enjoying the pix.