Thursday, September 16, 2010

Filling Joints

The current step of the carbon bike build is probably the ugliest.  It involves glopping a special epoxy mixture onto the joints, trying to form it to a shape, waiting for it to harden, then filing and sanding it smooth.  It doesn't usually go down in one fell swoop, and involves lots of clean up between efforts.

There aren't pictures for each step in the process, but here are some mid-stream:


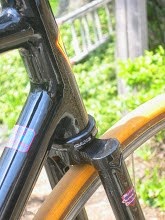
The joint above has been filled, filed, and sanded.  Now a lighter layer of filler is applied.  When dry, it will be sanded down to a smooth transition between the tubes.


Here's the lower head-joint at about the same point.  As the epoxy tacks up, a rag with acetone is used to clean the excess from the tubes away from the joint itself - which saves on sanding later.


The bottom of the BB is done, and a woven reinforcement has been applied.  The upper between the tubes is almost finished, and filler still needs to be built up between the seat-tube and chain-stay.

More soon....

The Dean of Custom Carbon Bikes

Have you checked out the Dean of Custom Carbon Fiber Bikes?  That would be Nick Crumpton, just click on Crumpton Cycles in the Smoked Out list on the right.

Wednesday, September 15, 2010

Carbon Builders

Hey,

If you're interested in custom carbon frames, you ought to check out Kevin at Polytube Cycles.  Just click on Polytube Cycles in the Smoked Out list on the right.

Tell him Rick sent ya,

Ciao

Monday, September 13, 2010

Wade Patton

Hey gang, it's Wade Patton's turn to get Smoked Out over at the VelocipedeSalon.  He's a very interesting new builder with a fascinating story.  So take a peek.

Just go over to the Smoked Out alumni list on the right and click on Wade Patton!

Cheers,

Rick

Saturday, September 11, 2010

Getting Ready for Wrapping

As pictured below, the frame now holds together as a unit, even out of the jig.


Therefore it's time for an alignment check, and it all looks good.  Here's a picture of the rear alignment test.


The height gauge is a nice antique Starrett that I picked up on e-bay for less than $50.  It has decimal inches on one side and mm/cm on the other.  Even came in a nice leather covered case:


All of this led to the largest task of the evening; marking joints and masking the rest of the frame.  It's the voice of experience talking when I say you should always mask the frame before wrapping joints.


Stay tuned....

Thursday, September 09, 2010

Glue it up!

My 6061 Alu tubing arrived this week.  I cut off a piece and turned it down in the lathe to fit the inside of hte steering tube.  It's hard to read the scale in this picture, but it reads 5 grams, so the pre-joining weight of this frame comes out to 995 grams.

It's also hard to see that I turned this offset, so the wall that will be tapped is thicker than the one opposite.


Here you can see the reinforcement through the mounting hole for the front derailer hanger, and a shot mid-way through tapping the hole.


I'm pleased with how this detail is working out.


Next is putting everything together in the jig and checking alignments one more time, then cleaning and gluing the joints.  You can see the high-tech methods used to hold the top-tube in position during the curing of the glue.  The bike will cure in the jig at least 24 hours before moving on to other steps.  In this case, it will probably sit until Sunday.


Then came a detour to service a few bikes that have been waiting.  Mostly just cleaning, and changing an inner-tube.

The later is interesting.  I did a 45 mile ride Sunday, most of which was off-road.  So I took my rough-rider with the Cross tires.  UCI legal, BTW, with a 32mm width.  Getting home from the day-job on Monday, it's clear that the front tire is flat.  After pulling the tire tonight, and inspecting the inside, there is no evidence of a hole.  Looking at the tube reveals a different story with a 1.5" long split in a seam.  I'm guessing it let go with a bang when no one was around to pay any attention.

It's import to work to a sequence and schedule when building frames.  By this I mean that there is no room for impatience - which could lead to shortcuts (never work), or expecting materials to be ready before they are. 

Besides the service work above, there's another important task prior working further on this frame: I need a place to vacuum bag!  If you've been paying attention, my shop is very small, and very full.  To wrap the joints requires space to mix epoxy and wet out the carbon fiber, as well as a big flat space for the bag itself.  Fortunately, there's a table in the shop dedicated to this function.  But when not wrapping and vacuuming, it gets re-purposed.  Consequently, the last task for the evening was cleaning up this space.

Tasks still remaining include building and shaping the fillets around the joints, and laying down a special reinforcing layer of knit CF that will be applied and cured  before doing the main laminating of the joints.

More soon.

Tuesday, September 07, 2010

Couldn't weight.

Still need to install the reinforcing for the front derailer, but I was curious about the pre-wrap weight of this frame.

Monday, September 06, 2010

Working on Details Cont'd

Got a to work on a few more details today - including the first round of polishing for some bits that go on two frames, one steel and the other carbon.

To begin with, I'm installing a 'braze-on' front derailer mount on the carbon bike.  Because we can't braze carbon fiber, a different method of mounting is required.  This mount will be bonded with epoxy, but that's not enough for the stresses on the front derailer.  Moreover, I'd like to have the option to use band style derailers.  The seat-tube should be plenty strong, but it makes sense to add a little reinforcement for a long-term bike.  My supplier ran a day behind schedule, before a 3 day weekend.  So the inner aluminum sleeve is still at UPS, it'll get bonded in Thursday (check-in then for pix).  The sleeve will also provide a threaded base for a mounting M5 screw that will fix the derailer mount.  For now, the screw is threaded into the carbon tube.


More pictures later, once I've finished polishing the mount.

The brake cable stops are now installed on the top tube.


These are bonded and riveted in place, and then the backsides of the rivets are bonded.  The holes are drilled for the derailer cable stops, but problems with the rivet tool have delayed their installation.  Should be done by Thursday.  So at this point, things are ready to clean up and start wrapping joints.  Which means that its time for me to start cleaning and organizing the space for wrapping and vacuum bagging - which will probably occur next week.

On Nick's bike (steel), we have a pump mounted to the left seat-stay.  At the bottom (drop-out), feet on the pump head sit on the chain and seat stays.  To prevent the feet from wearing out the paint, I've brazed on stainless plates.  There's a little filing left to do around the edges of the plates, and a little more polishing to be done on the plates, but they're coming along and beginning to look nice.
The curve of the pump handle necessitates a long plate on the seat-stay.

The small plate


The big plate.

And that's about it for now.

Saturday, September 04, 2010

Gaulzetti

If you haven't heard of Gaulzetti bikes, and there is a good chance that you haven't, then you probably ought to check in at Smoked Out and get up to speed.

Thursday, September 02, 2010

Putting Together More Details

This is getting close to ready for wrapping joints, just a few details left.  Here's an overall shot:


There's lots of work getting to here.  You can see a bit of white on the front of the chain stays.  That's paint so my marks will better show up for mitering.  There's also which on the seat tube under where the seat stays join, again to show off marks and measures.

The head tube fit up is good:


The top tube is sitting a little low from it's final spot, but the fit is fine.

Water bottle mounts go in before bonding things together.  This allows me to coat the backsides (inside the tubes) with a heavy epoxy to better reinforce the hole and mount.  I'll also be mounting front derailer hanger, but haven't got that done today.


The rear triangle seems to be fitting nicely too!  As always, a bit needs to be trimmed from the backside of the seat tube miter to clear the box section of the chainstays.


It I get any more done tonight, I'll update this post.

Sorry, nothing more to show.  Decided to use stainless front derailer hanger, and I spent time sanding on it.   hope to get it polished.  I'm afraid it will be quite the little time sink.