Monday, September 24, 2007

More Bits and Pieces


Today was good for progress on some small bits of the Path Racer. For starters, I drilled and tapped mounting holes in the track forks.

You can see how the bolt fits into the curve at the end of the stay. I'll be fabbing up some custom connectors for the fender stays that will fit in place of the bolt.


You can also see how on, the chain stay, I've cut back into the pin (nail) used to hold it in place while brazing. I'll have to work that a little differently next time.

By the way, there is a weird shadow in the picture that makes the bottom edge of the track fork look carved out. It's not, instead it forms a straight line up to the bend,and then tapers gently towards the stay.

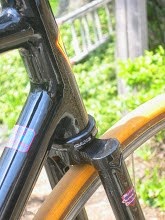
I also tried out some new filler today (from Fred Parr) which is designed to build up fillets. The lugs have a very abrupt transition from one spigot to the next, and I
wanted to try smoothing the transition out. Here's an example from the seat lug. Take a peek at the edge of the outline - that looks nice to me.

Based on the results, I'm going to try the head lugs too.

Finally, I spent some time playing with polishing crank arms. Here are three arms in various states of polish:


Sorry for the glare, but I wanted to get in close with the camera.

That's it for tonight.

Toddles!


Sunday, September 23, 2007

Odds 'n Ends

Since dropping frames off for paint, I've been moving a little bit slowly in the shop and getting in a few more miles on the road. The next two weeks may be more of the same as we are going out of town next week for a long weekend to attend a wedding. Still, there are a few things to share which you may find of interest. Hence, Odds 'n Ends.

First my Stein Stronglight crank-puller arrived along with a VAR that works on modern cranks and older TAs (another unique crank thread). So the Path Racer is fully torn down and I'm working on final surface prep, but probably won't get this to the painter for 2-3 weeks.

Using the Stein/Stronglight puller, the fit is very tight. So much so, that I stopped installing it, and tried the VAR/TA. The TA is too small. It threads in nicely, but has a very loose fit, which worries me about damaging the threads. So, I reverted to the Stein/Stronglight and used a wrench to turn it in. The crank pulled out easily and it wasn't too difficult to remove the puller. But a small sliver of aluminum fell out while removing the puller, which has me a little concerned. I think I'll contact Stein before using this on my Stronglight 49 crankarms.

Having pulled the Stronglight 93 arms, I tried doing a little polishing on the right arm. Most of the face cleaned up nicely, but these was a spot that wouldn't come out (I'll have to post some pictures). My guess is that something got on the arm and caused some corrosion, leaving a small area with a pitted surface. I tried sanding the area, and then filing it lightly. But neither will get to the bottom of this pitting without changing the contour of the outer face of the crank. I guess I'll have to do some research on methods to repair this surface.

A new set of Velo-Orange fenders arrived this week (for the Path Racer). They appear very well formed, and of reasonable weight. The stays are good, as is most of the hardware. On the Velo-Orange site, it's noted that the fork attachment isn't as nice as the one that comes from Honjo. But, I find that, half the time, I need to fabricate a custom attachment anyhow, so that doesn't concern me very much.

These fenders cost about 1/2 of the comparable Honjos, but they come unfinished. The raw aluminum sheet is formed, packaged, and shipped. I did some test polishing on one of these fenders to see how hard this would be. I put a buffer in the drill press, running at its highest speed (3150 RPM). First I tried Simichrome polish. I does a nice job, to a point. The fender become shiny. But, there are some typical imperfections in the aluminum that it doesn't easily address.

Next up was some buffing compound (designed for steel). I have several, including one that is courser for cutting and one that is finer for polishing. Even the finer compound did a better job than the Simichrome at removing the surface imperfections. And, I couldn't see improvements in the finish after applying Simichrome on top of the area that had been worked with the buffing compound. My guess, is that it'll take me about an hour per fender to polish them to a satisfactory state.

I was concerned about the durability of the polished surface - would it oxidize, discolor, whatever? After doing a bit of research, it appears that a thin oxide layer quickly forms. This layer protects the underlying aluminum and generally looks fine. So I'm going to try going without any overcoat (Shellac, clear-coat, whatever).

Well, that's it for now. See ya next time.


Thursday, September 20, 2007

Tuesday - D-Day

Tuesday was my D-Day. I had an appointment to drop two frames off with Duane for paint. Only there was a problem with the Path Racer.

Stronglight cranks (until recently) used their own proprietary crank pullers. I used to have one and believed it was still around. I could remember what it looked like and approximately where to find it in my old tools and components.

So, post shakedown, I started taking the Path Racer apart. When it was time to pull the cranks, a quick search found my Stronglight puller. Only, it was a Sugino puller. URGH!!!!! So the cranks are still in place (everything else is off). Apparently Stein is the only tool maker to still offer a Stronglight puller, thankfully they do. So I ordered one and a TA old-style puller as well. But until they arrive, the bike can't go to the painter.

Therefore it was time to come up with plan B. My first-ever frame was built without a jig or alignment table. The trick to this is to put a beam across the seat tube and either the head tube or down tube. Because the seat tube doesn't generally have the same diameter as these other tubes, shims must be used to keep the beam parallel with the centerline of the frame. Then the dropouts can be located laterally from the beam with a ruler.

I apparently calculated my shims wrong and ended up with a mis-aligned rear triangle. URGH!!!! From this I went on to build my next bike nice and straight. Now my frames rarely need a tweek of anything on the alignment table. Even when a tweak is required, it is in the build sequence and not afterwards. Knock on wood that things continue this way.

About 4 months ago, I cut out the rear triangle from frame numero uno and started over. This time withe nice stainless Henry James drop-outs. Even though this largely completed the frame, it's been sitting and waiting for final bits and cleanup.

Meanwhile, I have assembled a straight leg fork for this bike, with a polished crown and polished tips.

On Sunday I began final prep on this bike so that it could go to Duane's with the Randonneur. This included: thinning lugs; mounting a brake bridge on the seat stays; cleaning lug edges; polishing the dropouts; filing and sanding excess filler around the H20 mounts, double checking alignment, honing the seat and head tubes, milling the head tube, etc.

This kept me busy through Monday evening. Tuesday if was off to Duane's. Jody was there to help with color choices. Janet had already chosen a blue in the decals for the rando bike. Duane will use a slightly darker shade to outline the fancy Prugnat lugs. It should be pretty when done.

One the other bike, Jody helped steer us to a nice sage green metallic. We're going with a fairly fine grain to the metallic, and using silver lug lines. The silver will hopefully work well off of the polished stainless and the silver lettering in the down tube decals.

So it's time to clean up the shop again, and then start work on Charlies little carbon racer.

I took one of the Nervex arms with the stripped out pedal threads and gave it a quick polish. It looks nice. Clearly a better polish job is warranted, although it won't be possible to make them like new as there are some obvious nicks in the arms. Meanwhile, I drilled it out at a 150mm length and threaded it for the pedal. Next the old end will be cut off, the shape cleaned up with a file and sandpaper and then a real polish job. I figure the two arms are going to take a couple of days by themselves.

That's it for today - see you soon.

Thursday, September 13, 2007

Path Racer Trial

As noted in the previous post, yesterday was trial day for the Path Racer. So how did it go? Generally quite well.

It's hard to over emphasize how big a 700Cx35x38 tire is. Someone who had seen the tires on the shelf, felt the need to comment on their size after seeing them on the bike. They aren't as wide as an old Schwinn, but they're tall. And with my weight on the bike, the bottom squishes way out. So much so, that I went back to the Berto chart of suggested pressure for tire size and bike/rider weight. All was correct so I pushed off.

As I've gotten older, my hands have gotten more and more sensitive while riding - to the point I can now claim to have Cyclists Palsey. The tingly/numbness can last for hours after a ride. On the black track bike (which can be seen at www.CyclesNoir.com), I've switched to upright bars, and then had to add Oury grips to give me a cushioned perch. Otherwise, a 30 minute ride left my hands tingly for a couple of hours.

On the PR (Path Racer) shake down ride, I had some stiff Nitto drop bars. They weren't taped, but had a set of Oury's on the bottom for just-in-case. Generally, the bars are a bit slippery without tape and require a tight grip which can lead to cramping and exacerbate Cyclists Palsey. After two hours, my hands were fine. I felt like a young man again.

The PR's frame is 531 standard gauge in a 1.0/0.7/1.0 profile - so it's not light. And, while it isn't the stiffest frame I've ever ridden, it's not a slouch either. Those heavy wall tubes do their job. Combining these tubes with the tires (which I estimate at between 700 and 800 grams each) and you end up with a pretty heavy bike.

The heavy tires are felt under acceleration. The PR doesn't sprint as well as my road bike - not that I expected it to. But otherwise, it doesn't feel heavy under the saddle. The tires roll pretty well, considering that they aren't performance tires. Coasting isn't a problem, nor is maintaining a steady speed. And in some circumstances, its possible to go a little faster than usual because of the cushioning provided by the tires. So far - so good.

Handling is interesting - which isn't bad, just not quite what I expected. The tires provide a significant amount of stability. It can change direction quickly, that's not an issue, but it's as if the steering has a dampener in many circumstances. I need to decide whether to further rake the fork (and reduce trail), or leave it with the assumption that the next set of tires will be a little smaller/lighter.

Rolling down the road, the PR feels like its on rails. And this impression rises quickly with speed. Nonetheless, it's easy to turn the bars and this registers as an immediate reaction from the bike. Going around corners, the size of tire makes everything seem very planted. Lean angles that normally would feel 'at the limit' don't. But it is possible to steer to a tighter or looser line. On the other hand, leaning the bike takes more effort. Some of this may be due to the overall weight, and some to the increased centrifugal force from the big tires. The effect isn't unpleasent, just different.

Climbing was also interesting. I consider low-speed climbs to be a good test of effective bicycle geometries. Poor designs, tend to wander all over the road. The want to fall off of their line, and need a little burst of speed to be pointed back uphill. The path racer doesn't do this at all - so good. But, when standing, as the bike swings back and forth, the front wheel steers from side to side, about six inches either way from the center line. There is no loss of control - the wheel returns to straight ahead easily as the bike returns to vertical. But it doesn't want to track a perfectly straight line while standing. It may be that, with a loaded handlebar bag, this behavior will be dampened out. Time will tell.

Meanwhile, I have to mount that rear brake bridge and a couple of rear fender fittings, give it a final file and sand everything down. Tuesday evening it's scheduled to go to Duane's for some new paint. I'm still thinking about colors - so you'll just have to wait and see what we come up with.

Cheers

CLB Brakes

Yesterday afternoon was spent on a two hour shake-down ride with the path racer. So far, it still only has the front brake - and that's worth some comment.

The brakes are some NOS CLBs that I picked up from Velo-Orange. They're sidepull brakes with about a 47-60mm reach. In todays terms, this is long-reach, although at the date of their manufacture (probably early 70's) they would have been considered medium-reach.

These are not the classiest brakes on the block. The finish is a greyish/silverish paint with a little sticker that says "CLB". The bolts that hold the brake shoes have an agricultural look with a hex head in which there is also a slot cut for Phillips screwdriver. Nonetheless, these brakes are full of good design and work really well.

First of all, if you looked at the pictures in the previous post, it's clear that they were designed to provide fender clearances. This is too often overlooked in the design of longer modern sidepull brakes.

In the head-on picture, the front arm has a little tab on the right. Behind that, on the rear arm, is a nylon bearing. This ensures that under heavy braking, when the arms flex, they won't bind up on each other. This should contribute to better brake feel/control - but I've never seen it on another brake.

What isn't visible in the pictures is how the back of the arms fit around the brake bolt. For the most part, the arms are in a single plane. However, at the brake bolt, the forward arm sweeps forward and across the rear arm as it reaches for the brake cable. The sweep is elegantly designed to be hollowed out with stiffening tabs that run from front to back. The rear arm also gets a hollow before coming to the portion that forms the bearing on the brake bolt. The result of this is stiff yet light arms. Good on CLB.

After looking at them closely, I'm going to have to weigh them on a digital scale just to see how they do.

All of this is for naught, of course, if the brakes don't work well. The first time the brake was applied, the bike was moving slowly and the braking seemed rather anemic. The next time, I was at speed and pulled hard on the lever. It took about a revolution of the front wheel to break through the old surface of the brake pad - then the brakes grabbed right-now! Having got the pads bedded in, they offer lots of stopping power and good modulation. Combined with the fender clearances, more of CLBs are on my shopping list.

In the mean time, the levers sport the drilled-out look - kinda cool. So I'm thinking of removing the paint from the calipers and levers, and polishing the aluminum to a nice luster. This should enhance the overall look of the Path Racer.


Tuesday, September 11, 2007

More Path Racer (w pix)


Ok ok, I promised some pictures. So we'll start with a couple of shots of the Path Racer from when I built it up to test clearances. Most of the build is temporary, but the bars, brakes and tires are part of the final product. The tires are large, and even though the brakes have arms of decent length, it's important to see that everything works together. I'm fairly pleased with how everything is coming together, so take a peek:


Here's and image showing the clearance for the tire and easily a fender: If you enlarge the image and look closely, you will see into the underside of the steerer tube.

What you can't see is that this crown has between 4
and 6 hours of filing smooth it out and give it its shape. Originally it was quite asymmetrical and stuck out considerably around the fork tubes.

Because this frame is made from older materials and with older methods, everything about it takes time. One of the nice things, however, is that the older materials are much easier to work. Lugs can be adjusted more easily, shapes can be changed more easily, and tubes can be mitered more easily.


Last night I spent several hours building a chain stay bridge (the last bit of brazing for this frame). It would have been possible to use a pre-formed bridge, but there were two reasons not to: a) With the fastback stays, so much would be chopped off of a pre-formed bridge as to seem wasteful; b) The NOS brakes on this bike expect to fit on a simple tube. There are special washers on the brake nut designed to clamp around the tube.

This shot shows how the washers fit and several other things that we'll get to soon.
Below you can see that the bridge is mitered on each end to fit against the seat stays.


And here you can see that it is bored
through to take the brake bolt. Also that a water bottle boss has been brazed into a hole on the bottom side (or in this picture the top side).

And below is a view of the boss head-on:


The boss does create a problem for us.
It is long enough to interfere with the brake bolt passing through the bridge. Here is a picture of showing the filler holding the boss from the inside of the bridge and you can see how the end of the boss has been bored off to accommodate the brake bolt.

Finally, here is a picture of the test fit of the brake to the bridge. It may look nice here, but going back to the first picture, you can see that the fender boss interferes with the brake washers. Hence the washers will need a little 'adjustment' to make sure that all goes together smoothly.
That's if for tonight, hopefully we can meet again soon!


Saturday, September 08, 2007

Path Racer Lives

My Path Racer was designed around some big honking tires. 700Cx35x38. That's not a designation that I've seen before, but I think the 35x38 refers to the width and height of the carcass respectively. So these are big for a road bike. The beads are also big, and when combined with a large tube, its hard to get the stem through the rim enough to start inflating the tire. Whew.

Anyhow, I'm using an old pair of sidepull brakes along with these big tires. While I've done my calculations about three times, its still concerning whether all will fit together correctly. So, before mounting the rear brake bridge, it seemed prudent to button everything up to see how fits were coming along.

There was a bit of prep work to be done first including:

  • Drilling the fork crown for the brake
  • Cutting the fork crown for the crown race of the headset
  • Reaming and facing the headtube for the headset
  • Reaming the seat tube and cutting the slot in the seat lug
  • Cleaning the BB threads.
The crown is of the full sloping type and had very little room (vertically) for the brake mounting hole. So, measure once and drill twice. In a heavy steel crown, the method to make the hole is to measure and mark the hole on each side, and use a center punch to leave a depression to start the drill. The bigger the hole that is being drilled, the more heat is generated and the more work is done. So, we start with a small bit to drill a pilot hole. Both the surface of the crown and the bit itself get covered in cutting oil to cut down on friction. Then we go through steps of enlarging the hole with a series of bigger and bigger bits. Also, the hole on the front of the crown needs to be a larger diameter than the one of the back. The threaded portion of the brake mounting shaft doesn't exend all the way to the front - so the front hole needs to be one size larger than the back one.

Notice we marked both sides of the crown. That's because we drill from both sides. If we were a little off of square drilling one hole, it might not make a difference. But if we continued to be off while drilling through the other side - we'd end up with a crooked hole for the brake mounting shaft. As a consequence, the brake would be crooked on the crown and mess everything up. By cutting two holes from two directions, we make sure that the holes are in a straight line and square to the crown so that the brake fits and works correctly.

When using a hand cutter (as opposed to a lathe) for the crown landing, it's easy to miss cut. One problem is undercutting the shaft, so that the crown race doesn't have a tight enough fit. The other is to leave the landing out of square. Both problems are caused the fact that the cutter body has a little slack in its fit around the steerer. This allows the builder to tip the cutter. Doing so narrows the effective opening making for too narrow a shaft. If the tipping is held consistently to one position when going around the steerer, then the land will be out of square. So this is a fussy operation. What I do is cut a little at the top to give me an approximate diameter. Then I take a file and take a little off at a time, first front and back, then left and right, and finally in between the preceding cuts, creating an octagon shape. A few light licks smooth over the remaining corners (so the cutter doesn't catch on them) and I'm ready cut.

Having less material to cut seems to speed the cutter through the work. In so doing, there is less opportunity to tip the cutter and mess things up.

Anyhow, I popped a nice threaded 1" stronglight headset in place and it fits perfectly! After mounting the wheels, the front brake is a great fit too! There's plenty of room for a fender and the pads are close to being centered vertically in their slots.

For a crankset, I fit up an old pair of Nervar arms with a Stronglight chainring. Both use the small (50mm?) BCD that works with the old TA Cyclotourist crankarms. The combination looks good - the Stonglight star-like pattern chainring is one of my all time favorites. The question is what makes for the best chainline? Currently its at 45mm, but flopping the chainring to the other side of the crank is apt to end up with a 39mm chainline. So, it looks like a different BB is in order.

Unfortunately, the Nervar cranks proved to be bent (hard to see, but easy to feel) and the pedal threads in the right arm gave out on the inaugural ride. That said, the bike rides easy, it's comfortable, stable (despite having low trail), and pedals easily (even with one foot). Apart from needing new crank arms, I'm very pleased with the result.

So, now I need to mount the rear brake bridge, finish clean-up and pack this off to Duane for some paint.

Oh, and I'll get some pics tomorrow to post here.

fa

Wednesday, August 29, 2007

OOPs

Should posted this before the last posting - but I forgot to upload it.

What’s new?

I’m recently back from a family trip to the Eastern Sierras around Mammoth Lakes, CA. It’s a lovely part of the country and a great place to visit. With my lungs, however, I could never live there. We took 5 days to acclimate to the base altitude (8000’). This got me to the point of being comfortable, as long as there were no stairs to be seen. Then we packed in to camp for a few nights at 11,500’. We were on the shore of a beautiful blue lake rimmed with mountains – the sights couldn’t be beat. But, walking up from the lake to our camp (maybe 25’ of elevation) was enough to wind me. Ugh.

Many projects have been on hold for a while, but I’m beginning to finish them. The path racer is ready for paint except for some final filing around the track forks (dropouts). I’m pleased with how it looks, and it should be in the painter’s hands within a week. Janet’s randonneur frame is done and will go to paint at the same time. Charlie’s carbon frame is designed now. See picture below. It will be carbon (from an old trek 2500) w/ a steel bottom bracket shell, chainstays, dropouts and front fork. Charlie wants Gordon to paint this to look like my bike – which sounds like fun to me.

On Charlie’s bike, the BB will be lugged so that the down and seat tubes can be bonded in. This will involve filet brazing and I’ll try to get some pictures posted of the process. The head tube and seat cluster will be wet wrapped carbon that is vacuum-bagged to pull out excess epoxy. The seat cluster will be complicated because I’m using traditional stays (carbon of course) on either side of the seat tube. So four tubes come together in one place and need to be wet wrapped, then wrapped with a material through which the epoxy can pass, but which will not stick to the finished work. All of this then gets wrapped in a bleeder felt which allows air to be pulled out by the vacuum pump and which sucks up and holds the excess epoxy. Then, a plastic ‘bag” has to be put around all of this and sealed up (especially where the tubes pass through) so that the bleeder felt can do its job while the epoxy cures.

For the initial connection of the stays to the seat tube, I’ll be using my old reliable Scotchweld 420. This sets up in about 20 minutes, and should hold things together through the process of wrapping the joint up. A balsa plug will be located in the rear of the top tube so that the top tube can be similarly affixed to the seat tube before wrapping and bonding. All in all, I expect this process to take about an hour from first gluing until the bag is being vacuumed. This setup will be left to cure for 36 hours, then the vacuum is shut off, the bag removed, and the felt and transmission layer peeled off. Using a Mylar transmission layer (generally with perforations) can yield a very nice smooth looking outer surface. Given the complexity of the seat cluster, I’m not planning to use Mylar. Instead a specially treated polyester cloth (woven) will better follow the contours of the tubes. Even then, I expect to see some ridges, creases, and thick spots in the epoxy. My goal will be to sand these down to something presentable before shipping the frame off for paint.

Assuming that Charlie’s bike goes well, I’ll build a full scale prototype for me to ride. This will continue to use steel chain stays as an economy move. I have plenty of experience bonding carbon rear triangles – so I’m not worried about how that works. With two finished bikes in the bag with lugged bottom brackets and vacuum bagged head tubes/seat clusters, it should be time to apply this method to a production bike. I may apply this to Tim’s prize bike. It is a small frame size – which presents a builder with certain challenges in both design and construction. This system takes me away from the constraints of pre-built lugs which will make Tim’s bike easier to get right.

With Tim’s bike, we may also go with an aluminum bottom bracket. Bottom brackets are made in both aluminum and steel with a lug for bonding in a carbon seat stay. This would require outsourcing the TIG work of putting lugs socket son the bottom bracket for the seat and down tubes, but should reduce the overall frame weight. Similarly, I may look at milling grooves in the aluminum head tube. Because it will be carbon wrapped, it may be possible to take a little weight off of the aluminum. And, when we’re all done, Tim’s going to have a great frame!

I’ve also nearly finished a fork for an old project bike. Actually, the fork could go to paint right now. But it has a stainless crown and tips – and polishing takes a long time. I was pleased to find out that other builders have the same challenge as me. This is, to see a remaining scratch from one level of grit (be it sand paper or buffing compound) requires polishing down a couple of more levels. So it’s a two step forward and one step back kind of process. I find that it’s important to be in the right frame of mind.

When working the stainless, pressure has an equal impact to grit. It’s possible to work a piece for a while, and with one stroke of two much pressure, scratch a layer that needs to be sanded out before proceeding down the levels of grit. This plays out especially with oddly shaped pieces (can you say lugs, crowns, and dropouts?) where an even pressure needs to be applied around varying contours. On a nice flat surface, I can work through a series of grits with a flap wheel sander and have few problems. The flap wheel sander works fast, which is nice. But through in a corner or a curve and it may be possible to sand through the piece before getting it uniformly ready to work down to the next level of grit.

So, I’m about halfway, maybe a little more, through polishing this fork. But it takes a peaceful/patient frame of mind to get through this work. With what’s in front of me, the fork is being set to the side until I catch up a little. Anyway, when it’s done, another frame will go to the painter.

Finally, I’ve been filing (on my trip) some old Cinelli pressed lugs and have them almost ready to go. This is for a track frame I’m building for my neighbor. He want’s something very traditional. He’s got a Record Pista crankset, some nice pedals, a Cinelli steel stem (and soon a matching bar). He’s working on building up a set of wheels with some Record Pista high-flange hubs and some nice old Campy rims.

The Cinelli lugs are more symmetrical than some of the pressed lugs that I’ve used. But, in the weld area, near the edges, there is some porosity. We’re going with a cast Cinelli bottom bracket which should arrive this week. Hopefully it’s in a little better shape.

For tubing, I’ve been considering lots of options. The rider prefers to stick with Columbus – which is fine with me. However, there is a limited variety of standard-sized tubing available in the newer metals and these tend to have thin walls. As a consequence we’ll probably use one of the old sets of SL that I have kicking around. While I grew up thinking that SL was dangerously thin and whippy, it’s seriously a heavy gauge tube compared to modern tubing. If an SP downtube can be found, that will probably get subbed in. Also, we’ll look at the option of going to a heavier gauge chainstay. Together, this should provide the rider with the stiffness he desires while sticking to traditional tubing diameters.

My plate is full, eh? Also, I need to do some reconfiguration of the shop to make my space more efficient, and I’m starting to look at lathes. There’s lots to do so I’ll stop writing for now and get back to work. See you soon.

Tuesday, August 28, 2007

Fork & Crown

Fork & Crown. Could be the name of Pub, eh? Anyhow, I've had forks and crowns on my mind lately and there are a few pictures to share.

The last post contained a bit of blather about the difficulties of polishing stainless - enough that you might wonder why I or anyone else does it. Hopefully this picture answers the question. The crown on this fork is nearly done. Click on the pic to enlarge it. This was taken with an older 2 mega-pixel camera, without flash, this evening at my kitchen table. You can clearly see the camera and towel (on which the fork lies) in the finish of this crown. Just a little more touch up here, and a bit of work on the dropouts (also stainless) and this can go to the painter.

Here is a view of the complete fork. It's straight legged and the dropout sockets have a similar shape and cutout as the crown.


Along with polishing, this evening was spent filing the intersection of some seat stays and a seat cluster.
The cluster is rather unique (in my experience) in that it is fastback with legs coming off of the binder bolt tabs all as one casting. These are designed to fit a bi-conical stay, and start rather square, then shift towards round where they mate with the stays. Anyhow, the legs needed a little tuning to make a smooth transition into the stays. I think the overall effect will look very nice under paint.

This seat cluster above is on the Path Racer I'm making for myself. This frame is built with an old set of Reynolds 531 using Prugnat lugs. The fork crown is an old full-sloping casting, and was very rough when I started. The most
frustrating part of the crown was that the spigots (over which the fork legs slide) were very asymmetrical, with one side of each being thick and one very thin. And, the thin side of each was facing the same side of the crown. So, it was impossible to file them to fit the fork legs while maintaining an equal distance from the center of the steerer tube for each leg. The difference probably won't be visually apparent - and the fork with is well aligned and will steer nicely. Still I didn't like the result.

Just to quantify things, I'm close to having an old set of pressed steel lugs prepared for use - maybe 4-5 hours worth of work. But the old sloping crown has already taken at least twice as much effort and I'm still working on its final finish. The problem is that the fork legs are Imperial Ovals.

Richard Sachs makes a point that new builders, working with todays high quality castings, just don't appreciate what long-time builders have gone
through as part of their learning curve. He's right, until one works with old time castings and pressed parts, its hard to understand how much goes into preparing these, parts prior to building.

One also loses some of the opportunities to develop ones eye, and tool skills, that comes from doing significant fabrication work on these parts. This is one of the reason for my recent focus on old lugs and components. The modern stuff is undoubtedly better, but working with the old stuff is improving my skills.

Because I have another set of 531 w/ Imperial Oval blades, and I prefer a flat topped crown, I contacted Richard to see if he had any kicking around in his shop. He was gracious enough to send me one gratis - and its a Nervex to boot.

You can see that the old Nervex crown is considerably narrower in overall width than the newer Continental Oval crown (today, crowns and legs are made almost exclusively in the Continental Oval style). These two crowns have the same spacing between the fork legs, but the Continental crown is clearly wider. overall.


Many folks hear Nervex and think of the Nervex Professional lug set. No wonder, with its intricate design, it was a builders favorite for top end frames including the Schwinn Paramount. But Nervex made a variety of styles of lug, fork crowns, and bottom brackets. The crown that Richard sent me is not the Professional, although I'm not sure what model it is. Suffice it to say that it is an example of a quality crown of its time. Here's a picture.

What may not be clear are some file or grinder marks just to the left of the center bulge and just to the left of the right hand socket. At first I thought that Richard had sent me a crown that he had previously started to work. I related to him that it was difficult to start in on a crown that showed his handy-work. He let me know that this crown, complete with these marks, was as-delivered by Nervex. Perhaps this is where the mold connected to the sprue, and the channel for steel to enter the mold. But its interesting, especially given the rough nature (compared to today) of the casting, that someone had to perform some manual clean
up before the crown was shipped.

In the picture of two crowns, the second on is a Sachs Newvex in stainless. Because it will be polished, and because it has some complex shapes, it takes more preparation time then most newly manufactured crowns.
But, make no mistake, this is a very nicely made crown - any builder would be happy to work with materials of this quality!

As we look more closely, its easy to
see how much thinner the walls are on the newer crown. The old castings required significant thinning by the builder before they could be assembled into a bike. This is of course all done by hand with a file. And, in the process, the builder has to maintain fidelity to the shape of the crown. Curves must remain smooth and even, for example. And, in some places, its not possible to move the file around the crown on the desired path without hitting or rubbing another part of the crown. So a builder needs to employ creative approaches for getting his/her file into and around all the complex shapes of the crown.

Another difference between these crowns is that the old one has built-in reinforcing tangs on the inside of the blades, whereas the new one has
pockets into which separate tangs can be place prior to brazing. One advantage of the modern approach is that the tangs can be prepared with cutouts apart from the rest of the crown - which makes things easier.

Going back to the first picture of the pair of crowns, the Newvex crown has
an extended area that has been throttled in preparation for cutting the crown race. If the builder is using a crown race cutter (as opposed to a lathe), then this will need to be further reduced with a file prior cutting the race. Skipping this step forces the cutter through too much material, with the consequence that it wanders some from side to side. In the process, the crown becomes too narrow and the headset won't be held firmly.

On the Nervex crown, the throttled section must be continued down to an appropriate depth by the builder prior to filing and cutting for the headset race. Depending on a builders skill, this could take a considerable bit of
time.

Here's a side view. The Newvex crown is based on the old Nervex
Professional and you can see all the frilly detail for which the Professional is and was known. By comparison the Nervex crown is rather simple. I may yet shape it to place more emphasis on the outer two points. On the Newvex crown its easy to see the pocket (indent) for its add-on reinforcing tangs. Also, if you look at the bore for the steering tube, the Newvex crown has a ledge on the bottom providing a hard stop for the steerer prior to brazing. The Nervex crown is open on the bottom, which gives to builder the option to have it stick out a little as a platform for applying filler. Then when the brazing has cooled off, the builder can file off the excess steering to be flush with the crown itself. Finally, the Newvex crown has a breather hole. By putting a matching vent hole in the fork leg, the vent hole is: a) out of sight; b) surrounded by, and brazed to, the crown - providing more strength to this invasion of the fork leg. The Nervex crown has a huge opening that can act in the same way as a breather hole. Because of the limits of old-time casting, however, the fork leg gets much less support on this side than with the newer crown. Furthermore, because the bottom of this opening terminates in a sharp V shape, there is the possibility of inducing a stress riser. Is the crown or leg likely to fail due to this rise? Probably not. On the other hand, modern casting abilities prevent us from having to test this assertion.

Ah, once again its late. So I'm going to sign off here. Happy Trails!


Saturday, July 14, 2007

Hey there


My apologies for being gone so long. I've been meaning to start posting again for a while, but life is busy. Anyhow, I've been sick in bed for 3 days and figured I ought to use the time to catch up on a few things.

I took pictures of my current build, but the macro wasn't working right. You'll have to settle for one teaser until I can borrow another camera.

My last couple of bikes have been very traditional. Columbus SL or Reynolds 531 tubing, pressed steel lugs (Prugnat in one case), forged steel ends. On the one hand, these materials (apart from the tubing) take more work. They're not as well finished as
modern parts. But, they are much easier to manipulate and they encourage one to express some artisitic license. The tubing itself seems much easier to cut and file than even basic CroMo tubing of recent vintage. So, if you're willing to work slowly, its a very rewarding process.

One of thes bikes is a randonneuse for my wife. It should be back from the painter in a couple of weeks and I'll
post pictures here. This bike is built around 650b wheels w/ Gran Bois tires. Janet took it for a short ride prior to paint and remarked "It's so light" That's not what a scale would say - but a reflection of how good fit and frame design rides. So I'm very happy for the recognition.

The picture from today is of a bottom
bracket. It's my first cut-out BB. You will clearly see that it's hand made - but that's part of the charm. No one will think that the holes were cast in place or punched out on a machine. They will know that someone laboring over a bench with some simple tools created them by hand. As always, you can click to enlarge.

I've used this frame to try some different styles for finishing off the tips and track-ends. You'll have to wait for the photos to see how they came out, but I'm pretty satisfied.

The bike is set up for 700Cx32 tires, and there's a nice old set of white Pirelli tires with terracotta treads waiting to go on the finished bike. The crank will probably be a set of old Nervar arms with the little bolt circle that most folks recognize from TA Cyclotourist cranks. On it will go a pretty polished Stronglight chain-ring with their traditional star-pattern spider. Naturally, the seat will be a Brooks B-17.

The bike is built with a low trail design, which should work well with a front bag. Interestingly, I've seen specs on some old high-end British path-racers - the kind that always have their luggage hanging from the seat. And some of these use very low-trail designs. So, maybe there's more flexibility to this approach than I realize.

I haven't sorted out colors yet. One would be a Cabernet metallic with gold lug lines. Another would be sea-foam green and periwinkle as in the picture at the head of the post (Sorry, it won't move down here for me).

Anyhow, that's it for now. I'll get pix up as soon as I can. Until next time, happy travels!