No photos yet - sorry. I've been busy updating this and the Cycles Noir sites. This blog is just about done - although I have to figure out how to get my counter back. The website is coming along fine too - you can check it out on the link at the right.
In the mean time, Happy New Years to everyone!
Monday, December 31, 2007
Thursday, December 27, 2007
Catch up again
Over the last two weeks, the day job has been very busy - meaning no time in the shop. Then of course there was Christmas - which was great, but didn't allow for any building. So, today, I got back into the shop and working. I'll try to get some pix tomorrow to illustrate. Anyhow, here's what's up.
I'm back to working on Paul's track bike. The path-racer is so close to being done, but I decided that it's inspiration (the white tires) didn't look right on it. I've ordered some new Grand Bois to replace them, but I can't finish it until they arrive. That said, the Honjo hammered fenders look great against the Burgundy paint. The seat is a B17 special in dark green with copper rails. The handlebar tape will be green cotton shellacked, so as to accent the saddle. Final pictures should be ready in about 2 weeks.
Therefore, back to Paul's bike. He likes all things Italian and has been steadily collecting old Campy components. The hardest so far has been the hubs. He needed 32 hole (to match some NOS rims he has) and wanted high flange. These are a bit hard to find - but we did it.
Anyhow, the lugs are old Cinelli pressed steel. The bottom bracket is is a cast Cinelli road bracket - the one with 'spoiler' on the bottom. Of course, that isn't quite right for a track bike. Out came the hack saw and the cable eye is gone. That and a bit of work with the file and a rotary stone had things cleaned up. There are also cast in tunnels (canals?) for the cables. So I filled these using some Allstate Nickel-Silver filler. This filler has the characteristic of being Eutectic. What this means is that once it melts and rehardens, it takes significantly more heat to re-melt. So, it starts to be workable around 1200 degrees Fahrenheit, but it requires a bit over 1700 degrees to remelt. So what? Well, we'll be reheating this BB to install the Seat Tube, Down Tube, and Seat Stays. It sure would be nice to make sure that these processes don't damage the filler in the tunnels, eh? And my brass (bronze, alloy, whatever) filler works below the remelt temp of this Nickel-Silver so I can use it or silver based fillers to finish off the BB. At this point, the shell has been soaked and is ready for a little wire brush to clean off any remaining flux.
I also finished cutting miters on the main triangle today, and did a basic test fit. The lugs are close to ready for brazing and the fit up looks good. I had to adjust the lower head tube lug a bit, and may yet be doing the same for the upper and the seat cluster. The latter two haven't been checked yet for angles (the seat and head tubes are parallel - so this is basically to ensure that the top tube is level).
Adjusting the lower head lug was challenging. Basically I'm adjusting from about a 73 degree angle to a 75 degree angle. This means that the top of the lug at the back of the head tube needs to move forward. However, on this lug, this area is rather short. There isn't a lot of material to bend. I think that I have it looking good and fitting ok. But it took a lot of work with a ball-pein hammer. This lead to some additional file work to make sure that it had a smooth surface.
The pressed seat cluster had the standard hollow ears - which I always consider a possible weak point. My solution is to braze tube inside them (for the binder bolt to pass through) and then fill the lug up around the tube. Here is another good use for Eutectic filler. It's too easy for everything to get up to temperature at once, and therefore have the filler melt out of one part while trying to fill another part. Particularly on the inside (against the seatpost) there isn't much support. In fact its like a big square window into the backside of the ears. Moreover, I've already widened the slot (in part to get a nice square looking edge on the ears), leaving even less support. Working a spot, and letting is solidify and then moving on, its possible to fill and get the filler to stay in place very easily with the Eutectic filler.
Anyhow, this is done and been soaked. Again, it may need a quick shot with the wire brush, but basically its time to clean up the filler with a file. First will be the inside of the tube so the seat tube will fit inside. Then I'll do around the inner edges of the ears, giving them some definition. Apart from this, the seat cluster appears ready to clean up and install.
Summing up, the angles of the seat cluster and upper head lug need to be checked and adjusted as necessary. The upper head lug needs a little filing and sanding. The bottom bracket needs a bit of filing and sanding - mostly in the hard to reach spots. And then we can fit everything in the jig, check numbers one more time, clean, flux and braze the front triangle. Yea!
Again, with luck there will be some build photo's tomorrow. That's all for tonight. Cheers!
Tuesday, December 11, 2007
What's up now?
Things have been busy, even though I've had too little shop time of late. So let's catch up a little.
The path racer is back from paint and I've been slowly building it up. After looking at the paint, it wasn't possible to go with a simple curved fender, so Velo-Orange shipped me some nice hammered Honjo's. The rear is fitted and looks great.
Usually with Honjo's, there is one eye-bolt per stay - centered on the fender. With the hammered fenders, there are two grooves running the length of the fender, and each is pre-drilled for an eye-bolt - so the stay is attached with two bolts set at close to a 90 degree angle. Eye-bolts always fit snuggly (there isn't a lot of take-up available so they need a tight fit). And the stay, where it bends around the fender, gets distorted a little so that the bolts fit even more tightly. Fitting two in together is a tricky job. I still have some final fitting to do so that everything is good and straight. That said, even with just the one fender mounted, its obvious that the hammered fender was the right choice.
The crank arms are old Stronglight 49's. Nice cranks. Came with a TA track chain-ring (1/8"). It took some experimentation, but a Sugino Mighty Comp (at least that's what the seller called it) with a 113 axle worked great. Perfect chain-line, the right crank sits right up close to the BB with the chain-ring bolts running a circle around the end of the BB shell. The BB is interesting, being composed of a pair of Sugino 75 NJS (says so right on them) cups with an axle that looks just like the 75 NJS track axle except that its longer and doesn't have the NJS label. I suspect that this will prove to be a good and durable BB, and plan to purchase some more. And, these cranks/BB set up yield a tread (or Q-factor) of 132mm - which works will with my knees.
After mounting everything, it became clear that the chain-ring was severely warped. I tried to straighten it, but after checking it on the alignment table - it was clearly shot. Once again Velo-Orange to the rescue! Hopefully my new ring will be here by the end of the week. In the meantime, an old Stronglight road chain-ring is in use for fitting everything together. It's pretty with their typical star pattern.
Wheels are Velocity Razor rims laced to Miche high-flange track hubs. The front is laced trued and tensioned. The rear, well, I've decided that the drive side needs shorter spokes. It's nice when all the spokes are the same length, but things got pushed a bit far, so I'm waiting for my new spokes to arrive. Should be here by the weekend, so I can finish the rear wheel. In the meantime, another wheel is standing in for fitting purposes.
If look at prior posts, you'll see this bike (sans paint) more or less built up around the tires that started this whole project. I may be replacing them with a pair of Grand Bois. The white tires feel a bit over the top for a claret metallic bike with hammered fenders. It's hard to be sure until we try them on the new wheels, but I'm leaning towards the Grand Bois right now.
I polished up a beat-up old aluminum seat-post for this bike. Up close, it still looks kinda rough, but from 2 feet away, it looks nice. Anyway, it'll do until I find an appropriate replacement. The headset is a Stronglight A9, and looks good on the bike. The steerer was left long so to fit brass bell on a spacer below the lock nut. In order for the bell to clear the headset, a 10mm spacer was required below it - so the steerer is really 15-17mm too long. That's ok because the stem is a Nitto Technomic, which is long to begin with. Having the long steerer hides more of the stem and makes everything look better balanced. If parts come in timely, this bike could be ready for pictures by the weekend!
I'm still working on Duane's bike. The key thing is polishing the head-tube. I'm down to 400 grit, at which point its possible to start to make out reflections. Still it needs to be worked down to 1200 or maybe 1500 and then polished. So, there are a few hours to go yet before final fitting of lugs and tubes prior to brazing. In the meantime, this is setting on the side as I have a more urgent project.
A friend and bike mechanic asked for a track frame, which we started this week. He's been collecting vintage Campy and Cinelli parts, and mostly has what he needs. I've found some Columbus SLX to fit, so we're building with that and an old set of Cinelli pressed lugs. He loves the Cinelli airfoil BB, so even though that's a road BB, we're going to use it. That means cutting off the cable stop, filling the cable grooves, and closing the cable eyes in the airfoil. This is more than my usual amount of prep work for a BB, but should be an interesting mini-project.
So far, the lugs are rough prepped. The still need their angles set and the edges squared, but they've been filed and are close to their final contours. The other night Paul cleaned, checked, measured and marked the main tubes, and tonight we started a couple of miters. First Paul did one with hacksaw and files. He got chance to see how hard it is to create a good fit. Mind you, he's good with tools and has a good eye, so if he felt challenged, anyone would. I finished that one up - just a little tuning really, and we moved on to the next one. This was the bottom of the seat tube. For it, I demonstrated the hacksaw, grinding wheel, file, method. It went much more quickly as the grinding wheel rapidly took us close to the template all around. So now we only have three more miters prior to fitting and tacking the main triangle. There will be no braze-ons, so this should go together relatively fast.
In other news, I received a set of the new ('08) White Industries H2 hubs today. They look lovely, and weigh in at about 300 grams for the pair. They will be paired with a set of Velocity 650B Arrowhead rims. Along with 32 14/15ga spokes per wheel, and brass nipples, I'm hoping to have these wheels come in around 1500grams total. Which would be quite a feat!
To go with these, a SRAM Force group is on order. It would be nice to use Red, but out-of-pocket expenses must be managed. Red can go on a customer bike. Anyhow, the Force group is sans brakes. Most likely these will be cantilevers - still trying to decide on which to use. Its likely that what ever gets picked will be lighter than even the Red brakes - but will accommodate fenders and wider tires.
Also in the package from white is one of their Cranksets. It looks lovely, and I want to see how low a tread I can get with it. It might be the modern replacement for the TA Cyclotourist. One disappointment is to find that the chain-rings only come in black. Apparently, the bare aluminum isn't durable enough for long life and requires a hard anodize finish to last. Old chain-rings didn't need this, and must have been made from a stronger alloy. I wish I knew how to get White to make their rings from a stronger allow to so that I could have polished rings.
By the way, if you've never looked at these, they're kinda of unique. The large chain ring has deep slots running in five radii from the center. The small ring bolts to these slots, so an infinite number of small chain-ring BCD's can be used. Kinda cool, and it allows for small chainrings too! Very nice.
It's late, that's all for tonight. More soon.
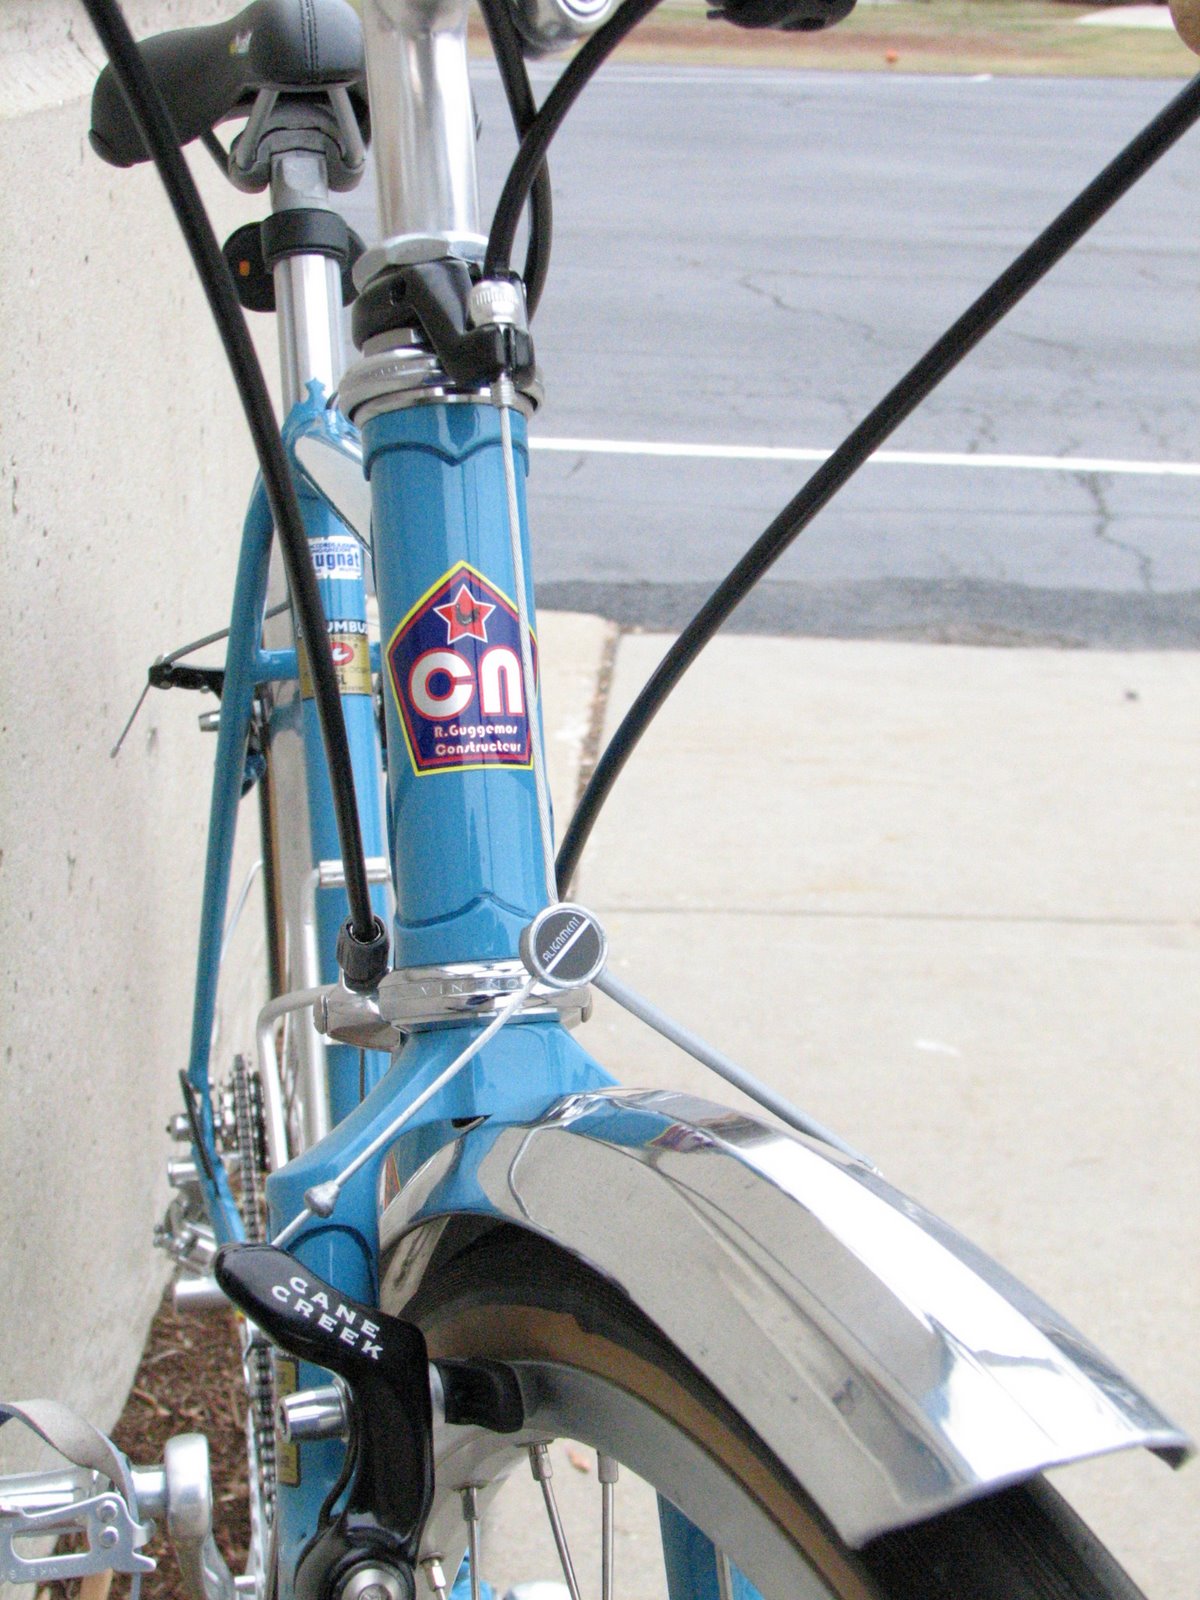
Saturday, December 01, 2007
Blue Bike Done


I've been a bit busy. Got the shop re-organized in preparation for another binge of building. Also got the blue frame built up. Take a peek (click on the pic to enlarge):


Subscribe to:
Posts (Atom)

