Knowing that CF works best under tension, and in a straight line, it isn't a big step to accept that it doesn't liked to be 'crimped' into a woven fabric. It's not that this can't be done, it's just that the zigzag nature of the path of the individual fibers doesn't fully leverage their strength. This is not to say that a woven fabric of CF doesn't offer strength, just that it doesn't maximize the strength to weight ratio.
Similarly, a random felt of fibers usually have similar issues of crimping, as well as a large percentage of fibers that are bent, rather than straight.
This takes us back to uni-directional fibers as a usable, but not the only, way to wrap joints. It's possible to wrap a thick thread of CF fibers (called tow) around and around the joint. If properly impregnated with epoxy, and pulled very tightly, the resulting joint can effectively hold tubes together. Implied in this is some thought to how much this nest of fiber must overlap each tube in the joint, and which directions are best for wrapping in order to control the vectors of force encountered by the joint. In a tow wrapped joint, there is minimal crimping, and limited (as much as possible in a joint) bending of the fibers. Probably the biggest difficulty is squeezing tightly enough to extract excess epoxy, and achieving a balanced spread of fiber around the joint. There may be the temptation to sand to shape, but this risks breaking the fibers up into shorter segments which may be less strong due to less overlap between fibers that control sheer forces in the joint.
Sheer forces? Think of a salami sandwich, with a stack of salami slices. Try pulling a slice free - essentially the force between that slice and those adjacent is sheer. Of course, most folks don't use wrapped tow joints, so we don't have to worry about this on bikes, right? Wrong.
Individual layers of uni-directional fibers experience sheer stresses too! And this can be the most destructive forces in the joints between tubes. There are several ways to control sheer forces. These include: having sufficient overlap between layers to ensure the joint's integrity; bonding all layers simultaneously so that there is a chemical bond between the epoxy of each of the layers; using some fibers/materials that pierce layers and act to tie them together. All of these methods can and may be used in the manufacture of a CF bicycle frame.
If you've read this far, you're probably aware that CF is often available as pre-preg. This means that the builder obtains CF with epoxy already impregnated in the fabric. The epoxy has some degree of stability in its un-cured state (often maintained by refrigeration), and some means of causing it to cure (often through heat).
At a minimum, working with pre-preg requires the builder to have some form of refrigerator or freezer, and some kind of oven. Naturally, this drives a significant investment, which requires some minimum level of sales to support same. On the other hand, pre-pregs off some stability in handling compared to dry CF fabrics. The epoxy in the pre-preg can hold the fibers in position while the material is wrapped around a joint. With a dry CF, something (usually glue or a matrix of fine fibers) have to be bonded to one side to hold the CF fibers in alignment until wet epoxy is applied, and the fabric is wrapped around the joint.
Pre-preg is also a bit easier to layer up prior to curing. For one thing, curing doesn't begin until heated, whereas wet epoxy starts the curing process as soon as its mixed up. Depending on the blend, the builder has more or less time until the curing reaches a point where further handling is unproductive.
Also, wet epoxy acts a bit like lubricant between layers of CF. And the layers of uni CF tend to be stiff and unwilling to bend around 3D shapes. Trying to hold the layers in place, without wrinkling, while placing others on top, quickly becomes a six-handed puzzle. If one hasn't strategized the operation adequately, it can turn into a very frustrating experience, with epoxy and fiber ending up everywhere except where it needs to be.
I don't do the volume of work to justify the equipment necessary for pre-pregs. But, fortunately there are a few fabric producers out there who have come up with some very workable solutions to these problems. These are in the form of fabrics which have multiple layers of uni CF, oriented along different axises, which are held together by some loose stitching through the whole of the cloth, and occasionally very light layers of scrim bonded to the adjacent CF layers. Even with the scrim, these fabrics drape easily over complex shapes. With a somewhat higher weight to strength ratio are knit fabrics which have lesser crimping than woven fabrics, while allowing for easy draping over three dimensions.
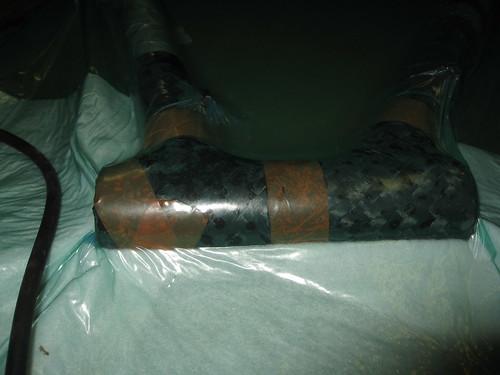
This is a picture of a knit tape applied to the backside of the head tube, top tube and down tube. You can see how gracefully it follows the contours.
Prior to the main reinforcement of the joint, I use this knit fabric to establish basic strength of the join and help ensure that nothing about the vacuum bagging process changes alignment of the joint. This tape is held in place during the cure with reversed electrical tape (sticky side out), which is stretched tightly around the joint. The resulting pressure forces any excess epoxy out through holes that I punch in the tape.
From here I move to working with two specialty fabrics, made with fibers from Toray and Hexcel. The first is a two-ply uni-CF with the plies aligned at +/- 45 degrees from the axis of the fiber.
Along the edge you can see the two plys. This cloth has no scrim layer so only the loose white stitching holds it together. You can see how easily the edge comes undone, and even how the individual bundles of CF are ready to quickly unravel.
The second one is a nine-ply uni-CF with the plies aligned 0, 90 & +/- 45 degrees. You can see the not just the stitching on this, but also the scrim layer. It's hard to see, much less count the 9 layers.
And where the scrim has been pulled away from the edge, you can see how quickly this fabric also unravels.
Along with these, I make selective use of traditional single-ply uni-CF tapes. Between these fabrics, I can create layup schedules for each of the joints that have sufficient material (strength), and the proper directions of plys (to handle the vectors of force) to make great joints. And because I am effectively working with fewer layers, of material more easily shaped to the joint, its possible to avoid the six-handed frustration of wet-wrapping joints.
Let's digress for a moment. I have good sources for my materials, but I wouldn't call them robust. My sources for state-of-the-art materials don't cater to small volume buyers, and the folks that do tend to do so as a favor. So don't ask me where I buy my CF and I'll tell you no lies. Also, don't ask me my specific lamination schedules. I can't assure that your methods will be identical to mine, and I don't want any responsibility for the success of your joints. Go get your own materials, practice, test, refine, repeat, until you have a working solution. OK? Great!
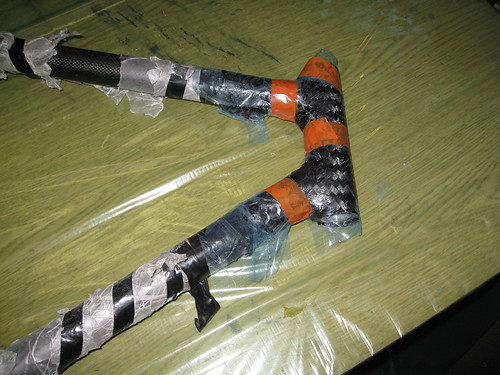
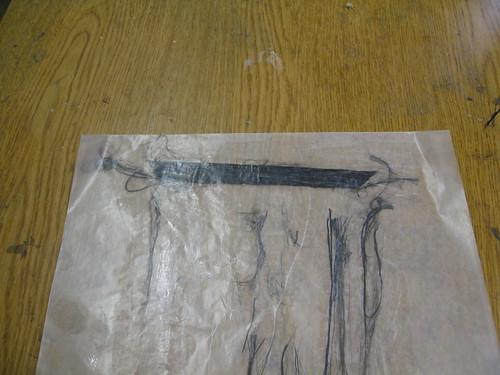
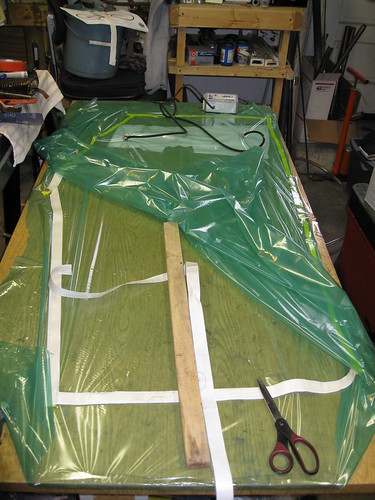
Fitting fabric to a joint is complicated. I start with rough paper patterns. Because paper doesn't adapt over 3D like my fabrics, these can only be rough. But these give me a starting point, from which I can trim material until I have good coverage of a joint, including overlapping the material on itself (so that the tubes are wrapped through 360 degrees plus). Then epoxy can be painted on the joint, and for thinner layers painted on the fabric, which is then applied to the joint. Because multiple layers will be applied, I don't attempt to force the material to adhere to the tubing until the last layer is applied. Special flashing tape helps to hold materials in position. A release layer of some type is applied next. Guess what: this stuff doesn't like to work in 3D. Therefore there is cutting and fitting to make it conform to shape of the joint. This too can benefit from flash tape. Outside of this goes a layer of batting which serves as a conduit for the vacuum and acts to soak up any excess epoxy pulled out during the vacuum process.
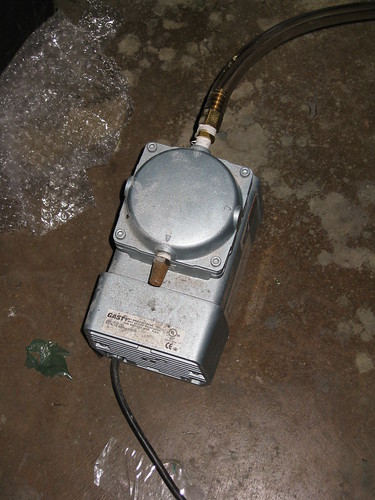
We'll speak more about vacuum bagging at some future date, I'm sure. But for now, this gives you an overview what I use, and how it goes together to make a CF bike frame.
So I'm done here for now (well, except for possible editting). Hope you've found this informative. Don't hesitate to ask questions.
Cheers,