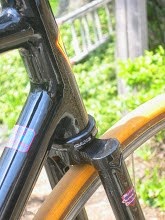
Well, I had showings both Saturday and Sunday as well as a Sunday open-house. Still I managed some good progress on 010106.
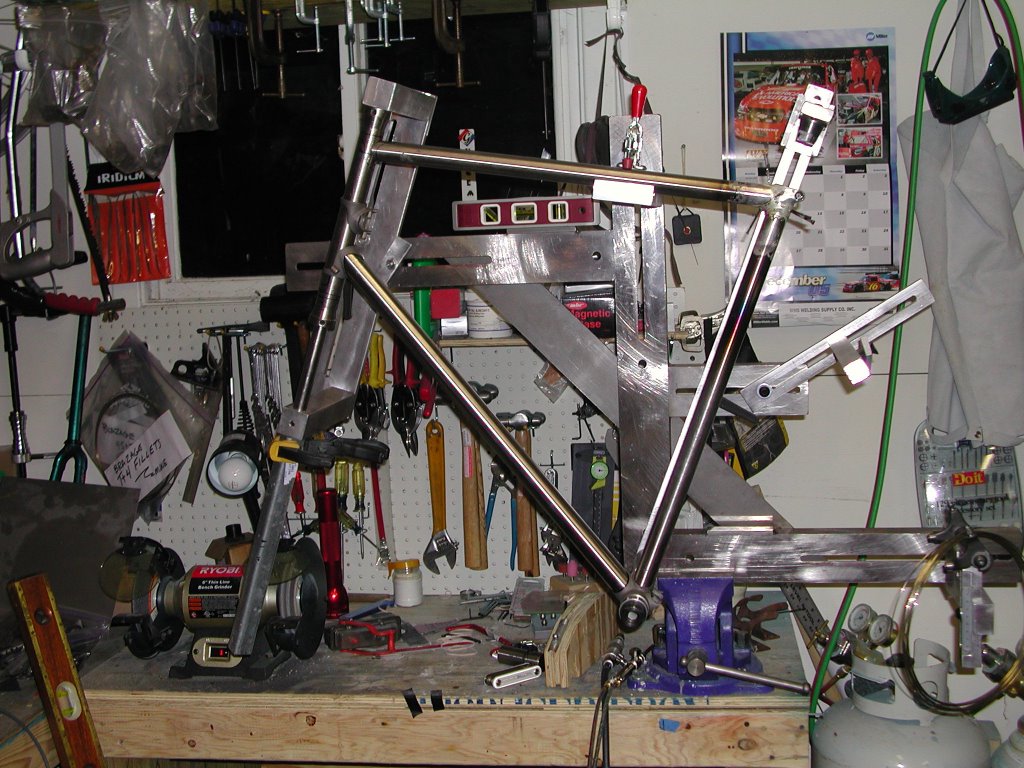
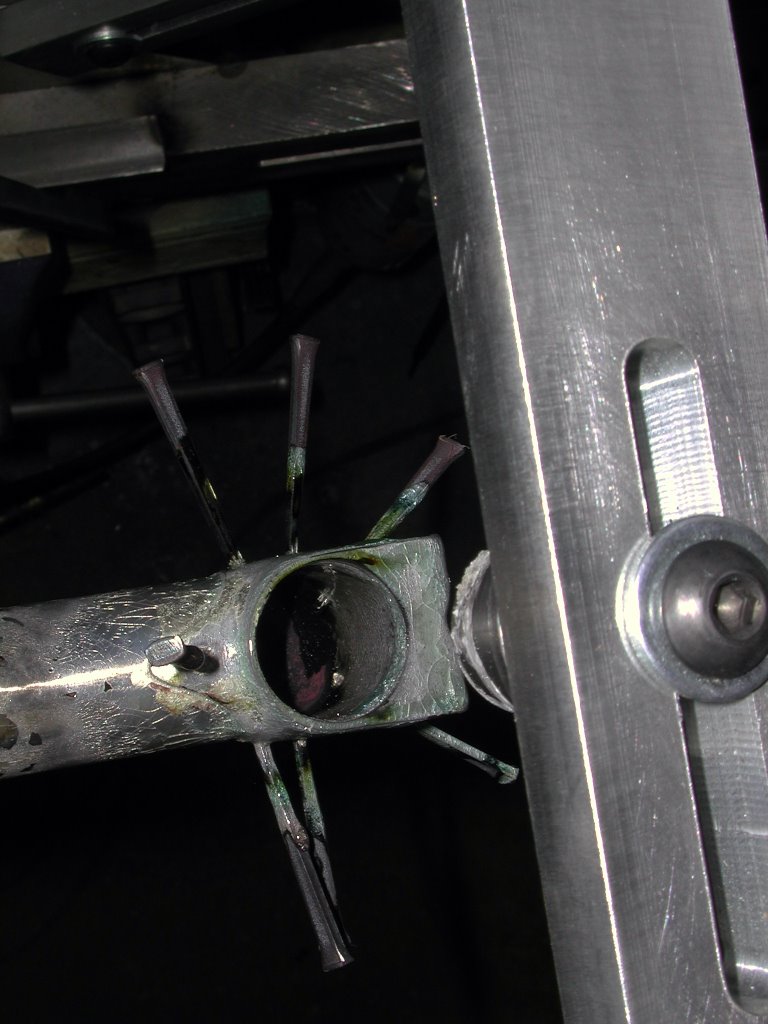
The front triangle is finished except for some sanding. It looks good and straight. The BB went much better than in the past - in part because it's much easier to do a really good job of pinning the joints in a jig. Everything is held securely in place while setting the pins, so there's no risk to setting the pins firmly. One tube in the BB needed some touchup work. All the joints flowed through nicely, but the one flowed a little too much and left a slight gap at the edge where I was feeding the silver. That's taken care of now.
Very little cleanup filing was required - mostly just the pins on the inside and outside of the tubes. The angles and BB height all checked out fine, so I moved onto the chainstays. They're going to be fairly long (430mm). The first one went in great, but the second one seems to have got a little out of alignment - and needs some additional work. I think I'll drill out the pins, reheat the joint and reposition the stay. Hopefully I won't need to do any further cosmetic fill when this is done. I could probably just cold set things, but I don't want to go that route.
Reynolds is shipping me some pre-bent fork blades which should be here soon. Probably a pair of these will be coupled with a HJ fork crown with a built-in 3 degree rake. I'll make up two forks resulting to different trail figures to see how each works.
That's it for now. Time to swap back to Carbon 1 and get it done and out the door.
Cheers
Monday, January 30, 2006


Friday, January 27, 2006
Need some more pictures of the final product
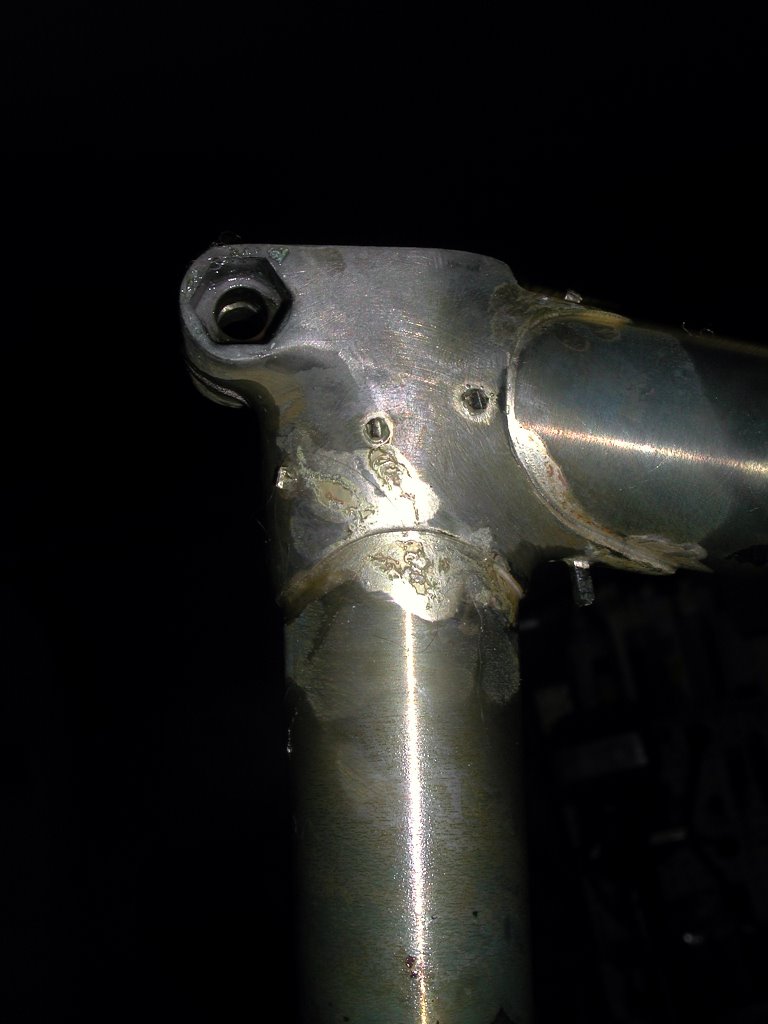

I can see that while these are clipped and have had the flux soaked off, I don't have any pictures showing the lugs after filing off the pins. Maybe tomorrow.
If you're curious about what's happened to Carbon 1, its an issue of running out of epoxy. I like how the filets are building up at the joints. While this is non-structural, I want to complete this process to get the nicest possible finish - but the epoxy ran out. Should have some tomorrow - so then back to Carbon 1
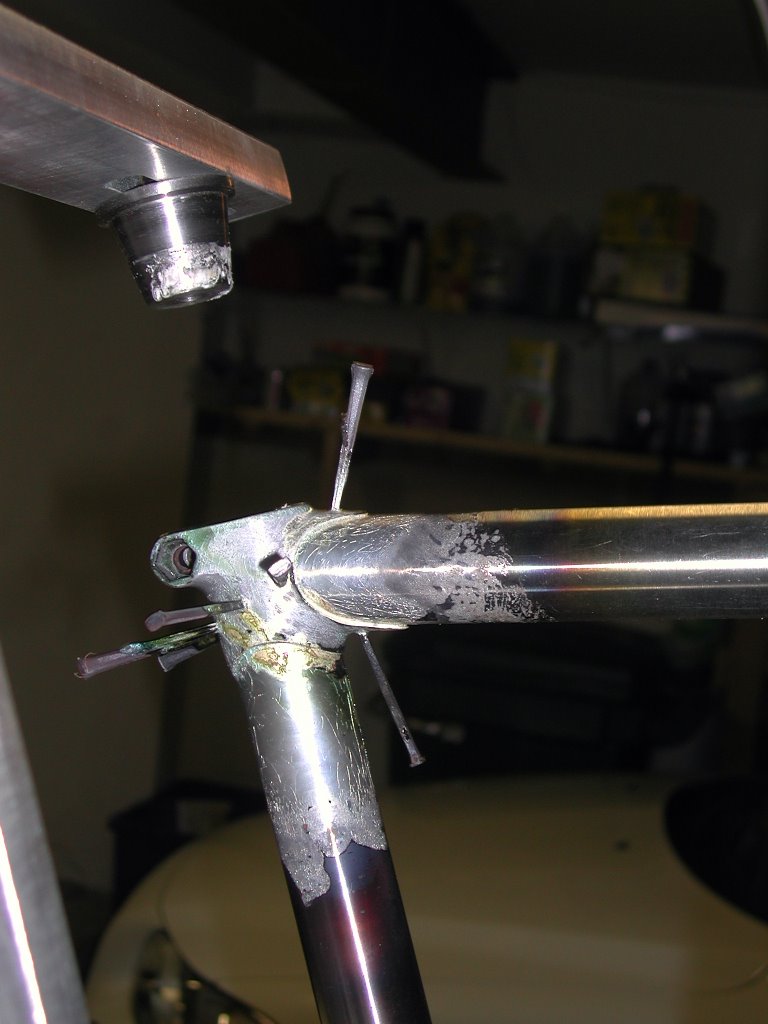
Some post-clean-up pix


Clean-up primarily consisted of clipping the pins, and then filing them down both inside and outside the lug.
Here we are post-clipping.
Thursday, January 26, 2006
Backwards Order


When posting pictures, I usually forget that writing goes down the page, but posts go up. Hence, my sequence of posting here is a bit backwards. Oh well.
Some Pictures Finally
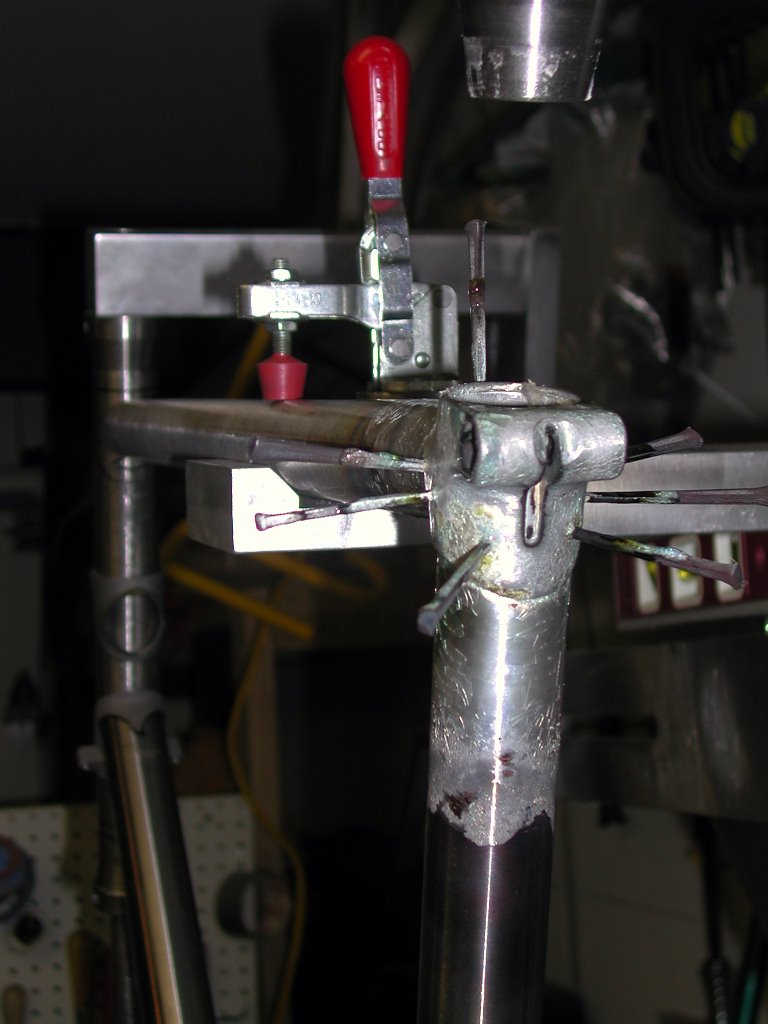
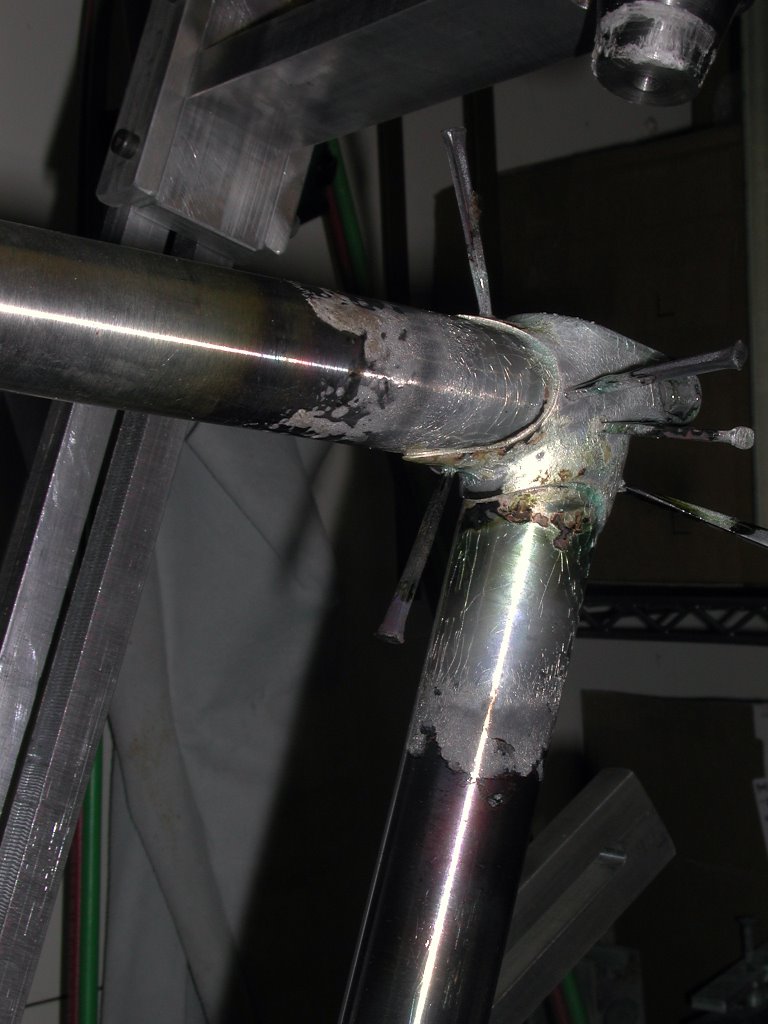
Well, here are some pictures of my latest frame project (010106). It's a sloping top tube road bike. The upper lugs are Henry James mountain bike lugs to get the slope. The bottom are Walter which give me the BB drop I want with 700C wheels. Also, the lower head lug has built-in ergo stops. Very cool.
I've been fiddling with joint fit and geometry. This is much easier with a jig than off drawings IMHO. Borrowing an idea from Nic Crumpton, I've clamped a piece of 1x1 angle channel to the the bottom rod that carries the head-tube cones. This gives a reference point for where the steering axis touches the ground. Thus its possible to ensure that the bottom head-lug is positioned properly for the chosen length of fork. Very nice.
Things were looking good tonight, so I took to filing down the seat-lug. It needed a lot of work because I didn't like parts of its shape. The seat-tube ends within the lug. There is a ring around the top of the seat-tube spigot, so its important to get one's seat-tube length right (see prior paragraph) as there's no leaving it to long and trimming later. Because of this design, the lug essentially has a flat top. There's probably a good engineering reason for this relative to mountain bikes, anyway I picked the lug so I'm not complaining. But, the transition from the sides of the lug to the top was a bit to amorphous for me. In fact the whole seat-tube barrel and the lugs for the binder bolt also seemed from a visual perspective to be a bit too much like pudding.
So, I spent a couple of hours with a file, and got a result that looked much better - especially when mounted on the tubes. Anyhow, everything was fitting fine, and I've had an itch to get the torch back in my hand, so I had a go at it.
First the usual cleaning of lug and tubes. Then drilling and fluxing. Finally pinning the joint and checking everything in the jig. Looking good, so on to some more flux, mount the joint in a work stand and have at it with the torch.
The pictures were taken after the finished assembly was put back into the jig to check fit. The jig isn't an alignment table, but things looked real good.
For having been away from the torch for a while, I was very pleased with the braze. There was a little bit of cooked flux on the crotch of the joint, but overall things looked good. The edges were clean and require no filing. Not to much silver was dripped in the wrong places. The edges are nice filled showing that I pulled the silver through well. There's a nice ring of silver at the end of the seat-tube inside of the lug. Cool.
Tuesday, January 24, 2006
Bugs
Bugs, everyone at my house is suffering from bugs. Or do you call them colds. This has been the winter from hell as regards our basic health.
Anyway, things are progressing slowly in the shop. Most of the sanding of filets is done. Tonight should finish up everything but the BB cable guides. After the guides it will be on to the paint shop.
Speaking of guides, I purchased 1 - 3/16x6" stainless steel tube, 1 - 5/32x6" stainless steel tube, 1 - 3/16x36" brass tube, 1 - 5/32x36" brass tube, and 1 - 3/16X36" aluminum tube. All of these are intended for experiments in BB guides. I'm not sure yet which will go on the bike. Part of the issue is what is required fit this into the couplings that bisect the base of the chainstay.
The 5 little pieces of metal came to a bit over $36. The lady ringing things up at the hardware store did a double take, and asked me if I was sure I wanted all these tubes given their price? I said, no that everything was OK. But, boy are those little suckers expensive at the hardware. Once I have things sorted out, I'll have to purchase quantity from an industrial source.
What I want to try is to flare the end of a tube so that it "fills" the hole in the bushing I've placed in the top of the chain stay. Then I'd like to bend the tube as it exits the lower bushing and epoxy the tube to both bushings and at the front to the bottom of the bottom bracket.
An alternative under consideration is a stainless sheet bent around the bottom of the bottom bracket, which is glued and riveted to the BB. With a rolled edge, the cables should stay on this sheet, and the front of the chainstay tube could be brazed (off the bike) to this plate. The sheet would serve to keep the cables from digging into and damaging the carbon around the BB.
All of this should be the subject of some fiddling tonight. I'll keep you posted on progress.
Anyway, things are progressing slowly in the shop. Most of the sanding of filets is done. Tonight should finish up everything but the BB cable guides. After the guides it will be on to the paint shop.
Speaking of guides, I purchased 1 - 3/16x6" stainless steel tube, 1 - 5/32x6" stainless steel tube, 1 - 3/16x36" brass tube, 1 - 5/32x36" brass tube, and 1 - 3/16X36" aluminum tube. All of these are intended for experiments in BB guides. I'm not sure yet which will go on the bike. Part of the issue is what is required fit this into the couplings that bisect the base of the chainstay.
The 5 little pieces of metal came to a bit over $36. The lady ringing things up at the hardware store did a double take, and asked me if I was sure I wanted all these tubes given their price? I said, no that everything was OK. But, boy are those little suckers expensive at the hardware. Once I have things sorted out, I'll have to purchase quantity from an industrial source.
What I want to try is to flare the end of a tube so that it "fills" the hole in the bushing I've placed in the top of the chain stay. Then I'd like to bend the tube as it exits the lower bushing and epoxy the tube to both bushings and at the front to the bottom of the bottom bracket.
An alternative under consideration is a stainless sheet bent around the bottom of the bottom bracket, which is glued and riveted to the BB. With a rolled edge, the cables should stay on this sheet, and the front of the chainstay tube could be brazed (off the bike) to this plate. The sheet would serve to keep the cables from digging into and damaging the carbon around the BB.
All of this should be the subject of some fiddling tonight. I'll keep you posted on progress.
Wednesday, January 18, 2006
ZZZZZZZZZZzzzzzzzzzzzzz...............
Hey There!
I've been getting too little sleep and am sometimes relying on excess enthusiasm to keep moving. :)
Work continues to be big, but things are also moving along in the shop. I'm cutting out early to interview some painters for Carbon 1 (whoops, went on a showing instead). It's just about ready for them, with the joint filets looking pretty sharp. The Cane Creek IS-8 arrived. I did a test install of the fork. One thing about an integrated headset, it's easy to install. I got the version with a tall carbon spacer and it looks much like the Record with it's tall carbon spacer. I trimmed the steerer correctly the first time. Cool! Now the fork is safely packed away in its protective bubble wrap until the bike gets built up.
Speaking of trimming steerers, the Park tool for cutting threadless steerers is a great way to get a square cut on any tube. It's much easier than trying to free-hand the hacksaw through the tube. That means a lot for building stems.
Joe is waiting for dimensions from me to build a trunnion for my jig. The problem is, I thought it just went into the clamp of the Park stand. Wrong. It replaces the clamp. My clamp attaches with what is essentially a big conical nylon bearing that fits into a female fitting on the stand. At the center of the cone is a threaded shaft. This is used to pull the bearing into it's fitting, and to lock it from spinning. So, Joe needs some dimensions - but I don't know where to begin. It's probably time to give him a call.
Joe got me my new lower head lug, so I've finished fitting the downtube on my new sloping top-tube bike. Essentially, the seat tube will be my usual length, but the stem/handlebars will be located higher. If you've looked at the pictures below (of my current bike), this will make sense. So, pinning and brazing soon.
Meanwhile, it doesn't make sense for me to have two bikes underway at once, so I'm going to concentrate on sanding down Carbon 1 and getting it off to the painter. But to be honest, I'm more excited about the steel frame. I really want to see how much my craft has progressed since the last one.
Tonight is math-night at school with the twins, then early to bed. Tomorrow I have to figure out my painter. Friday night should finish prep on Carbon 1, and the its on to frame 010106.
Cheers,
I've been getting too little sleep and am sometimes relying on excess enthusiasm to keep moving. :)
Work continues to be big, but things are also moving along in the shop. I'm cutting out early to interview some painters for Carbon 1 (whoops, went on a showing instead). It's just about ready for them, with the joint filets looking pretty sharp. The Cane Creek IS-8 arrived. I did a test install of the fork. One thing about an integrated headset, it's easy to install. I got the version with a tall carbon spacer and it looks much like the Record with it's tall carbon spacer. I trimmed the steerer correctly the first time. Cool! Now the fork is safely packed away in its protective bubble wrap until the bike gets built up.
Speaking of trimming steerers, the Park tool for cutting threadless steerers is a great way to get a square cut on any tube. It's much easier than trying to free-hand the hacksaw through the tube. That means a lot for building stems.
Joe is waiting for dimensions from me to build a trunnion for my jig. The problem is, I thought it just went into the clamp of the Park stand. Wrong. It replaces the clamp. My clamp attaches with what is essentially a big conical nylon bearing that fits into a female fitting on the stand. At the center of the cone is a threaded shaft. This is used to pull the bearing into it's fitting, and to lock it from spinning. So, Joe needs some dimensions - but I don't know where to begin. It's probably time to give him a call.
Joe got me my new lower head lug, so I've finished fitting the downtube on my new sloping top-tube bike. Essentially, the seat tube will be my usual length, but the stem/handlebars will be located higher. If you've looked at the pictures below (of my current bike), this will make sense. So, pinning and brazing soon.
Meanwhile, it doesn't make sense for me to have two bikes underway at once, so I'm going to concentrate on sanding down Carbon 1 and getting it off to the painter. But to be honest, I'm more excited about the steel frame. I really want to see how much my craft has progressed since the last one.
Tonight is math-night at school with the twins, then early to bed. Tomorrow I have to figure out my painter. Friday night should finish prep on Carbon 1, and the its on to frame 010106.
Cheers,
Saturday, January 14, 2006
Carbon Carbon Everywhere
There's something about carbon, when you sand it, it seems to go everywhere.
Anyway, I've been sanding the down the frame in anticipation of paint. I got about three-quarters of fit done. It's been decided that most of the Deda decoration on the rear triangle will disappear. We'll just keep a small "Dedacciai" at the rear end of each chainstay.
All but one of the cable/ergo stops are mounted. For this frame, the ergo's are on the sides of the down tube (next time I may try the underside). They need to be perfectly positioned to be symmetrical. So, I'm taking my time in positioning the last one.
The frame takes an integrated headset. Too bad, because there isn't an integrated headset standard. What should be the right headset is in the mail, along with an FSA gauge that will help me make sure. Ah well, sooner or later we'll sort that out.
I mounted water bottle bosses in the top and bottom of the monostay on the chainstay. There are to route the front derailer cable. The carbon is so thick here that there can be very little rivet effect. Maybe if I had some bosses that were twice as long. However, they are also epoxied into place and unlikely to move for a very long time. Next will come the under bottom brake guide. Finally, I've also applied some epoxy to fair in the joints between the major portions of the frame. I think that's going to look real nice.
My neighbor brought by his teams jersey, so we can find some match paint colors. A big stripe will run across the frame in these colors - hopefully that'll generate some sales. Net of all this, I'm almost ready for the paint shop. It's going to be fun to see how it all turns out.
I'll keep you posted.
Anyway, I've been sanding the down the frame in anticipation of paint. I got about three-quarters of fit done. It's been decided that most of the Deda decoration on the rear triangle will disappear. We'll just keep a small "Dedacciai" at the rear end of each chainstay.
All but one of the cable/ergo stops are mounted. For this frame, the ergo's are on the sides of the down tube (next time I may try the underside). They need to be perfectly positioned to be symmetrical. So, I'm taking my time in positioning the last one.
The frame takes an integrated headset. Too bad, because there isn't an integrated headset standard. What should be the right headset is in the mail, along with an FSA gauge that will help me make sure. Ah well, sooner or later we'll sort that out.
I mounted water bottle bosses in the top and bottom of the monostay on the chainstay. There are to route the front derailer cable. The carbon is so thick here that there can be very little rivet effect. Maybe if I had some bosses that were twice as long. However, they are also epoxied into place and unlikely to move for a very long time. Next will come the under bottom brake guide. Finally, I've also applied some epoxy to fair in the joints between the major portions of the frame. I think that's going to look real nice.
My neighbor brought by his teams jersey, so we can find some match paint colors. A big stripe will run across the frame in these colors - hopefully that'll generate some sales. Net of all this, I'm almost ready for the paint shop. It's going to be fun to see how it all turns out.
I'll keep you posted.
Friday, January 13, 2006
Brrrr!!!!
Thursday the temprature reached up into the mid-50's. I saw a number of cyclists out, but I was stuck at work with a bunch of crabby people. So, Friday morning I vowed to get in a ride.
Waking up the temperature was 38 and it was raining. With fenders and a raincoat things should be fine. It was to be an interesting test of bike and rider.
Starting out, with the wind at my back, the ride was very pleasant. There was no rain on my face and the fenders keep the road water where it belonged, even when riding through puddles. At the turnaround, things got nasty. The temperature had been falling and the rain drops were turning to ice. Little daggers were attacking my face and I had to keep my windward eye shut. It was also at this point that I realized that my winter gloves weren't waterproof. Wet fingers and the now freezing temperature combined to make my digits numb. It was hard to work the shifter, small motor skills were declining. Each finger would take a turn in the heart of the glove to to take the edge off the numb, and then swap for another. This strategy was staving off the worst, but hardly a substitute for warm hands.
It was here that the bike showed what was right about its design. When physical discomfort or fatigue set in, little issues get magnified. An uncomfortable seat, tendonitis, poor fit, will all begin to feel unbearable. But there was none of that. Moreover, when a rider is tired or sore or, in my case, suffering from a lack of feeling in the hands, bike handling and stability become much more important. I could concentrate on keeping my hands from freezing and trust the bike to get me home - and when you're on the edge, thats a nice feeling.
The bike was changed, however, since the last ride. I'd replaced my aerohead wheels with a set of MA3 on record wheels. My skewers were missing and I replaced these with a set of American Classic skewers from ebay. And from there came my second problem of the ride. The rear skewer just didn't want to hold my rear wheel in place. Eventually I tightened it more than seemed prudent, but it held. At that point it also became clear that there isn't any positive lever stop for the closed position. It appeared I could keep closing the lever until it would hit the spokes (not an option that I tested). Moreover, that as the lever closed farther, it was over-center and thus at less than its maximal tightness.
In response, I twisted the lever so that it closed against the seat stay. This doesn't leave much room to grab the lever to open it. And it may rub off the paint on the stay. Obviously this isn't a long term solution. Now, I'll grant you that this is probably a poor skewer choice for the bike. After all these are very light weight as for a racing bike. Still, I didn't know that there could be such deviation in basic functionality of a skewer. Anyhow, these will probably go on the carbon bike to minimize its weight. Meanwhile, they will get some shop time to see if there is a tweak to improve them.
Shifting in the lower gears was a little off too. The wheels have an almost new cluster (again from ebay). But, I didn't expect it to give problems. When I looked back at it, I could see the problem. Starting from the big cog, the #2 & #3 cogs were spaced much closer together than the rest. I'm not sure why. But, there's another shop project.
So, a couple of minor mechanicals to deal with, but overall a solid bike for the ride. By the way, freezing fingers and all, this was much more fun than spinning class.
Ciao
Waking up the temperature was 38 and it was raining. With fenders and a raincoat things should be fine. It was to be an interesting test of bike and rider.
Starting out, with the wind at my back, the ride was very pleasant. There was no rain on my face and the fenders keep the road water where it belonged, even when riding through puddles. At the turnaround, things got nasty. The temperature had been falling and the rain drops were turning to ice. Little daggers were attacking my face and I had to keep my windward eye shut. It was also at this point that I realized that my winter gloves weren't waterproof. Wet fingers and the now freezing temperature combined to make my digits numb. It was hard to work the shifter, small motor skills were declining. Each finger would take a turn in the heart of the glove to to take the edge off the numb, and then swap for another. This strategy was staving off the worst, but hardly a substitute for warm hands.
It was here that the bike showed what was right about its design. When physical discomfort or fatigue set in, little issues get magnified. An uncomfortable seat, tendonitis, poor fit, will all begin to feel unbearable. But there was none of that. Moreover, when a rider is tired or sore or, in my case, suffering from a lack of feeling in the hands, bike handling and stability become much more important. I could concentrate on keeping my hands from freezing and trust the bike to get me home - and when you're on the edge, thats a nice feeling.
The bike was changed, however, since the last ride. I'd replaced my aerohead wheels with a set of MA3 on record wheels. My skewers were missing and I replaced these with a set of American Classic skewers from ebay. And from there came my second problem of the ride. The rear skewer just didn't want to hold my rear wheel in place. Eventually I tightened it more than seemed prudent, but it held. At that point it also became clear that there isn't any positive lever stop for the closed position. It appeared I could keep closing the lever until it would hit the spokes (not an option that I tested). Moreover, that as the lever closed farther, it was over-center and thus at less than its maximal tightness.
In response, I twisted the lever so that it closed against the seat stay. This doesn't leave much room to grab the lever to open it. And it may rub off the paint on the stay. Obviously this isn't a long term solution. Now, I'll grant you that this is probably a poor skewer choice for the bike. After all these are very light weight as for a racing bike. Still, I didn't know that there could be such deviation in basic functionality of a skewer. Anyhow, these will probably go on the carbon bike to minimize its weight. Meanwhile, they will get some shop time to see if there is a tweak to improve them.
Shifting in the lower gears was a little off too. The wheels have an almost new cluster (again from ebay). But, I didn't expect it to give problems. When I looked back at it, I could see the problem. Starting from the big cog, the #2 & #3 cogs were spaced much closer together than the rest. I'm not sure why. But, there's another shop project.
So, a couple of minor mechanicals to deal with, but overall a solid bike for the ride. By the way, freezing fingers and all, this was much more fun than spinning class.
Ciao
Subscribe to:
Posts (Atom)