Don't forget to vote on the right for your favorite frame building material!
Tuesday, January 01, 2008


Monday, December 31, 2007
Updated Sites
No photos yet - sorry. I've been busy updating this and the Cycles Noir sites. This blog is just about done - although I have to figure out how to get my counter back. The website is coming along fine too - you can check it out on the link at the right.
In the mean time, Happy New Years to everyone!
In the mean time, Happy New Years to everyone!
Thursday, December 27, 2007
Catch up again
Over the last two weeks, the day job has been very busy - meaning no time in the shop. Then of course there was Christmas - which was great, but didn't allow for any building. So, today, I got back into the shop and working. I'll try to get some pix tomorrow to illustrate. Anyhow, here's what's up.
I'm back to working on Paul's track bike. The path-racer is so close to being done, but I decided that it's inspiration (the white tires) didn't look right on it. I've ordered some new Grand Bois to replace them, but I can't finish it until they arrive. That said, the Honjo hammered fenders look great against the Burgundy paint. The seat is a B17 special in dark green with copper rails. The handlebar tape will be green cotton shellacked, so as to accent the saddle. Final pictures should be ready in about 2 weeks.
Therefore, back to Paul's bike. He likes all things Italian and has been steadily collecting old Campy components. The hardest so far has been the hubs. He needed 32 hole (to match some NOS rims he has) and wanted high flange. These are a bit hard to find - but we did it.
Anyhow, the lugs are old Cinelli pressed steel. The bottom bracket is is a cast Cinelli road bracket - the one with 'spoiler' on the bottom. Of course, that isn't quite right for a track bike. Out came the hack saw and the cable eye is gone. That and a bit of work with the file and a rotary stone had things cleaned up. There are also cast in tunnels (canals?) for the cables. So I filled these using some Allstate Nickel-Silver filler. This filler has the characteristic of being Eutectic. What this means is that once it melts and rehardens, it takes significantly more heat to re-melt. So, it starts to be workable around 1200 degrees Fahrenheit, but it requires a bit over 1700 degrees to remelt. So what? Well, we'll be reheating this BB to install the Seat Tube, Down Tube, and Seat Stays. It sure would be nice to make sure that these processes don't damage the filler in the tunnels, eh? And my brass (bronze, alloy, whatever) filler works below the remelt temp of this Nickel-Silver so I can use it or silver based fillers to finish off the BB. At this point, the shell has been soaked and is ready for a little wire brush to clean off any remaining flux.
I also finished cutting miters on the main triangle today, and did a basic test fit. The lugs are close to ready for brazing and the fit up looks good. I had to adjust the lower head tube lug a bit, and may yet be doing the same for the upper and the seat cluster. The latter two haven't been checked yet for angles (the seat and head tubes are parallel - so this is basically to ensure that the top tube is level).
Adjusting the lower head lug was challenging. Basically I'm adjusting from about a 73 degree angle to a 75 degree angle. This means that the top of the lug at the back of the head tube needs to move forward. However, on this lug, this area is rather short. There isn't a lot of material to bend. I think that I have it looking good and fitting ok. But it took a lot of work with a ball-pein hammer. This lead to some additional file work to make sure that it had a smooth surface.
The pressed seat cluster had the standard hollow ears - which I always consider a possible weak point. My solution is to braze tube inside them (for the binder bolt to pass through) and then fill the lug up around the tube. Here is another good use for Eutectic filler. It's too easy for everything to get up to temperature at once, and therefore have the filler melt out of one part while trying to fill another part. Particularly on the inside (against the seatpost) there isn't much support. In fact its like a big square window into the backside of the ears. Moreover, I've already widened the slot (in part to get a nice square looking edge on the ears), leaving even less support. Working a spot, and letting is solidify and then moving on, its possible to fill and get the filler to stay in place very easily with the Eutectic filler.
Anyhow, this is done and been soaked. Again, it may need a quick shot with the wire brush, but basically its time to clean up the filler with a file. First will be the inside of the tube so the seat tube will fit inside. Then I'll do around the inner edges of the ears, giving them some definition. Apart from this, the seat cluster appears ready to clean up and install.
Summing up, the angles of the seat cluster and upper head lug need to be checked and adjusted as necessary. The upper head lug needs a little filing and sanding. The bottom bracket needs a bit of filing and sanding - mostly in the hard to reach spots. And then we can fit everything in the jig, check numbers one more time, clean, flux and braze the front triangle. Yea!
Again, with luck there will be some build photo's tomorrow. That's all for tonight. Cheers!
I'm back to working on Paul's track bike. The path-racer is so close to being done, but I decided that it's inspiration (the white tires) didn't look right on it. I've ordered some new Grand Bois to replace them, but I can't finish it until they arrive. That said, the Honjo hammered fenders look great against the Burgundy paint. The seat is a B17 special in dark green with copper rails. The handlebar tape will be green cotton shellacked, so as to accent the saddle. Final pictures should be ready in about 2 weeks.
Therefore, back to Paul's bike. He likes all things Italian and has been steadily collecting old Campy components. The hardest so far has been the hubs. He needed 32 hole (to match some NOS rims he has) and wanted high flange. These are a bit hard to find - but we did it.
Anyhow, the lugs are old Cinelli pressed steel. The bottom bracket is is a cast Cinelli road bracket - the one with 'spoiler' on the bottom. Of course, that isn't quite right for a track bike. Out came the hack saw and the cable eye is gone. That and a bit of work with the file and a rotary stone had things cleaned up. There are also cast in tunnels (canals?) for the cables. So I filled these using some Allstate Nickel-Silver filler. This filler has the characteristic of being Eutectic. What this means is that once it melts and rehardens, it takes significantly more heat to re-melt. So, it starts to be workable around 1200 degrees Fahrenheit, but it requires a bit over 1700 degrees to remelt. So what? Well, we'll be reheating this BB to install the Seat Tube, Down Tube, and Seat Stays. It sure would be nice to make sure that these processes don't damage the filler in the tunnels, eh? And my brass (bronze, alloy, whatever) filler works below the remelt temp of this Nickel-Silver so I can use it or silver based fillers to finish off the BB. At this point, the shell has been soaked and is ready for a little wire brush to clean off any remaining flux.
I also finished cutting miters on the main triangle today, and did a basic test fit. The lugs are close to ready for brazing and the fit up looks good. I had to adjust the lower head tube lug a bit, and may yet be doing the same for the upper and the seat cluster. The latter two haven't been checked yet for angles (the seat and head tubes are parallel - so this is basically to ensure that the top tube is level).
Adjusting the lower head lug was challenging. Basically I'm adjusting from about a 73 degree angle to a 75 degree angle. This means that the top of the lug at the back of the head tube needs to move forward. However, on this lug, this area is rather short. There isn't a lot of material to bend. I think that I have it looking good and fitting ok. But it took a lot of work with a ball-pein hammer. This lead to some additional file work to make sure that it had a smooth surface.
The pressed seat cluster had the standard hollow ears - which I always consider a possible weak point. My solution is to braze tube inside them (for the binder bolt to pass through) and then fill the lug up around the tube. Here is another good use for Eutectic filler. It's too easy for everything to get up to temperature at once, and therefore have the filler melt out of one part while trying to fill another part. Particularly on the inside (against the seatpost) there isn't much support. In fact its like a big square window into the backside of the ears. Moreover, I've already widened the slot (in part to get a nice square looking edge on the ears), leaving even less support. Working a spot, and letting is solidify and then moving on, its possible to fill and get the filler to stay in place very easily with the Eutectic filler.
Anyhow, this is done and been soaked. Again, it may need a quick shot with the wire brush, but basically its time to clean up the filler with a file. First will be the inside of the tube so the seat tube will fit inside. Then I'll do around the inner edges of the ears, giving them some definition. Apart from this, the seat cluster appears ready to clean up and install.
Summing up, the angles of the seat cluster and upper head lug need to be checked and adjusted as necessary. The upper head lug needs a little filing and sanding. The bottom bracket needs a bit of filing and sanding - mostly in the hard to reach spots. And then we can fit everything in the jig, check numbers one more time, clean, flux and braze the front triangle. Yea!
Again, with luck there will be some build photo's tomorrow. That's all for tonight. Cheers!
Tuesday, December 11, 2007
What's up now?
Things have been busy, even though I've had too little shop time of late. So let's catch up a little.
The path racer is back from paint and I've been slowly building it up. After looking at the paint, it wasn't possible to go with a simple curved fender, so Velo-Orange shipped me some nice hammered Honjo's. The rear is fitted and looks great.
Usually with Honjo's, there is one eye-bolt per stay - centered on the fender. With the hammered fenders, there are two grooves running the length of the fender, and each is pre-drilled for an eye-bolt - so the stay is attached with two bolts set at close to a 90 degree angle. Eye-bolts always fit snuggly (there isn't a lot of take-up available so they need a tight fit). And the stay, where it bends around the fender, gets distorted a little so that the bolts fit even more tightly. Fitting two in together is a tricky job. I still have some final fitting to do so that everything is good and straight. That said, even with just the one fender mounted, its obvious that the hammered fender was the right choice.
The crank arms are old Stronglight 49's. Nice cranks. Came with a TA track chain-ring (1/8"). It took some experimentation, but a Sugino Mighty Comp (at least that's what the seller called it) with a 113 axle worked great. Perfect chain-line, the right crank sits right up close to the BB with the chain-ring bolts running a circle around the end of the BB shell. The BB is interesting, being composed of a pair of Sugino 75 NJS (says so right on them) cups with an axle that looks just like the 75 NJS track axle except that its longer and doesn't have the NJS label. I suspect that this will prove to be a good and durable BB, and plan to purchase some more. And, these cranks/BB set up yield a tread (or Q-factor) of 132mm - which works will with my knees.
After mounting everything, it became clear that the chain-ring was severely warped. I tried to straighten it, but after checking it on the alignment table - it was clearly shot. Once again Velo-Orange to the rescue! Hopefully my new ring will be here by the end of the week. In the meantime, an old Stronglight road chain-ring is in use for fitting everything together. It's pretty with their typical star pattern.
Wheels are Velocity Razor rims laced to Miche high-flange track hubs. The front is laced trued and tensioned. The rear, well, I've decided that the drive side needs shorter spokes. It's nice when all the spokes are the same length, but things got pushed a bit far, so I'm waiting for my new spokes to arrive. Should be here by the weekend, so I can finish the rear wheel. In the meantime, another wheel is standing in for fitting purposes.
If look at prior posts, you'll see this bike (sans paint) more or less built up around the tires that started this whole project. I may be replacing them with a pair of Grand Bois. The white tires feel a bit over the top for a claret metallic bike with hammered fenders. It's hard to be sure until we try them on the new wheels, but I'm leaning towards the Grand Bois right now.
I polished up a beat-up old aluminum seat-post for this bike. Up close, it still looks kinda rough, but from 2 feet away, it looks nice. Anyway, it'll do until I find an appropriate replacement. The headset is a Stronglight A9, and looks good on the bike. The steerer was left long so to fit brass bell on a spacer below the lock nut. In order for the bell to clear the headset, a 10mm spacer was required below it - so the steerer is really 15-17mm too long. That's ok because the stem is a Nitto Technomic, which is long to begin with. Having the long steerer hides more of the stem and makes everything look better balanced. If parts come in timely, this bike could be ready for pictures by the weekend!
I'm still working on Duane's bike. The key thing is polishing the head-tube. I'm down to 400 grit, at which point its possible to start to make out reflections. Still it needs to be worked down to 1200 or maybe 1500 and then polished. So, there are a few hours to go yet before final fitting of lugs and tubes prior to brazing. In the meantime, this is setting on the side as I have a more urgent project.
A friend and bike mechanic asked for a track frame, which we started this week. He's been collecting vintage Campy and Cinelli parts, and mostly has what he needs. I've found some Columbus SLX to fit, so we're building with that and an old set of Cinelli pressed lugs. He loves the Cinelli airfoil BB, so even though that's a road BB, we're going to use it. That means cutting off the cable stop, filling the cable grooves, and closing the cable eyes in the airfoil. This is more than my usual amount of prep work for a BB, but should be an interesting mini-project.
So far, the lugs are rough prepped. The still need their angles set and the edges squared, but they've been filed and are close to their final contours. The other night Paul cleaned, checked, measured and marked the main tubes, and tonight we started a couple of miters. First Paul did one with hacksaw and files. He got chance to see how hard it is to create a good fit. Mind you, he's good with tools and has a good eye, so if he felt challenged, anyone would. I finished that one up - just a little tuning really, and we moved on to the next one. This was the bottom of the seat tube. For it, I demonstrated the hacksaw, grinding wheel, file, method. It went much more quickly as the grinding wheel rapidly took us close to the template all around. So now we only have three more miters prior to fitting and tacking the main triangle. There will be no braze-ons, so this should go together relatively fast.
In other news, I received a set of the new ('08) White Industries H2 hubs today. They look lovely, and weigh in at about 300 grams for the pair. They will be paired with a set of Velocity 650B Arrowhead rims. Along with 32 14/15ga spokes per wheel, and brass nipples, I'm hoping to have these wheels come in around 1500grams total. Which would be quite a feat!
To go with these, a SRAM Force group is on order. It would be nice to use Red, but out-of-pocket expenses must be managed. Red can go on a customer bike. Anyhow, the Force group is sans brakes. Most likely these will be cantilevers - still trying to decide on which to use. Its likely that what ever gets picked will be lighter than even the Red brakes - but will accommodate fenders and wider tires.
Also in the package from white is one of their Cranksets. It looks lovely, and I want to see how low a tread I can get with it. It might be the modern replacement for the TA Cyclotourist. One disappointment is to find that the chain-rings only come in black. Apparently, the bare aluminum isn't durable enough for long life and requires a hard anodize finish to last. Old chain-rings didn't need this, and must have been made from a stronger alloy. I wish I knew how to get White to make their rings from a stronger allow to so that I could have polished rings.
By the way, if you've never looked at these, they're kinda of unique. The large chain ring has deep slots running in five radii from the center. The small ring bolts to these slots, so an infinite number of small chain-ring BCD's can be used. Kinda cool, and it allows for small chainrings too! Very nice.
It's late, that's all for tonight. More soon.
The path racer is back from paint and I've been slowly building it up. After looking at the paint, it wasn't possible to go with a simple curved fender, so Velo-Orange shipped me some nice hammered Honjo's. The rear is fitted and looks great.
Usually with Honjo's, there is one eye-bolt per stay - centered on the fender. With the hammered fenders, there are two grooves running the length of the fender, and each is pre-drilled for an eye-bolt - so the stay is attached with two bolts set at close to a 90 degree angle. Eye-bolts always fit snuggly (there isn't a lot of take-up available so they need a tight fit). And the stay, where it bends around the fender, gets distorted a little so that the bolts fit even more tightly. Fitting two in together is a tricky job. I still have some final fitting to do so that everything is good and straight. That said, even with just the one fender mounted, its obvious that the hammered fender was the right choice.
The crank arms are old Stronglight 49's. Nice cranks. Came with a TA track chain-ring (1/8"). It took some experimentation, but a Sugino Mighty Comp (at least that's what the seller called it) with a 113 axle worked great. Perfect chain-line, the right crank sits right up close to the BB with the chain-ring bolts running a circle around the end of the BB shell. The BB is interesting, being composed of a pair of Sugino 75 NJS (says so right on them) cups with an axle that looks just like the 75 NJS track axle except that its longer and doesn't have the NJS label. I suspect that this will prove to be a good and durable BB, and plan to purchase some more. And, these cranks/BB set up yield a tread (or Q-factor) of 132mm - which works will with my knees.
After mounting everything, it became clear that the chain-ring was severely warped. I tried to straighten it, but after checking it on the alignment table - it was clearly shot. Once again Velo-Orange to the rescue! Hopefully my new ring will be here by the end of the week. In the meantime, an old Stronglight road chain-ring is in use for fitting everything together. It's pretty with their typical star pattern.
Wheels are Velocity Razor rims laced to Miche high-flange track hubs. The front is laced trued and tensioned. The rear, well, I've decided that the drive side needs shorter spokes. It's nice when all the spokes are the same length, but things got pushed a bit far, so I'm waiting for my new spokes to arrive. Should be here by the weekend, so I can finish the rear wheel. In the meantime, another wheel is standing in for fitting purposes.
If look at prior posts, you'll see this bike (sans paint) more or less built up around the tires that started this whole project. I may be replacing them with a pair of Grand Bois. The white tires feel a bit over the top for a claret metallic bike with hammered fenders. It's hard to be sure until we try them on the new wheels, but I'm leaning towards the Grand Bois right now.
I polished up a beat-up old aluminum seat-post for this bike. Up close, it still looks kinda rough, but from 2 feet away, it looks nice. Anyway, it'll do until I find an appropriate replacement. The headset is a Stronglight A9, and looks good on the bike. The steerer was left long so to fit brass bell on a spacer below the lock nut. In order for the bell to clear the headset, a 10mm spacer was required below it - so the steerer is really 15-17mm too long. That's ok because the stem is a Nitto Technomic, which is long to begin with. Having the long steerer hides more of the stem and makes everything look better balanced. If parts come in timely, this bike could be ready for pictures by the weekend!
I'm still working on Duane's bike. The key thing is polishing the head-tube. I'm down to 400 grit, at which point its possible to start to make out reflections. Still it needs to be worked down to 1200 or maybe 1500 and then polished. So, there are a few hours to go yet before final fitting of lugs and tubes prior to brazing. In the meantime, this is setting on the side as I have a more urgent project.
A friend and bike mechanic asked for a track frame, which we started this week. He's been collecting vintage Campy and Cinelli parts, and mostly has what he needs. I've found some Columbus SLX to fit, so we're building with that and an old set of Cinelli pressed lugs. He loves the Cinelli airfoil BB, so even though that's a road BB, we're going to use it. That means cutting off the cable stop, filling the cable grooves, and closing the cable eyes in the airfoil. This is more than my usual amount of prep work for a BB, but should be an interesting mini-project.
So far, the lugs are rough prepped. The still need their angles set and the edges squared, but they've been filed and are close to their final contours. The other night Paul cleaned, checked, measured and marked the main tubes, and tonight we started a couple of miters. First Paul did one with hacksaw and files. He got chance to see how hard it is to create a good fit. Mind you, he's good with tools and has a good eye, so if he felt challenged, anyone would. I finished that one up - just a little tuning really, and we moved on to the next one. This was the bottom of the seat tube. For it, I demonstrated the hacksaw, grinding wheel, file, method. It went much more quickly as the grinding wheel rapidly took us close to the template all around. So now we only have three more miters prior to fitting and tacking the main triangle. There will be no braze-ons, so this should go together relatively fast.
In other news, I received a set of the new ('08) White Industries H2 hubs today. They look lovely, and weigh in at about 300 grams for the pair. They will be paired with a set of Velocity 650B Arrowhead rims. Along with 32 14/15ga spokes per wheel, and brass nipples, I'm hoping to have these wheels come in around 1500grams total. Which would be quite a feat!
To go with these, a SRAM Force group is on order. It would be nice to use Red, but out-of-pocket expenses must be managed. Red can go on a customer bike. Anyhow, the Force group is sans brakes. Most likely these will be cantilevers - still trying to decide on which to use. Its likely that what ever gets picked will be lighter than even the Red brakes - but will accommodate fenders and wider tires.
Also in the package from white is one of their Cranksets. It looks lovely, and I want to see how low a tread I can get with it. It might be the modern replacement for the TA Cyclotourist. One disappointment is to find that the chain-rings only come in black. Apparently, the bare aluminum isn't durable enough for long life and requires a hard anodize finish to last. Old chain-rings didn't need this, and must have been made from a stronger alloy. I wish I knew how to get White to make their rings from a stronger allow to so that I could have polished rings.
By the way, if you've never looked at these, they're kinda of unique. The large chain ring has deep slots running in five radii from the center. The small ring bolts to these slots, so an infinite number of small chain-ring BCD's can be used. Kinda cool, and it allows for small chainrings too! Very nice.
It's late, that's all for tonight. More soon.
Saturday, December 01, 2007
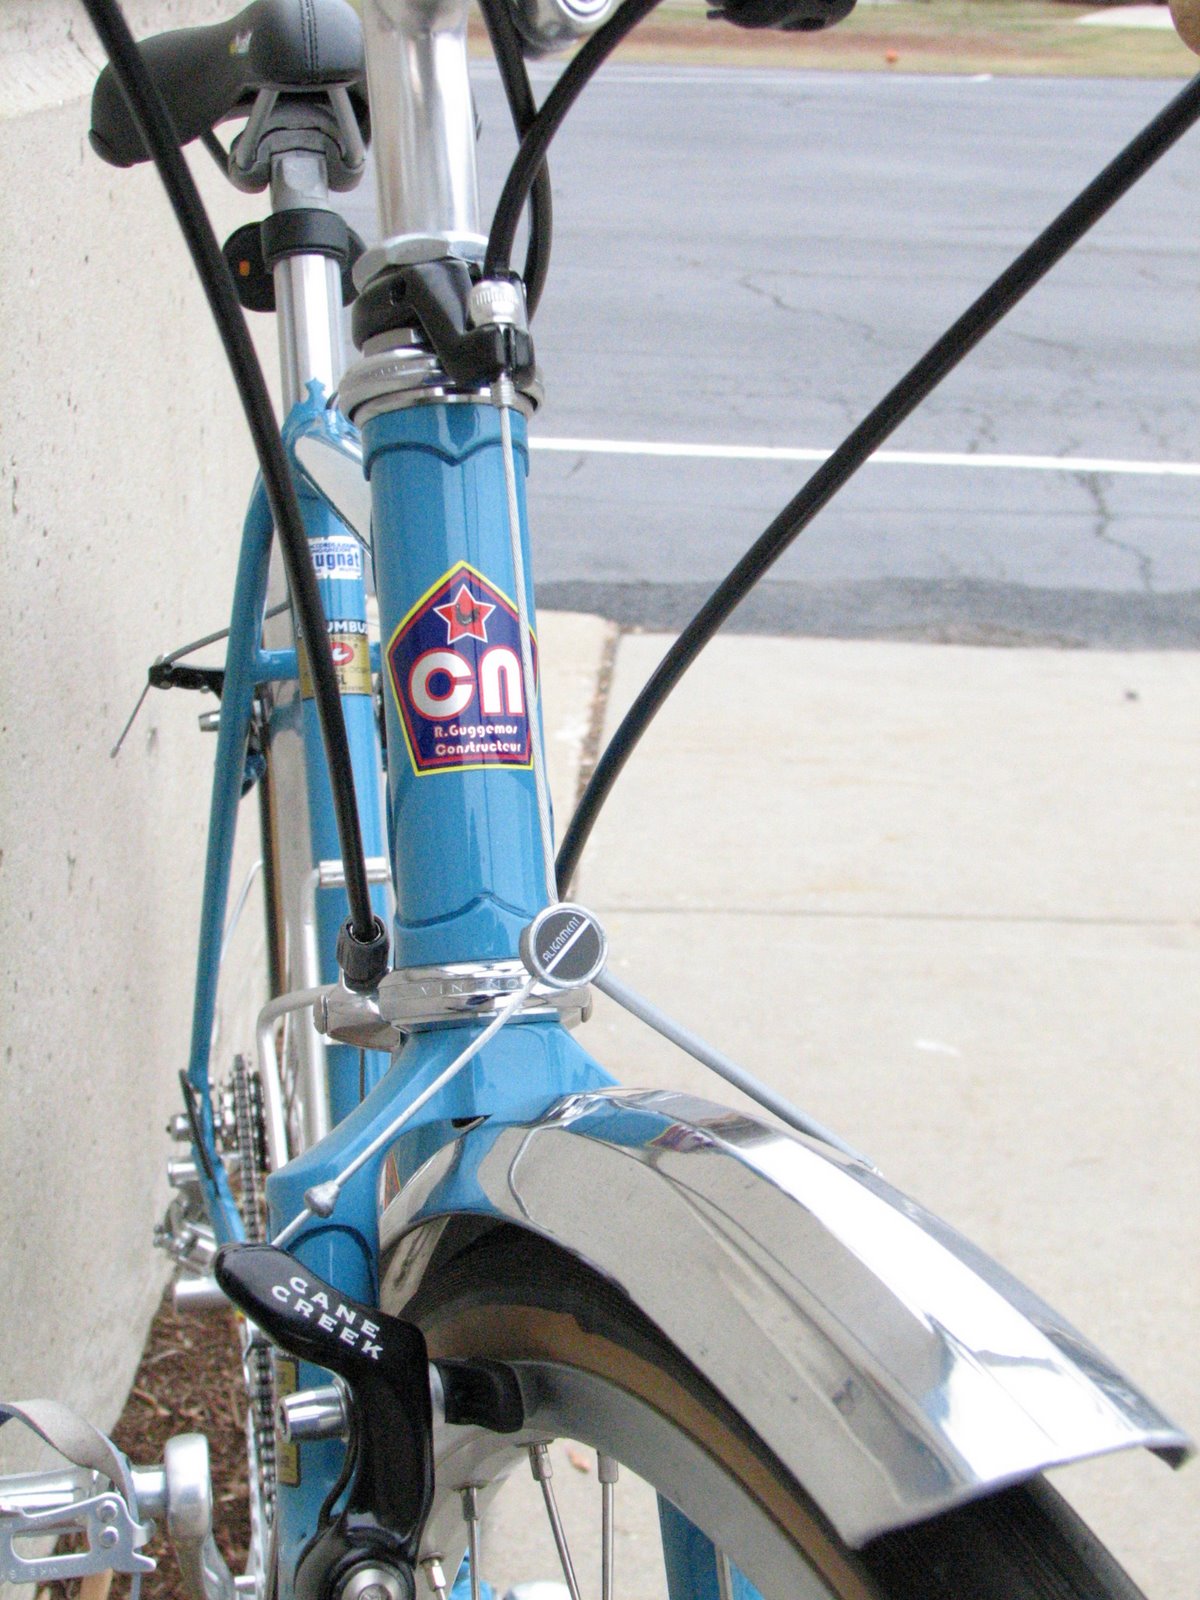
Blue Bike Done


I've been a bit busy. Got the shop re-organized in preparation for another binge of building. Also got the blue frame built up. Take a peek (click on the pic to enlarge):


Sunday, November 18, 2007
Apologies
My computer started to die early in the week. I've been struggling since then to move data and programs over to a new machine. The work is almost done, but has everything, including blogging, way behind schedule. I have received the path racer frame back from the painter. I'll have photos of the frame soon, and built up within 2 weeks.
Cheers
Cheers
Thursday, November 08, 2007
Checking back in with the world

OK, I've been gone for a while. Lots going on, much of which will provide fodder for the blog.
I'll have finished bike pictures of the green and blue bikes very soon, I promise. For today, we'll have something different to see.
What does that look like? If
 you said a GAST DOA-V722-AA, you were right. And in that case you must be much smarter than me.
So what you say? Well, I came to the sad realization that my current vacuum pump was too small to do adequate work making wet wrapped vacuum-bagged joints on a bicycle frame.
There are a couple of ways around that obstacle. It's possible to buy a little device which creates a vacuum when hooked up to the hose of a compressor for about $100. Or you can buy a good vacuum pump. In my experience these tend to run from about $500 and up. Or, you can go to trusty eBay and find someone selling a nice industrial quality vacuum pump, used, for reasonable prices.
It took three or for tries, but I purchased this one for $47. It'll draw over 25" of mercury, which should be plenty of pressure for the joints I'm going to do. In fact, for a small object, where the carbon is being formed over Styrofoam forms, this is probably too much pressure. It would tend to distort the form during the cure.
The basics of the process go like this. I'll miter carbon tubes to fit together correctly. Then I'll glue them in place with an epoxy, using the frame jig. This will create a straight carbon frame, but no where near enough strength in the joints to be used as a bicycle.
From here, I will wet out layers of carbon fiber with a high quality epoxy. These layers will be wrapped in various patterns around the joint. Along the way, the carbon fiber will be oriented to use its strength (pulling or stretching) not its weakness (compression or pushing). This could then be allowed to harden - but it won't.
First of all, there is no way to wet out the carbon fiber thoroughly without giving it too much epoxy. This adds excess weight, which isn't what we want to do with carbon fiber. Also, epoxy isn't all that strong on its own. If there are thick gobs and goobers of epoxy between the layers of carbon fiber, its likely to weaken the joint. Finally, as much as we try, there can be voids between the strands of CF where we didn't penetrate with epoxy during the wetting out - these areas will be weak.
This is where the vacuum pump comes in. We'll layer the wrapped joint with a material that will release from the epoxy after everything is set up. There are a variety of alternatives for this. A very smooth material, say like mylar, can give a very finished finish to the CF. That's nice, but no ideal for our case. I'm going to start with Teflon coated polyester cloth.
It just occurs to me that Teflon isn't a great material for the world, so maybe I'm going to have to look for an alternative in the long run.
Getting back on track, this cloth breaths. Behind the cloth will be a layer of batting. It looks sort of like the stuff people put on table tops to look like snow, before they set up a winter scene with figurines. Anyhow, this joint, wrapped in polyester cloth, with batting over that, gets sealed into a large plastic bag. At the back side of the batting (and potentially in more than one spot), a hose (or hoses) are attached to the bag and then to a vacuum pump (this is where the GAST DOA-V722-AA comes in).
Turning the pump on creates a (partial) vacuum inside the bag. Outside the bag, where there is no vacuum, we have the weight of our earth's atmosphere pushing on every side of everything it touches. If our skins were hollow (implying a vacuum inside), they would be squished down to a nasty little lump.
In the case of our bike frame, the carbon tubing provides a strong stiff platform for the vacuum to push against. So, the bag is pushed against the batting, which is pushed against the Teflon fabric, which is pushed against the set joint. In a process not unlike squeezing a little packet of ketchup, the wet epoxy wants to get out of the way of all this pushing.
It gets squeezed up through the layers of carbon fiber, and through the Teflon fabric, into the batting. Generally, the epoxy is too stiff to push through the batting and into the pump - which is a good thing. And, because the batting has enough strength or loft to keep from flattening out, it is home to a vacuum that the epoxy wants to fill.
In this way, the layers of CF are pressed closely together where the epoxy can effectively bind them and allow the CF to be the strength of the joint. Meanwhile, excess epoxy is removed from the joint, helping keep its weight to a minimum. And, with a little luck, most voids will be located somewhere with epoxy behind them. As the epoxy is sucked out to the batting, it will go through these voids, leaving enough epoxy to make sure that these areas of the CF are at full strength.
I seem to have a machinist lined up now to make my lug spigots for the bottom bracket. Hopefully before Christmas, I'll have my first prototype carbon frame with wet-wrapped vacuum-bagged joints. And while the GAST may look mundane, this is why I'm excited that it arrived. And that's all for today.
Friday, October 26, 2007
Friday Update
Wednesday night I did not mount fenders. Instead the rider took the bike for a test spin. By the way, its the blue bike listing below under "Sneak Preview" Anyhow, she was extremely happy with the ride. Good on that.
Now I've hung the blue bike up for a few days. Tomorrow is our annual ride up the Des Plaines river trail to the Wisconsin border. This is fun, and often wet. While the trail isn't paved, much of it is cinder, so it doesn't require anything like a mountain bike. 30mm tires and fenders will do the job. Nonetheless, a number of folks will ride mountain bikes because their road bikes can handle wider tires.
For myself, I'll be riding my test hack - which is why I've put the blue bike aside. I had some nice Michelin 28s, which were really more of a 30 or 32mm tire. They weren't great on the road, but they were fine on the trail. Unfortunately, one of them wore out. They got replaced by a nice set of Hutchinson's with a folding bead. These are fast tires, with 80psi in front and 85psi in back. But, they're too narrow for wet weather on the trail. It's been raining this evening and some form of rain is being predicted for the morning.
I went scouting out wider tires, naturally looking for a deal. I found some Panaracer Pasellas (sp?) with a folding bead for less than $20 each in a 700x35c. These are pretty highly regarded tires, reasonably light and good rolling. The question was: could I mount them and fenders on the hack?
Meanwhile, on my last ride, the hack was slow and draggy. The culprit seemed to be the bottom bracket. The crankset is an FSA Gossamer compact double with external cup bearings.
So, BB, tires, fenders, have taken all my shop time since Wednesday.
I pulled the cranks, sure enough the left bearing was toast. I dug up a Truvativ crankset with external cup BB from inventory. I mounted the cups and tried to push the Gossamer through. Oppps, I pushed the press-fit bearing out of the left cup. It turns out that FSA and Truvativ use different specs. The Truvativ left bearing has a smaller hole for the axle, which necks down to fit. The FSA axle doesn't neck down. As best I can tell, Truvativ uses the same spec as Shimano, but apparently FSA doesn't.
Hopefully I haven't damaged the Truvativ BB, but I wasn't going to use this crankset (carbon arms) on the hack in the mud tomorrow. This lead to some thinking. I got out a nice old Stronglight 93. One of prettiest cranksets ever made. It's rather dirty, and has some oxidation - but its cool.
The Stronglight is a true low-tread (low Q) crankset. And it needs a longer axle than any of the BB I have in stock - so that means a trip to pick up a new BB. Also, with 10speeds on the back, It didn't make much sense to me to leave the the large (52t) chain ring on. Instead the small (47t) ring got moved to the outside, and mounted with track chain ring bolts. On this went a set of bright red Look Keo pedals.
The normal wheels on the hack are a set of Record 10 hubs laced to some MA3 rims. Smooth rolling and dependable. I also have a set of wheels that matches this except that the hubs are Chorus. I mounted the new tires to the Chorus wheel set - so we can easily switch between to the two tire sizes. Unfortunately, the Chorus wheels (an eBay find) had their own problem. In particular, the cassette lockring won't engage to thread onto the cassette carrier. I can see anything wrong with the cassette carrier, and tried three different (brands or) lockring with the same results. Eventually, I gave up for now and swapped tires on the Record rear hub. Along the way I cleaned all the grit and dirt out of the cassette - so it looks so much better now next to the Stronglight crank.
Both wheels fit on the bike. They need a little pop to get past the brake shoes, but not enough to interfere with the angle of the shoes. The rear tire has a good fit all the way around except the chain stays. I tried to get my crimper in there to make an adjustment but it just doesn't fit. The tire appears to be not quite true (the rim appears fine) for some reason. I pumped it up to 120psi, and then the trueness returned. This isn't a realistic riding pressure, but it does increase the diameter of the tire enough so that it drags on the front mounting screw for the rear fender.
After returning to normal pressure, the snakiness returned to the tire. Argh!! Anyhow, careful adjustment makes sure that the tire clears both stays without issue. If the mud were to get deep, however, it could cause a problem. But that should be an unlikely scenario on this trail.
With the additional traction provided by these tires, it became clear that the front brake needed a tweek. Tightening up its cable made a big difference in the front stopping power.
I pulled out an old set of hack fenders and started to mount the front. It was a little bit tighter than I like, but not too bad. Then I tried the rear. Nope, not a winning combo. The fender is too narrow and when combined with a being a bit close to the tire, it just isn't ago.
I have a set of Velo Orange brand aluminum fenders size appropriately for these tires, and pulled out the rear. A bit of fiddling, tweeking, cutting, filing, drilling, futsing, and so on later, and I had a workable rear fender. The fender line isn't perfect, but it's not bad.
So now the hack has a plastic front fender painted white, and an unpolished aluminum rear fender. Not a fashion statement, but definitely a look that stands out.
Hopefully everything is snug and will hold together for the ride. More on this later.
It's late and I need to pack, so we'll see you around.
Now I've hung the blue bike up for a few days. Tomorrow is our annual ride up the Des Plaines river trail to the Wisconsin border. This is fun, and often wet. While the trail isn't paved, much of it is cinder, so it doesn't require anything like a mountain bike. 30mm tires and fenders will do the job. Nonetheless, a number of folks will ride mountain bikes because their road bikes can handle wider tires.
For myself, I'll be riding my test hack - which is why I've put the blue bike aside. I had some nice Michelin 28s, which were really more of a 30 or 32mm tire. They weren't great on the road, but they were fine on the trail. Unfortunately, one of them wore out. They got replaced by a nice set of Hutchinson's with a folding bead. These are fast tires, with 80psi in front and 85psi in back. But, they're too narrow for wet weather on the trail. It's been raining this evening and some form of rain is being predicted for the morning.
I went scouting out wider tires, naturally looking for a deal. I found some Panaracer Pasellas (sp?) with a folding bead for less than $20 each in a 700x35c. These are pretty highly regarded tires, reasonably light and good rolling. The question was: could I mount them and fenders on the hack?
Meanwhile, on my last ride, the hack was slow and draggy. The culprit seemed to be the bottom bracket. The crankset is an FSA Gossamer compact double with external cup bearings.
So, BB, tires, fenders, have taken all my shop time since Wednesday.
I pulled the cranks, sure enough the left bearing was toast. I dug up a Truvativ crankset with external cup BB from inventory. I mounted the cups and tried to push the Gossamer through. Oppps, I pushed the press-fit bearing out of the left cup. It turns out that FSA and Truvativ use different specs. The Truvativ left bearing has a smaller hole for the axle, which necks down to fit. The FSA axle doesn't neck down. As best I can tell, Truvativ uses the same spec as Shimano, but apparently FSA doesn't.
Hopefully I haven't damaged the Truvativ BB, but I wasn't going to use this crankset (carbon arms) on the hack in the mud tomorrow. This lead to some thinking. I got out a nice old Stronglight 93. One of prettiest cranksets ever made. It's rather dirty, and has some oxidation - but its cool.
The Stronglight is a true low-tread (low Q) crankset. And it needs a longer axle than any of the BB I have in stock - so that means a trip to pick up a new BB. Also, with 10speeds on the back, It didn't make much sense to me to leave the the large (52t) chain ring on. Instead the small (47t) ring got moved to the outside, and mounted with track chain ring bolts. On this went a set of bright red Look Keo pedals.
The normal wheels on the hack are a set of Record 10 hubs laced to some MA3 rims. Smooth rolling and dependable. I also have a set of wheels that matches this except that the hubs are Chorus. I mounted the new tires to the Chorus wheel set - so we can easily switch between to the two tire sizes. Unfortunately, the Chorus wheels (an eBay find) had their own problem. In particular, the cassette lockring won't engage to thread onto the cassette carrier. I can see anything wrong with the cassette carrier, and tried three different (brands or) lockring with the same results. Eventually, I gave up for now and swapped tires on the Record rear hub. Along the way I cleaned all the grit and dirt out of the cassette - so it looks so much better now next to the Stronglight crank.
Both wheels fit on the bike. They need a little pop to get past the brake shoes, but not enough to interfere with the angle of the shoes. The rear tire has a good fit all the way around except the chain stays. I tried to get my crimper in there to make an adjustment but it just doesn't fit. The tire appears to be not quite true (the rim appears fine) for some reason. I pumped it up to 120psi, and then the trueness returned. This isn't a realistic riding pressure, but it does increase the diameter of the tire enough so that it drags on the front mounting screw for the rear fender.
After returning to normal pressure, the snakiness returned to the tire. Argh!! Anyhow, careful adjustment makes sure that the tire clears both stays without issue. If the mud were to get deep, however, it could cause a problem. But that should be an unlikely scenario on this trail.
With the additional traction provided by these tires, it became clear that the front brake needed a tweek. Tightening up its cable made a big difference in the front stopping power.
I pulled out an old set of hack fenders and started to mount the front. It was a little bit tighter than I like, but not too bad. Then I tried the rear. Nope, not a winning combo. The fender is too narrow and when combined with a being a bit close to the tire, it just isn't ago.
I have a set of Velo Orange brand aluminum fenders size appropriately for these tires, and pulled out the rear. A bit of fiddling, tweeking, cutting, filing, drilling, futsing, and so on later, and I had a workable rear fender. The fender line isn't perfect, but it's not bad.
So now the hack has a plastic front fender painted white, and an unpolished aluminum rear fender. Not a fashion statement, but definitely a look that stands out.
Hopefully everything is snug and will hold together for the ride. More on this later.
It's late and I need to pack, so we'll see you around.
Wednesday, October 24, 2007
Blu Bik
It's been a busy few days with lots going on in the day job.
Still, I've started the build on the blue bike. The rider tried drop bars but decided she wants to stick with upright ones, so that's how the frame was built - giving it a bit longer top tube.
The fork is mounted using a nice Tange Levin headset (very durable and classic looking). I first grabbed a Nitto Technomic stem, not really thinking. Put it in the steerer and push down. Whoops, it won't go very far. This is a small frame with a short steerer. The bottom of steerer tubes is butted (its where most of the stress gets concentrated), and a stem won't fit through the butt. Because this steerer is so short, the butt is nearly half the tube and a tall stem like a Technomic ends up sticking way up in the air like a flag.
I have a nice SR forged stem in stock, this has more traditional proportions. Substituting it in gives just the vertical fit I'm looking for. Into this I mounted a Nitto Albatross aluminum bar. This is a big wide bar which the rider likes, even though it's more than is really necessary for the size of loads she'll be carrying.
For the seatpost, we're using a NOS Sugino fluted one bolt. It has a classic look, but is a bit easier to adjust. The lug design looks nice against the front of the post. On top of this we selected a Velo ladies saddle. I can' t say much about this except that its supposed to be comfortable to the rider. She wasn't interested in trying to break in a Brooks.
Brakes are Cane Creek cantilevers, which are now mounted on front and back. With their tension spring adjustments, these are so much easier to balance than old fashioned brakes. I toyed with the idea of using a TT style lever mounted in the end of the bars. But we're using cork grips and I don't like the idea of carving them up to make passage for the brake cable. Instead, we're using a nice old set of Sun Tour MTB brake levers. The rear is connected, using a single long casing routed through a top tube tunnel. It looks like it will wrap nicely under the handle bar tape, routed along the front side of the handlebar. This will give the rider a couple of more hand positions for longer rides, including one that gets her down out of the airstream.
As you may assume, given that the rear brake is adjusted, the wheels are mounted. The rear wheel needs a little work, based on the test fits prior to paint. It is an old 120mm hub with a new longer axle, that is re-spaced to 130mm. The spacers need to be adjusted to move the hub further toward the non-drive side of the dropouts, otherwise the derailer can't move the chain over to the small ring. As part of this, the wheel needs to be redished. So mounting and adjusting the derailers needs to await this change.
Even with all that's left to do, this is starting to look like a real bike now. Tonight I'll pull the wheels and mount fenders, then connect the front brake and finish the handlebars.
Pix soon.
Still, I've started the build on the blue bike. The rider tried drop bars but decided she wants to stick with upright ones, so that's how the frame was built - giving it a bit longer top tube.
The fork is mounted using a nice Tange Levin headset (very durable and classic looking). I first grabbed a Nitto Technomic stem, not really thinking. Put it in the steerer and push down. Whoops, it won't go very far. This is a small frame with a short steerer. The bottom of steerer tubes is butted (its where most of the stress gets concentrated), and a stem won't fit through the butt. Because this steerer is so short, the butt is nearly half the tube and a tall stem like a Technomic ends up sticking way up in the air like a flag.
I have a nice SR forged stem in stock, this has more traditional proportions. Substituting it in gives just the vertical fit I'm looking for. Into this I mounted a Nitto Albatross aluminum bar. This is a big wide bar which the rider likes, even though it's more than is really necessary for the size of loads she'll be carrying.
For the seatpost, we're using a NOS Sugino fluted one bolt. It has a classic look, but is a bit easier to adjust. The lug design looks nice against the front of the post. On top of this we selected a Velo ladies saddle. I can' t say much about this except that its supposed to be comfortable to the rider. She wasn't interested in trying to break in a Brooks.
Brakes are Cane Creek cantilevers, which are now mounted on front and back. With their tension spring adjustments, these are so much easier to balance than old fashioned brakes. I toyed with the idea of using a TT style lever mounted in the end of the bars. But we're using cork grips and I don't like the idea of carving them up to make passage for the brake cable. Instead, we're using a nice old set of Sun Tour MTB brake levers. The rear is connected, using a single long casing routed through a top tube tunnel. It looks like it will wrap nicely under the handle bar tape, routed along the front side of the handlebar. This will give the rider a couple of more hand positions for longer rides, including one that gets her down out of the airstream.
As you may assume, given that the rear brake is adjusted, the wheels are mounted. The rear wheel needs a little work, based on the test fits prior to paint. It is an old 120mm hub with a new longer axle, that is re-spaced to 130mm. The spacers need to be adjusted to move the hub further toward the non-drive side of the dropouts, otherwise the derailer can't move the chain over to the small ring. As part of this, the wheel needs to be redished. So mounting and adjusting the derailers needs to await this change.
Even with all that's left to do, this is starting to look like a real bike now. Tonight I'll pull the wheels and mount fenders, then connect the front brake and finish the handlebars.
Pix soon.
Sunday, October 21, 2007


Subscribe to:
Posts (Atom)