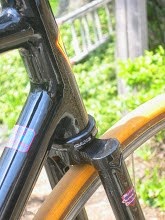
Just heard from Duane at Chester Cycles. I'll have two frames back from paint on Sunday. Pix Soon!
Wednesday, October 17, 2007


New Rule!
New Rule: Never say you're getting into a rhythm. It's only tempting fate.
Since the last posting, work's dumped on me. That said, I did a little more work last night.
The front and back dropouts on the Surprise Bike are traditional Campy forged. No fancy stainless steel, just good strong dropouts. Because of the horizontal slot on the rear, the bike will be a good candidate for a fixed conversion - which is another factor in choosing these DOs. Also, they are very classic and this will be a classic looking frame. So Campy it is.
Last night I brazed the rear DOs to the chain stays. I wanted to do these with brass filler. 1) there is a lot of space to fill and brass is way cheaper than silver; 2) when the seat stays are mounted, the temperature will be too low to bother the filler in the chain stay joint. The latter is important because with a high-mass DO like the Campy, much of the heat gets directed to it rather than the stay. If you over do it (without burning flux or anything) it carries this heat some distance and can cause silly problems. Therefore, it's brass on the first joint with the DO and Silver on the second.
I was low on flux and tried to pick some up at the local welding supply. I asked for Gasflux blue paste, but they didn't have any. Instead they offered me another brand, saying that all blue fluxes are the same. I should have just ordered some more from Henry James.
So, it turns out the new flux isn't paste. Its a dry powder. Powder may be an exaggeration. The grains are about like course sand. Anyhow, I tried mixing some with water. Nope, its just like wet sand in a bucket of water. It doesn't absorb the water no matter how much I mix it. Adding more flux doesn't help. So I set this aside. Fifteen minutes later, it was one solid mass. Hmmm??? Maybe with some heat it will melt and can be applied like paste flux.
The can says to dip a heated stick of filler into the can and then braze with the fluxed filler. That doesn't sound good enough for me. So, I dipped the parts into some degreaser and then dipped them in the can. This seems to work to get a decent coating on everything.
So, the parts go together and the chain stay gets mounted DO-end up in the vice. Then I heat the filler and dip it in flux and get to work.
One thing I'll say about this flux, it covers the work pretty well. Sometimes, a flux can drip off of a small area of the parts being heated and that area gets a burn mark. Not so for this stuff.
Moreover, the dipping process makes it pretty easy to add flux as desired to the hot parts. Adding a paste flux to hot parts is a no-no. As the water boils off, the temperature of the parts plummets which can affect their temper.
From here, the brazing went pretty well: plenty of penetration in the joint, not too much excess brass for later clean up. The same went for the second chain stay. I let things cool, and over dinner the stays went into the washtub with hot (too hot for me to put my hands in) water. Usually, if no flux is burned, this (about 45 mins) is plenty of time for the flux to wash off. Not so with this stuff.
After another 30 mins of soaking, there was still a lot of excess flux hardened onto the parts. Maybe an overnight soaking would have worked better. Anyhow, I tried taking them back into the shop and chipping the flux off with a welders hammer. This often works easily after the flux has soaked for a while. Not with this stuff. It's tenacious. They should probably use it to coat the ceramic tiles on the Space Shuttle.
Using a combination of a sanding drum, the welders hammer, and an old bastard file got most of the remnants off. Then it was off to clean up brass.
I've been working on some ideas for a signature style for finishing off the ends of stays. I haven't seen any examples that I can remember of the style that most appeals to me - perhaps because it's a lot of work.
After slotting the stays, I file the ends in a semicircle with the slot being the equator of the semicircle. This differs from a traditional bullet end, where the profile as seen from the side & the top is similar. With my style, the tubing is not bent inwards on the end. When viewed from above, the surface of the tube forms a straight line all the way to it's end. Whereas on the bullet style, the end of the tube is hammered inward, so that even from above it looks like a semi-circle.
Once this is brazed up, I file off the excess so that this semicircle presents a square face to the world. Pictures will be clearer, so here they are (Click to Enlarge):
 The reason that these are time consuming is that the further the edge of the tube is from the dropout, the more slumping/lumping the final filler will do in that space. With this style, there is a large open area between end of the stay and the DO. So, there is lots of post braze filing.
Next I have to prep the BB Shell so we can start to assemble the main triangle.


By the way, I hope everyone loves this little composition of pictures. Formating pix to page is a real PIA with blogger!

Since the last posting, work's dumped on me. That said, I did a little more work last night.
The front and back dropouts on the Surprise Bike are traditional Campy forged. No fancy stainless steel, just good strong dropouts. Because of the horizontal slot on the rear, the bike will be a good candidate for a fixed conversion - which is another factor in choosing these DOs. Also, they are very classic and this will be a classic looking frame. So Campy it is.
Last night I brazed the rear DOs to the chain stays. I wanted to do these with brass filler. 1) there is a lot of space to fill and brass is way cheaper than silver; 2) when the seat stays are mounted, the temperature will be too low to bother the filler in the chain stay joint. The latter is important because with a high-mass DO like the Campy, much of the heat gets directed to it rather than the stay. If you over do it (without burning flux or anything) it carries this heat some distance and can cause silly problems. Therefore, it's brass on the first joint with the DO and Silver on the second.
I was low on flux and tried to pick some up at the local welding supply. I asked for Gasflux blue paste, but they didn't have any. Instead they offered me another brand, saying that all blue fluxes are the same. I should have just ordered some more from Henry James.
So, it turns out the new flux isn't paste. Its a dry powder. Powder may be an exaggeration. The grains are about like course sand. Anyhow, I tried mixing some with water. Nope, its just like wet sand in a bucket of water. It doesn't absorb the water no matter how much I mix it. Adding more flux doesn't help. So I set this aside. Fifteen minutes later, it was one solid mass. Hmmm??? Maybe with some heat it will melt and can be applied like paste flux.
The can says to dip a heated stick of filler into the can and then braze with the fluxed filler. That doesn't sound good enough for me. So, I dipped the parts into some degreaser and then dipped them in the can. This seems to work to get a decent coating on everything.
So, the parts go together and the chain stay gets mounted DO-end up in the vice. Then I heat the filler and dip it in flux and get to work.
One thing I'll say about this flux, it covers the work pretty well. Sometimes, a flux can drip off of a small area of the parts being heated and that area gets a burn mark. Not so for this stuff.
Moreover, the dipping process makes it pretty easy to add flux as desired to the hot parts. Adding a paste flux to hot parts is a no-no. As the water boils off, the temperature of the parts plummets which can affect their temper.
From here, the brazing went pretty well: plenty of penetration in the joint, not too much excess brass for later clean up. The same went for the second chain stay. I let things cool, and over dinner the stays went into the washtub with hot (too hot for me to put my hands in) water. Usually, if no flux is burned, this (about 45 mins) is plenty of time for the flux to wash off. Not so with this stuff.
After another 30 mins of soaking, there was still a lot of excess flux hardened onto the parts. Maybe an overnight soaking would have worked better. Anyhow, I tried taking them back into the shop and chipping the flux off with a welders hammer. This often works easily after the flux has soaked for a while. Not with this stuff. It's tenacious. They should probably use it to coat the ceramic tiles on the Space Shuttle.
Using a combination of a sanding drum, the welders hammer, and an old bastard file got most of the remnants off. Then it was off to clean up brass.
I've been working on some ideas for a signature style for finishing off the ends of stays. I haven't seen any examples that I can remember of the style that most appeals to me - perhaps because it's a lot of work.
After slotting the stays, I file the ends in a semicircle with the slot being the equator of the semicircle. This differs from a traditional bullet end, where the profile as seen from the side & the top is similar. With my style, the tubing is not bent inwards on the end. When viewed from above, the surface of the tube forms a straight line all the way to it's end. Whereas on the bullet style, the end of the tube is hammered inward, so that even from above it looks like a semi-circle.
Once this is brazed up, I file off the excess so that this semicircle presents a square face to the world. Pictures will be clearer, so here they are (Click to Enlarge):
 The reason that these are time consuming is that the further the edge of the tube is from the dropout, the more slumping/lumping the final filler will do in that space. With this style, there is a large open area between end of the stay and the DO. So, there is lots of post braze filing.
Next I have to prep the BB Shell so we can start to assemble the main triangle.


By the way, I hope everyone loves this little composition of pictures. Formating pix to page is a real PIA with
 blogger!
Tuesday, October 09, 2007
Tuesday
Not building frames full time, it can sometimes be hard to get into a rhythm of work. Lately, however, thats coming easier - leading to more progress, faster.
No pix yet, but tonight I finished the penultimate miter in the main triangle. After fitting up in the jig, I'll miter the bottom of the down tube. The rest are all done based on measurements from BikeCad and either miter templates provided by same, or scribing the profile of the inside of a lug. Anyhow, a test fit up looks good so we're almost ready to jig.
After the miters, it's important to take care of any fittings that go on the tubes. In this case, that means H2O mounts on the seat and down tubes, and a brake casing tunnel in the bottom of the top tube. The H2O mounts are pretty simple. Measure, mark, drill a pilot hole, drill out one size larger, then drill the final hole. A little clean up with a deburer, file and sandpaper and they're ready to prep for brazing.
The tunnel is a bit more work. First a mark the tube where I want to entrance and exit to be. These are approximate locations. Then its a similar process to the H2O mounts to drill holes - only this time there are more bits involved because the holes are bigger. Then its time to cut a length of brake line - this needs to be longer than the distance between the holes. Using a tube bender, I tilt each end about 45 degrees. The bends are slightly closer together than the holes in the top tube - so that the tunnel will stand away from the walls of the top tube once its brazed in place.
Next comes a large (12" I think) bastard cut round file. I use this holding it with two hands and cutting with the last 6" or less of the file. Using this I can elongate the hole s in the top tube. With a bit of back and forth to test fitting, the holes get finished off and the ends of the tunnel shortened until I can just pop it into place. Then it's time to pop it out of place so we can prep for brazing.
All three tubes spent some time in hot water with Wisk to remove any cutting oil left over from drilling holes. Then a dip in a degreaser just to make sure all is well. After this, I check that the edges of the holes are clean of burrs. Finally, the tubes get sanded with 80 grit on the inside and outside. The inside can be a bit of a trick to sand. I ended up making a flap sander for this purpose,. It's a piece of copper tube about 3/8" in diameter. One end has a slit cut in with a hacksaw. Then this was squeezed part way closed. Into the slit go pieces of sandpaper. Usually, I pull a 3" strip off a roll of 2" wide paper. This piece gets split lengthwise, and the to pieces are placed back to back - then shoved into the slit. The back to back thing makes sure that a rough side always faces the tube, no matter how the paper is put into the tube.
Anyhow, this gets chucked into my portable drill and shoved up the tube. Zing! The inside gets clean.
Then its time to flux everything up. I used Freddy's Stainless Light tonight. It was a little dry, so water was added before zapping in the microwave. The heat usually makes it easier to spread onto the tubes, and have it stick. I like the flux to have the consistency of slightly loose mashed potatoes. Done right, not to much falls off in the application process - and what stays there drys onto the tube if its allowed to sit for a little while. This makes it easier to keep the flux where I want it once the torch starts heating the tubes.
The H2O mounts are surrounded by decorative reinforcers. I try to get these straight before the flux drys. Its much easier this way than trying to poke them into position after things are heated up. Using a small tip and a soft but medium to large flame, I warm the area until the flux starts melting. As the flux gets clear, its time to add silver. I start by pointing at the actual threaded mount, and applying silver to the edge of its flange on top of the reinforcer. I point the tip of the flame into the threads (which have been fluxed) to draw this silver around the mount and down into the tube.
I don't like to apply too much filler here, because its easy to leave a glob on top of the reinforcer while pulling silver around the bottom. So I then apply filler first to the edge of one end of the reinforcer, and then to the other end. The end of the filler wire gets touched up against the edge of the reinforcer that is closet to me, while I direct the flame the other side of the reinforcer. This pulls the silver from the point of contact, under the reinforcer, to the far side. A little waving of the torch makes sure that silver is making it to the side points of the reinforcer. The same process is used at the other, end, but less filler is necessary because the first step filled more than half of the reinforcer. At this point, its important to look to see if there are gaps, globs, or other issues than can be best cleaned up now while the joint is hot. On both tubes, things looked great, so it was time to move on.
For the H2O mounts, I used a 56% Silver alloy. This gets very wet when heated and fits into small places well. For the brake casing tunnel, I use something called Filet Pro, which is a special formulation (I think high nickel content) for making silver based filets. It will wet out and I can pull it into tight places, but this takes work. On the other hand, it has a relatively wide band of temperatures at which it is plastic. And if the tubes aren't over heated, its possible to set a 3/8-1/2 inch length down and melt it a bit at a time by moving the flame around. Where the fit is tight, more heat pulls the filler through. Where a filet is needed, less heat is applied to the filler. But, where the filler needs to pull up on to the exiting tunnel, heat on the tunnel with an occasional dip onto the filler (to soften it up) pulls the edge right up. The net of this is the filler can vary from internal to filet and back as it works around the tunnel.
Don't get me wrong, file work will be necessary tomorrow to dress up the tunnel to tube transition - but it will be much easier than if there was a large filet all the way around.
Well, that's all I got done today. Well the above and soaking the flux off the tubes. So tomorrow I'll inspect my work and do any necessary filing. Then it will be time to get out the jig. The breathing holes need to be drilled in the head and seat tubes. Then test the fit up of tubes and lugs in the jig. If all is well, the tubes can be preped and fluxed and then it will be on to brazing. So there should be lots to report on in the next few days.
Cheers!
No pix yet, but tonight I finished the penultimate miter in the main triangle. After fitting up in the jig, I'll miter the bottom of the down tube. The rest are all done based on measurements from BikeCad and either miter templates provided by same, or scribing the profile of the inside of a lug. Anyhow, a test fit up looks good so we're almost ready to jig.
After the miters, it's important to take care of any fittings that go on the tubes. In this case, that means H2O mounts on the seat and down tubes, and a brake casing tunnel in the bottom of the top tube. The H2O mounts are pretty simple. Measure, mark, drill a pilot hole, drill out one size larger, then drill the final hole. A little clean up with a deburer, file and sandpaper and they're ready to prep for brazing.
The tunnel is a bit more work. First a mark the tube where I want to entrance and exit to be. These are approximate locations. Then its a similar process to the H2O mounts to drill holes - only this time there are more bits involved because the holes are bigger. Then its time to cut a length of brake line - this needs to be longer than the distance between the holes. Using a tube bender, I tilt each end about 45 degrees. The bends are slightly closer together than the holes in the top tube - so that the tunnel will stand away from the walls of the top tube once its brazed in place.
Next comes a large (12" I think) bastard cut round file. I use this holding it with two hands and cutting with the last 6" or less of the file. Using this I can elongate the hole s in the top tube. With a bit of back and forth to test fitting, the holes get finished off and the ends of the tunnel shortened until I can just pop it into place. Then it's time to pop it out of place so we can prep for brazing.
All three tubes spent some time in hot water with Wisk to remove any cutting oil left over from drilling holes. Then a dip in a degreaser just to make sure all is well. After this, I check that the edges of the holes are clean of burrs. Finally, the tubes get sanded with 80 grit on the inside and outside. The inside can be a bit of a trick to sand. I ended up making a flap sander for this purpose,. It's a piece of copper tube about 3/8" in diameter. One end has a slit cut in with a hacksaw. Then this was squeezed part way closed. Into the slit go pieces of sandpaper. Usually, I pull a 3" strip off a roll of 2" wide paper. This piece gets split lengthwise, and the to pieces are placed back to back - then shoved into the slit. The back to back thing makes sure that a rough side always faces the tube, no matter how the paper is put into the tube.
Anyhow, this gets chucked into my portable drill and shoved up the tube. Zing! The inside gets clean.
Then its time to flux everything up. I used Freddy's Stainless Light tonight. It was a little dry, so water was added before zapping in the microwave. The heat usually makes it easier to spread onto the tubes, and have it stick. I like the flux to have the consistency of slightly loose mashed potatoes. Done right, not to much falls off in the application process - and what stays there drys onto the tube if its allowed to sit for a little while. This makes it easier to keep the flux where I want it once the torch starts heating the tubes.
The H2O mounts are surrounded by decorative reinforcers. I try to get these straight before the flux drys. Its much easier this way than trying to poke them into position after things are heated up. Using a small tip and a soft but medium to large flame, I warm the area until the flux starts melting. As the flux gets clear, its time to add silver. I start by pointing at the actual threaded mount, and applying silver to the edge of its flange on top of the reinforcer. I point the tip of the flame into the threads (which have been fluxed) to draw this silver around the mount and down into the tube.
I don't like to apply too much filler here, because its easy to leave a glob on top of the reinforcer while pulling silver around the bottom. So I then apply filler first to the edge of one end of the reinforcer, and then to the other end. The end of the filler wire gets touched up against the edge of the reinforcer that is closet to me, while I direct the flame the other side of the reinforcer. This pulls the silver from the point of contact, under the reinforcer, to the far side. A little waving of the torch makes sure that silver is making it to the side points of the reinforcer. The same process is used at the other, end, but less filler is necessary because the first step filled more than half of the reinforcer. At this point, its important to look to see if there are gaps, globs, or other issues than can be best cleaned up now while the joint is hot. On both tubes, things looked great, so it was time to move on.
For the H2O mounts, I used a 56% Silver alloy. This gets very wet when heated and fits into small places well. For the brake casing tunnel, I use something called Filet Pro, which is a special formulation (I think high nickel content) for making silver based filets. It will wet out and I can pull it into tight places, but this takes work. On the other hand, it has a relatively wide band of temperatures at which it is plastic. And if the tubes aren't over heated, its possible to set a 3/8-1/2 inch length down and melt it a bit at a time by moving the flame around. Where the fit is tight, more heat pulls the filler through. Where a filet is needed, less heat is applied to the filler. But, where the filler needs to pull up on to the exiting tunnel, heat on the tunnel with an occasional dip onto the filler (to soften it up) pulls the edge right up. The net of this is the filler can vary from internal to filet and back as it works around the tunnel.
Don't get me wrong, file work will be necessary tomorrow to dress up the tunnel to tube transition - but it will be much easier than if there was a large filet all the way around.
Well, that's all I got done today. Well the above and soaking the flux off the tubes. So tomorrow I'll inspect my work and do any necessary filing. Then it will be time to get out the jig. The breathing holes need to be drilled in the head and seat tubes. Then test the fit up of tubes and lugs in the jig. If all is well, the tubes can be preped and fluxed and then it will be on to brazing. So there should be lots to report on in the next few days.
Cheers!
Monday, October 08, 2007
New Efforts
Well, two frames are being painted and should be back and built up in the next week or two, and the Path Racer is ready to go into the paint shop when I pick up the others. So its time for a new project.
I'd like to start on the bike for the winner of this years MS ride, but I'm still looking for the machinist who will turn down some lug spigots for that build. So, it's on a short hold.
As a consequence, I've started on a surprise bike. It has somewhat odd dimensions (one of the bene's of a custom build) - by memory they are 59 c-c seat tube & 57 c-c top tube. It's for someone long-legged.
This frame is using a set of lugs left over from when the Match frame shop closed. At one time they produced the Schwinn Paramount, and these are the lugs used on the Paramount.
I thought (memory is a tricky thing) that these used three main tubes all of 28.6mm diameter. Usually, either the top tube is a smaller diameter than the rest, or the down tube is a larger diameter than the rest. Which would make these lugs even more unique.
Alas, my memory is bad. These use a standard 1Xoversize tube set (31.7 dt, 28.6 st, 28.6 tt). Which is fine, I have the necessary tubes in stock, including a stainless head tube. When polished up, a stainless head tube really stands out + it really shows off lugs with fancy shapes and these Paramount lugs are definitely fancy.
Mostly this will be a pretty straight forward design. It's designed for a 700cX28 tire, although a 30 or 32 will probably fit as well. The chain stays are a medium length at 415mm. Not short, but not long either. I would have made them longer but with this rider, the weight tends to sit forward and I didn't want too much weight shifted to the front wheel.
Angles are 73 degrees parallel with about 51mm trail. This is a traditional racing trail from back in the days when they used wider tires, like the ones that will be used on this bike. It should be able to handle a front bag, but probably not more then 5 lbs or so in the bag.
With the 28mm tires, fenders will fit, so it will come with mounting points. Naturally it will be set up for two water bottles and a pump, and it's going to look something like this. Click to enlarge the picture. Two cautions: 1) don't pay too much attention to the numbers. They don't always represent the measurement that you would assume. 2) Colors haven't been selected by the client yet - these colors were just to give me something other than black & white to look at.
At the end of the day, this should be a pretty good road bike, but it will have the edges softened just a little to make it more flexible in use.
This picture gives a hint at what the head lugs are like. Note the head tube still needs a lot polishing.
See ya next time!
I'd like to start on the bike for the winner of this years MS ride, but I'm still looking for the machinist who will turn down some lug spigots for that build. So, it's on a short hold.
As a consequence, I've started on a surprise bike. It has somewhat odd dimensions (one of the bene's of a custom build) - by memory they are 59 c-c seat tube & 57 c-c top tube. It's for someone long-legged.
This frame is using a set of lugs left over from when the Match frame shop closed. At one time they produced the Schwinn Paramount, and these are the lugs used on the Paramount.
I thought (memory is a tricky thing) that these used three main tubes all of 28.6mm diameter. Usually, either the top tube is a smaller diameter than the rest, or the down tube is a larger diameter than the rest. Which would make these lugs even more unique.
Alas, my memory is bad. These use a standard 1Xoversize tube set (31.7 dt, 28.6 st, 28.6 tt). Which is fine, I have the necessary tubes in stock, including a stainless head tube. When polished up, a stainless head tube really stands out + it really shows off lugs with fancy shapes and these Paramount lugs are definitely fancy.
Mostly this will be a pretty straight forward design. It's designed for a 700cX28 tire, although a 30 or 32 will probably fit as well. The chain stays are a medium length at 415mm. Not short, but not long either. I would have made them longer but with this rider, the weight tends to sit forward and I didn't want too much weight shifted to the front wheel.
Angles are 73 degrees parallel with about 51mm trail. This is a traditional racing trail from back in the days when they used wider tires, like the ones that will be used on this bike. It should be able to handle a front bag, but probably not more then 5 lbs or so in the bag.
With the 28mm tires, fenders will fit, so it will come with mounting points.
 Naturally it will be set up for two water bottles and a pump, and it's going to look something like this. Click to enlarge the picture. Two cautions: 1) don't pay too much attention to the numbers. They don't always represent the measurement that you would assume. 2) Colors haven't been selected by the client yet - these colors were just to give me something other than black & white to look at.
At the end of the day, this should be a pretty good road bike, but it will have the edges softened just a little to make it more flexible in use.

This picture gives a hint at what the head lugs are like. Note the head tube still needs a lot polishing.
See ya next time!
Wednesday, October 03, 2007
Details details
Updated Oct 6

Back to work this evening. Yesterday I built fillets up on the head tube lugs similar to the seat cluster as seen in prior posts. I'm sorry, but you'll have to wait until tomorrow for pix. Anyhow, these will show how the raw filler looks after washing off the flux. The trick is to melt the filler enough to flow and bond, but not enough to 'wet out' and want to fall with gravity or the pull of heat. So the raw filler looks kinda smooth and lumpy.
This smooth and lumpy filler needs to be made into a finished joint, which is what I was doing tonight. 3 sizes of half round files, 5 sizes of full round files (including regular and chainsaw), plus a few other odd files and various sandpaper are the tools for this project. First, any odd nodules need to be 'knocked' off. A heavy work glove on the left hand allows it to be used as a guide for the bastard (course) files used here. Then a large half round comes in handy to begin shaping the contours.
In an ideal world, filler gets laid down perfectly symmetrically on the joint. But in reality, some of the shaping is to find the lowest common denominator. At the center, the lug spreads the farthest as does the filler, at the sides the lug is narrow and fairly flat, so filler isn't needed. In between, the size of the concave face of the filler varies infinitely - so the contour has to vary infinitely in shape from side to side. And, the shapes should be pleasing to the eye, without abrupt changes. Net net, there is a lot of eyeballing going on. Even when the shape looks good, and I've sanded it smooth, I'll find problems and have to go back to filing. This often happens 5 or 6 times on a fillet. But patience is rewarded with a nice looking fillet that will redefine how the lug looks under paint.
I'd like to say that the joints are all done. They are for tonight. But probably, by tomorrow, I'll decide that they need a little extra work.
I also brazed the rear fender mount tonight. This is a piece of stainless tubing with water bottle mount brazed to the end. The tube has bent with a nice arc near the end. At first the plan was to mount this to a chain stay, but tonight, the right solution presented itself. I trimmed off most of the straight portion and mitered the end to fit the seat tube. Mounting it about an inch above the point of the BB socket leads to having the fitting perfectly positioned for the fender. And the profile is of a graceful arc coming out of the seat tube, ending just above the chain stays.
Most of the flux came off with a wet rag. The rest is soaking should be gone by tomorrow.
At present, I'm thinking that this frame needs a pump peg. Several options present themselves: a) mount it just above the fender mount on the seat tube; b) mount it high on the left-side seat stay, allowing the bottom of the pump to rest on the track fork. The more that I think about it, the more I am leaning toward this latter option, but tomorrow will tell for sure.
Well I tried fitting the pump in between the left track fork and the seat cluster. Guess what? It fits in place beautifully without a peg of any kind.
That's all for tonight. Pictures tomorrow.

Back to work this evening. Yesterday I built fillets up on the head tube lugs similar to the seat cluster as seen in prior posts. I'm sorry, but you'll have to wait until tomorrow for pix. Anyhow, these will show how the raw filler looks after washing off the flux. The trick is to melt the filler enough to flow and bond, but not enough to 'wet out' and want to fall with gravity or the pull of heat. So the raw filler looks kinda smooth and lumpy.
This smooth and lumpy filler needs to be made into a finished joint, which is what I was doing tonight. 3 sizes of half round files, 5 sizes of full round files (including regular and chainsaw), plus a few other odd files and various sandpaper are the tools for this project. First, any odd nodules need to be 'knocked' off. A heavy work glove on
 the left hand allows it to be used as a guide for the bastard (course) files used here. Then a large half round comes in handy to begin shaping the contours.
 In an ideal world, filler gets laid down perfectly symmetrically on the joint. But in reality, some of the shaping is to find the lowest common denominator. At the center, the lug spreads the farthest as does the filler, at the sides the lug is narrow and fairly flat, so filler isn't needed. In between, the size of the concave face of the filler varies infinitely - so the contour has to vary infinitely in shape from side to side. And, the shapes should be pleasing to the eye, without abrupt changes. Net net, there is a lot of eyeballing going on. Even when the shape looks good, and I've sanded it smooth, I'll find problems and have to go back to filing. This often happens 5 or 6 times on a fillet.
 But patience is rewarded with a nice looking fillet that will redefine how the lug looks under paint.
I'd like to say that the joints are all done. They are for tonight. But probably, by tomorrow, I'll decide that they need a little extra work.
I also brazed the rear fender mount tonight. This is a piece of stainless tubing with water bottle mount brazed to the end. The tube has bent with a nice arc near the end. At first the
 plan was to mount this to a chain stay, but tonight, the right solution presented itself. I trimmed off most of the straight portion and mitered the end to fit the seat tube. Mounting it about an inch above the point of the BB socket leads to having the fitting perfectly positioned for the fender. And the profile is of a graceful arc coming out of the seat tube, ending just above the chain stays.
Most of the flux came off with a wet rag. The rest is soaking should be gone by tomorrow.
At present, I'm thinking that this frame needs a pump peg. Several options present themselves: a) mount it just above the fender mount on the seat tube; b) mount it high on the left-side seat stay, allowing the bottom of the pump to rest on the track fork. The more that I think about it, the more I am leaning toward this latter option, but tomorrow will tell for sure.
Well I tried fitting the pump in between the left track fork and the seat cluster. Guess what? It fits in place beautifully without a peg of any kind.
That's all for tonight. Pictures tomorrow.
Monday, September 24, 2007
More Bits and Pieces

Today was good for progress on some small bits of the Path Racer. For starters, I drilled and tapped mounting holes in the track forks.
You can see how the bolt fits into the curve at the end of the stay. I'll be fabbing up some custom connectors for the fender stays that will fit in place of the bolt.
You can also see how on, the chain stay, I've cut back into the pin (nail) used to hold it in place while brazing. I'll have to work that a little differently next time.
By the way, there is a weird shadow in the picture that makes the bottom edge of the track fork look carved out. It's not, instead it forms a straight line up to the bend,and then tapers gently towards the stay.
I also tried out some new filler today (from Fred Parr) which is designed to build up fillets. The lugs have a very abrupt transition from one spigot to the next, and I
 wanted to try smoothing the transition out. Here's an example from the seat lug. Take a peek at the edge of the outline - that looks nice to me.
Based on the results, I'm going to try the head lugs too.
Finally, I spent some time playing with polishing crank arms. Here are three arms in various states of polish:

Sorry for the glare, but I wanted to get in close with the camera.
That's it for tonight.
Toddles!
Sunday, September 23, 2007
Odds 'n Ends
Since dropping frames off for paint, I've been moving a little bit slowly in the shop and getting in a few more miles on the road. The next two weeks may be more of the same as we are going out of town next week for a long weekend to attend a wedding. Still, there are a few things to share which you may find of interest. Hence, Odds 'n Ends.
First my Stein Stronglight crank-puller arrived along with a VAR that works on modern cranks and older TAs (another unique crank thread). So the Path Racer is fully torn down and I'm working on final surface prep, but probably won't get this to the painter for 2-3 weeks.
Using the Stein/Stronglight puller, the fit is very tight. So much so, that I stopped installing it, and tried the VAR/TA. The TA is too small. It threads in nicely, but has a very loose fit, which worries me about damaging the threads. So, I reverted to the Stein/Stronglight and used a wrench to turn it in. The crank pulled out easily and it wasn't too difficult to remove the puller. But a small sliver of aluminum fell out while removing the puller, which has me a little concerned. I think I'll contact Stein before using this on my Stronglight 49 crankarms.
Having pulled the Stronglight 93 arms, I tried doing a little polishing on the right arm. Most of the face cleaned up nicely, but these was a spot that wouldn't come out (I'll have to post some pictures). My guess is that something got on the arm and caused some corrosion, leaving a small area with a pitted surface. I tried sanding the area, and then filing it lightly. But neither will get to the bottom of this pitting without changing the contour of the outer face of the crank. I guess I'll have to do some research on methods to repair this surface.
A new set of Velo-Orange fenders arrived this week (for the Path Racer). They appear very well formed, and of reasonable weight. The stays are good, as is most of the hardware. On the Velo-Orange site, it's noted that the fork attachment isn't as nice as the one that comes from Honjo. But, I find that, half the time, I need to fabricate a custom attachment anyhow, so that doesn't concern me very much.
These fenders cost about 1/2 of the comparable Honjos, but they come unfinished. The raw aluminum sheet is formed, packaged, and shipped. I did some test polishing on one of these fenders to see how hard this would be. I put a buffer in the drill press, running at its highest speed (3150 RPM). First I tried Simichrome polish. I does a nice job, to a point. The fender become shiny. But, there are some typical imperfections in the aluminum that it doesn't easily address.
Next up was some buffing compound (designed for steel). I have several, including one that is courser for cutting and one that is finer for polishing. Even the finer compound did a better job than the Simichrome at removing the surface imperfections. And, I couldn't see improvements in the finish after applying Simichrome on top of the area that had been worked with the buffing compound. My guess, is that it'll take me about an hour per fender to polish them to a satisfactory state.
I was concerned about the durability of the polished surface - would it oxidize, discolor, whatever? After doing a bit of research, it appears that a thin oxide layer quickly forms. This layer protects the underlying aluminum and generally looks fine. So I'm going to try going without any overcoat (Shellac, clear-coat, whatever).
Well, that's it for now. See ya next time.
First my Stein Stronglight crank-puller arrived along with a VAR that works on modern cranks and older TAs (another unique crank thread). So the Path Racer is fully torn down and I'm working on final surface prep, but probably won't get this to the painter for 2-3 weeks.
Using the Stein/Stronglight puller, the fit is very tight. So much so, that I stopped installing it, and tried the VAR/TA. The TA is too small. It threads in nicely, but has a very loose fit, which worries me about damaging the threads. So, I reverted to the Stein/Stronglight and used a wrench to turn it in. The crank pulled out easily and it wasn't too difficult to remove the puller. But a small sliver of aluminum fell out while removing the puller, which has me a little concerned. I think I'll contact Stein before using this on my Stronglight 49 crankarms.
Having pulled the Stronglight 93 arms, I tried doing a little polishing on the right arm. Most of the face cleaned up nicely, but these was a spot that wouldn't come out (I'll have to post some pictures). My guess is that something got on the arm and caused some corrosion, leaving a small area with a pitted surface. I tried sanding the area, and then filing it lightly. But neither will get to the bottom of this pitting without changing the contour of the outer face of the crank. I guess I'll have to do some research on methods to repair this surface.
A new set of Velo-Orange fenders arrived this week (for the Path Racer). They appear very well formed, and of reasonable weight. The stays are good, as is most of the hardware. On the Velo-Orange site, it's noted that the fork attachment isn't as nice as the one that comes from Honjo. But, I find that, half the time, I need to fabricate a custom attachment anyhow, so that doesn't concern me very much.
These fenders cost about 1/2 of the comparable Honjos, but they come unfinished. The raw aluminum sheet is formed, packaged, and shipped. I did some test polishing on one of these fenders to see how hard this would be. I put a buffer in the drill press, running at its highest speed (3150 RPM). First I tried Simichrome polish. I does a nice job, to a point. The fender become shiny. But, there are some typical imperfections in the aluminum that it doesn't easily address.
Next up was some buffing compound (designed for steel). I have several, including one that is courser for cutting and one that is finer for polishing. Even the finer compound did a better job than the Simichrome at removing the surface imperfections. And, I couldn't see improvements in the finish after applying Simichrome on top of the area that had been worked with the buffing compound. My guess, is that it'll take me about an hour per fender to polish them to a satisfactory state.
I was concerned about the durability of the polished surface - would it oxidize, discolor, whatever? After doing a bit of research, it appears that a thin oxide layer quickly forms. This layer protects the underlying aluminum and generally looks fine. So I'm going to try going without any overcoat (Shellac, clear-coat, whatever).
Well, that's it for now. See ya next time.
Thursday, September 20, 2007
Tuesday - D-Day
Tuesday was my D-Day. I had an appointment to drop two frames off with Duane for paint. Only there was a problem with the Path Racer.
Stronglight cranks (until recently) used their own proprietary crank pullers. I used to have one and believed it was still around. I could remember what it looked like and approximately where to find it in my old tools and components.
So, post shakedown, I started taking the Path Racer apart. When it was time to pull the cranks, a quick search found my Stronglight puller. Only, it was a Sugino puller. URGH!!!!! So the cranks are still in place (everything else is off). Apparently Stein is the only tool maker to still offer a Stronglight puller, thankfully they do. So I ordered one and a TA old-style puller as well. But until they arrive, the bike can't go to the painter.
Therefore it was time to come up with plan B. My first-ever frame was built without a jig or alignment table. The trick to this is to put a beam across the seat tube and either the head tube or down tube. Because the seat tube doesn't generally have the same diameter as these other tubes, shims must be used to keep the beam parallel with the centerline of the frame. Then the dropouts can be located laterally from the beam with a ruler.
I apparently calculated my shims wrong and ended up with a mis-aligned rear triangle. URGH!!!! From this I went on to build my next bike nice and straight. Now my frames rarely need a tweek of anything on the alignment table. Even when a tweak is required, it is in the build sequence and not afterwards. Knock on wood that things continue this way.
About 4 months ago, I cut out the rear triangle from frame numero uno and started over. This time withe nice stainless Henry James drop-outs. Even though this largely completed the frame, it's been sitting and waiting for final bits and cleanup.
Meanwhile, I have assembled a straight leg fork for this bike, with a polished crown and polished tips.
On Sunday I began final prep on this bike so that it could go to Duane's with the Randonneur. This included: thinning lugs; mounting a brake bridge on the seat stays; cleaning lug edges; polishing the dropouts; filing and sanding excess filler around the H20 mounts, double checking alignment, honing the seat and head tubes, milling the head tube, etc.
This kept me busy through Monday evening. Tuesday if was off to Duane's. Jody was there to help with color choices. Janet had already chosen a blue in the decals for the rando bike. Duane will use a slightly darker shade to outline the fancy Prugnat lugs. It should be pretty when done.
One the other bike, Jody helped steer us to a nice sage green metallic. We're going with a fairly fine grain to the metallic, and using silver lug lines. The silver will hopefully work well off of the polished stainless and the silver lettering in the down tube decals.
So it's time to clean up the shop again, and then start work on Charlies little carbon racer.
I took one of the Nervex arms with the stripped out pedal threads and gave it a quick polish. It looks nice. Clearly a better polish job is warranted, although it won't be possible to make them like new as there are some obvious nicks in the arms. Meanwhile, I drilled it out at a 150mm length and threaded it for the pedal. Next the old end will be cut off, the shape cleaned up with a file and sandpaper and then a real polish job. I figure the two arms are going to take a couple of days by themselves.
That's it for today - see you soon.
Stronglight cranks (until recently) used their own proprietary crank pullers. I used to have one and believed it was still around. I could remember what it looked like and approximately where to find it in my old tools and components.
So, post shakedown, I started taking the Path Racer apart. When it was time to pull the cranks, a quick search found my Stronglight puller. Only, it was a Sugino puller. URGH!!!!! So the cranks are still in place (everything else is off). Apparently Stein is the only tool maker to still offer a Stronglight puller, thankfully they do. So I ordered one and a TA old-style puller as well. But until they arrive, the bike can't go to the painter.
Therefore it was time to come up with plan B. My first-ever frame was built without a jig or alignment table. The trick to this is to put a beam across the seat tube and either the head tube or down tube. Because the seat tube doesn't generally have the same diameter as these other tubes, shims must be used to keep the beam parallel with the centerline of the frame. Then the dropouts can be located laterally from the beam with a ruler.
I apparently calculated my shims wrong and ended up with a mis-aligned rear triangle. URGH!!!! From this I went on to build my next bike nice and straight. Now my frames rarely need a tweek of anything on the alignment table. Even when a tweak is required, it is in the build sequence and not afterwards. Knock on wood that things continue this way.
About 4 months ago, I cut out the rear triangle from frame numero uno and started over. This time withe nice stainless Henry James drop-outs. Even though this largely completed the frame, it's been sitting and waiting for final bits and cleanup.
Meanwhile, I have assembled a straight leg fork for this bike, with a polished crown and polished tips.
On Sunday I began final prep on this bike so that it could go to Duane's with the Randonneur. This included: thinning lugs; mounting a brake bridge on the seat stays; cleaning lug edges; polishing the dropouts; filing and sanding excess filler around the H20 mounts, double checking alignment, honing the seat and head tubes, milling the head tube, etc.
This kept me busy through Monday evening. Tuesday if was off to Duane's. Jody was there to help with color choices. Janet had already chosen a blue in the decals for the rando bike. Duane will use a slightly darker shade to outline the fancy Prugnat lugs. It should be pretty when done.
One the other bike, Jody helped steer us to a nice sage green metallic. We're going with a fairly fine grain to the metallic, and using silver lug lines. The silver will hopefully work well off of the polished stainless and the silver lettering in the down tube decals.
So it's time to clean up the shop again, and then start work on Charlies little carbon racer.
I took one of the Nervex arms with the stripped out pedal threads and gave it a quick polish. It looks nice. Clearly a better polish job is warranted, although it won't be possible to make them like new as there are some obvious nicks in the arms. Meanwhile, I drilled it out at a 150mm length and threaded it for the pedal. Next the old end will be cut off, the shape cleaned up with a file and sandpaper and then a real polish job. I figure the two arms are going to take a couple of days by themselves.
That's it for today - see you soon.
Thursday, September 13, 2007
Path Racer Trial
As noted in the previous post, yesterday was trial day for the Path Racer. So how did it go? Generally quite well.
It's hard to over emphasize how big a 700Cx35x38 tire is. Someone who had seen the tires on the shelf, felt the need to comment on their size after seeing them on the bike. They aren't as wide as an old Schwinn, but they're tall. And with my weight on the bike, the bottom squishes way out. So much so, that I went back to the Berto chart of suggested pressure for tire size and bike/rider weight. All was correct so I pushed off.
As I've gotten older, my hands have gotten more and more sensitive while riding - to the point I can now claim to have Cyclists Palsey. The tingly/numbness can last for hours after a ride. On the black track bike (which can be seen at www.CyclesNoir.com), I've switched to upright bars, and then had to add Oury grips to give me a cushioned perch. Otherwise, a 30 minute ride left my hands tingly for a couple of hours.
On the PR (Path Racer) shake down ride, I had some stiff Nitto drop bars. They weren't taped, but had a set of Oury's on the bottom for just-in-case. Generally, the bars are a bit slippery without tape and require a tight grip which can lead to cramping and exacerbate Cyclists Palsey. After two hours, my hands were fine. I felt like a young man again.
The PR's frame is 531 standard gauge in a 1.0/0.7/1.0 profile - so it's not light. And, while it isn't the stiffest frame I've ever ridden, it's not a slouch either. Those heavy wall tubes do their job. Combining these tubes with the tires (which I estimate at between 700 and 800 grams each) and you end up with a pretty heavy bike.
The heavy tires are felt under acceleration. The PR doesn't sprint as well as my road bike - not that I expected it to. But otherwise, it doesn't feel heavy under the saddle. The tires roll pretty well, considering that they aren't performance tires. Coasting isn't a problem, nor is maintaining a steady speed. And in some circumstances, its possible to go a little faster than usual because of the cushioning provided by the tires. So far - so good.
Handling is interesting - which isn't bad, just not quite what I expected. The tires provide a significant amount of stability. It can change direction quickly, that's not an issue, but it's as if the steering has a dampener in many circumstances. I need to decide whether to further rake the fork (and reduce trail), or leave it with the assumption that the next set of tires will be a little smaller/lighter.
Rolling down the road, the PR feels like its on rails. And this impression rises quickly with speed. Nonetheless, it's easy to turn the bars and this registers as an immediate reaction from the bike. Going around corners, the size of tire makes everything seem very planted. Lean angles that normally would feel 'at the limit' don't. But it is possible to steer to a tighter or looser line. On the other hand, leaning the bike takes more effort. Some of this may be due to the overall weight, and some to the increased centrifugal force from the big tires. The effect isn't unpleasent, just different.
Climbing was also interesting. I consider low-speed climbs to be a good test of effective bicycle geometries. Poor designs, tend to wander all over the road. The want to fall off of their line, and need a little burst of speed to be pointed back uphill. The path racer doesn't do this at all - so good. But, when standing, as the bike swings back and forth, the front wheel steers from side to side, about six inches either way from the center line. There is no loss of control - the wheel returns to straight ahead easily as the bike returns to vertical. But it doesn't want to track a perfectly straight line while standing. It may be that, with a loaded handlebar bag, this behavior will be dampened out. Time will tell.
Meanwhile, I have to mount that rear brake bridge and a couple of rear fender fittings, give it a final file and sand everything down. Tuesday evening it's scheduled to go to Duane's for some new paint. I'm still thinking about colors - so you'll just have to wait and see what we come up with.
Cheers
It's hard to over emphasize how big a 700Cx35x38 tire is. Someone who had seen the tires on the shelf, felt the need to comment on their size after seeing them on the bike. They aren't as wide as an old Schwinn, but they're tall. And with my weight on the bike, the bottom squishes way out. So much so, that I went back to the Berto chart of suggested pressure for tire size and bike/rider weight. All was correct so I pushed off.
As I've gotten older, my hands have gotten more and more sensitive while riding - to the point I can now claim to have Cyclists Palsey. The tingly/numbness can last for hours after a ride. On the black track bike (which can be seen at www.CyclesNoir.com), I've switched to upright bars, and then had to add Oury grips to give me a cushioned perch. Otherwise, a 30 minute ride left my hands tingly for a couple of hours.
On the PR (Path Racer) shake down ride, I had some stiff Nitto drop bars. They weren't taped, but had a set of Oury's on the bottom for just-in-case. Generally, the bars are a bit slippery without tape and require a tight grip which can lead to cramping and exacerbate Cyclists Palsey. After two hours, my hands were fine. I felt like a young man again.
The PR's frame is 531 standard gauge in a 1.0/0.7/1.0 profile - so it's not light. And, while it isn't the stiffest frame I've ever ridden, it's not a slouch either. Those heavy wall tubes do their job. Combining these tubes with the tires (which I estimate at between 700 and 800 grams each) and you end up with a pretty heavy bike.
The heavy tires are felt under acceleration. The PR doesn't sprint as well as my road bike - not that I expected it to. But otherwise, it doesn't feel heavy under the saddle. The tires roll pretty well, considering that they aren't performance tires. Coasting isn't a problem, nor is maintaining a steady speed. And in some circumstances, its possible to go a little faster than usual because of the cushioning provided by the tires. So far - so good.
Handling is interesting - which isn't bad, just not quite what I expected. The tires provide a significant amount of stability. It can change direction quickly, that's not an issue, but it's as if the steering has a dampener in many circumstances. I need to decide whether to further rake the fork (and reduce trail), or leave it with the assumption that the next set of tires will be a little smaller/lighter.
Rolling down the road, the PR feels like its on rails. And this impression rises quickly with speed. Nonetheless, it's easy to turn the bars and this registers as an immediate reaction from the bike. Going around corners, the size of tire makes everything seem very planted. Lean angles that normally would feel 'at the limit' don't. But it is possible to steer to a tighter or looser line. On the other hand, leaning the bike takes more effort. Some of this may be due to the overall weight, and some to the increased centrifugal force from the big tires. The effect isn't unpleasent, just different.
Climbing was also interesting. I consider low-speed climbs to be a good test of effective bicycle geometries. Poor designs, tend to wander all over the road. The want to fall off of their line, and need a little burst of speed to be pointed back uphill. The path racer doesn't do this at all - so good. But, when standing, as the bike swings back and forth, the front wheel steers from side to side, about six inches either way from the center line. There is no loss of control - the wheel returns to straight ahead easily as the bike returns to vertical. But it doesn't want to track a perfectly straight line while standing. It may be that, with a loaded handlebar bag, this behavior will be dampened out. Time will tell.
Meanwhile, I have to mount that rear brake bridge and a couple of rear fender fittings, give it a final file and sand everything down. Tuesday evening it's scheduled to go to Duane's for some new paint. I'm still thinking about colors - so you'll just have to wait and see what we come up with.
Cheers
CLB Brakes
Yesterday afternoon was spent on a two hour shake-down ride with the path racer. So far, it still only has the front brake - and that's worth some comment.
The brakes are some NOS CLBs that I picked up from Velo-Orange. They're sidepull brakes with about a 47-60mm reach. In todays terms, this is long-reach, although at the date of their manufacture (probably early 70's) they would have been considered medium-reach.
These are not the classiest brakes on the block. The finish is a greyish/silverish paint with a little sticker that says "CLB". The bolts that hold the brake shoes have an agricultural look with a hex head in which there is also a slot cut for Phillips screwdriver. Nonetheless, these brakes are full of good design and work really well.
First of all, if you looked at the pictures in the previous post, it's clear that they were designed to provide fender clearances. This is too often overlooked in the design of longer modern sidepull brakes.
In the head-on picture, the front arm has a little tab on the right. Behind that, on the rear arm, is a nylon bearing. This ensures that under heavy braking, when the arms flex, they won't bind up on each other. This should contribute to better brake feel/control - but I've never seen it on another brake.
What isn't visible in the pictures is how the back of the arms fit around the brake bolt. For the most part, the arms are in a single plane. However, at the brake bolt, the forward arm sweeps forward and across the rear arm as it reaches for the brake cable. The sweep is elegantly designed to be hollowed out with stiffening tabs that run from front to back. The rear arm also gets a hollow before coming to the portion that forms the bearing on the brake bolt. The result of this is stiff yet light arms. Good on CLB.
After looking at them closely, I'm going to have to weigh them on a digital scale just to see how they do.
All of this is for naught, of course, if the brakes don't work well. The first time the brake was applied, the bike was moving slowly and the braking seemed rather anemic. The next time, I was at speed and pulled hard on the lever. It took about a revolution of the front wheel to break through the old surface of the brake pad - then the brakes grabbed right-now! Having got the pads bedded in, they offer lots of stopping power and good modulation. Combined with the fender clearances, more of CLBs are on my shopping list.
In the mean time, the levers sport the drilled-out look - kinda cool. So I'm thinking of removing the paint from the calipers and levers, and polishing the aluminum to a nice luster. This should enhance the overall look of the Path Racer.
The brakes are some NOS CLBs that I picked up from Velo-Orange. They're sidepull brakes with about a 47-60mm reach. In todays terms, this is long-reach, although at the date of their manufacture (probably early 70's) they would have been considered medium-reach.
These are not the classiest brakes on the block. The finish is a greyish/silverish paint with a little sticker that says "CLB". The bolts that hold the brake shoes have an agricultural look with a hex head in which there is also a slot cut for Phillips screwdriver. Nonetheless, these brakes are full of good design and work really well.
First of all, if you looked at the pictures in the previous post, it's clear that they were designed to provide fender clearances. This is too often overlooked in the design of longer modern sidepull brakes.
In the head-on picture, the front arm has a little tab on the right. Behind that, on the rear arm, is a nylon bearing. This ensures that under heavy braking, when the arms flex, they won't bind up on each other. This should contribute to better brake feel/control - but I've never seen it on another brake.
What isn't visible in the pictures is how the back of the arms fit around the brake bolt. For the most part, the arms are in a single plane. However, at the brake bolt, the forward arm sweeps forward and across the rear arm as it reaches for the brake cable. The sweep is elegantly designed to be hollowed out with stiffening tabs that run from front to back. The rear arm also gets a hollow before coming to the portion that forms the bearing on the brake bolt. The result of this is stiff yet light arms. Good on CLB.
After looking at them closely, I'm going to have to weigh them on a digital scale just to see how they do.
All of this is for naught, of course, if the brakes don't work well. The first time the brake was applied, the bike was moving slowly and the braking seemed rather anemic. The next time, I was at speed and pulled hard on the lever. It took about a revolution of the front wheel to break through the old surface of the brake pad - then the brakes grabbed right-now! Having got the pads bedded in, they offer lots of stopping power and good modulation. Combined with the fender clearances, more of CLBs are on my shopping list.
In the mean time, the levers sport the drilled-out look - kinda cool. So I'm thinking of removing the paint from the calipers and levers, and polishing the aluminum to a nice luster. This should enhance the overall look of the Path Racer.
Subscribe to:
Posts (Atom)