skip to main |
skip to sidebar
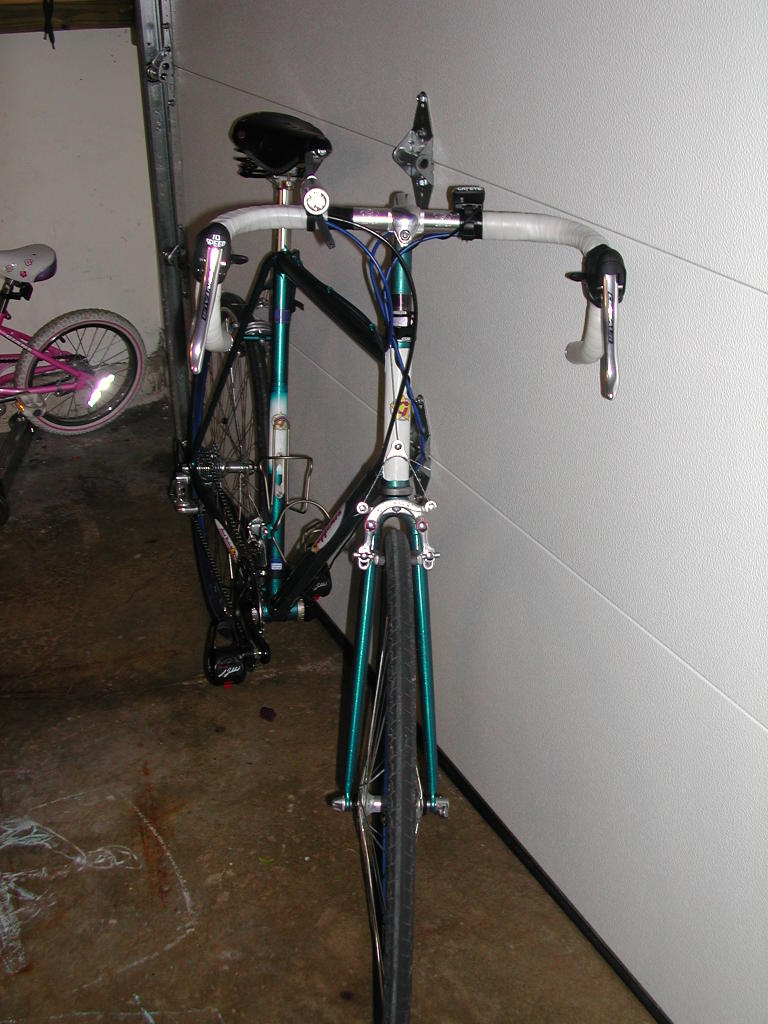
 Here's what the front end looks like complete with NOS Mafac brakes!
 The final layout of the stem and steerer are yet to be resolved. You can see the system here that is used to hold the headset together while using a quill stem.
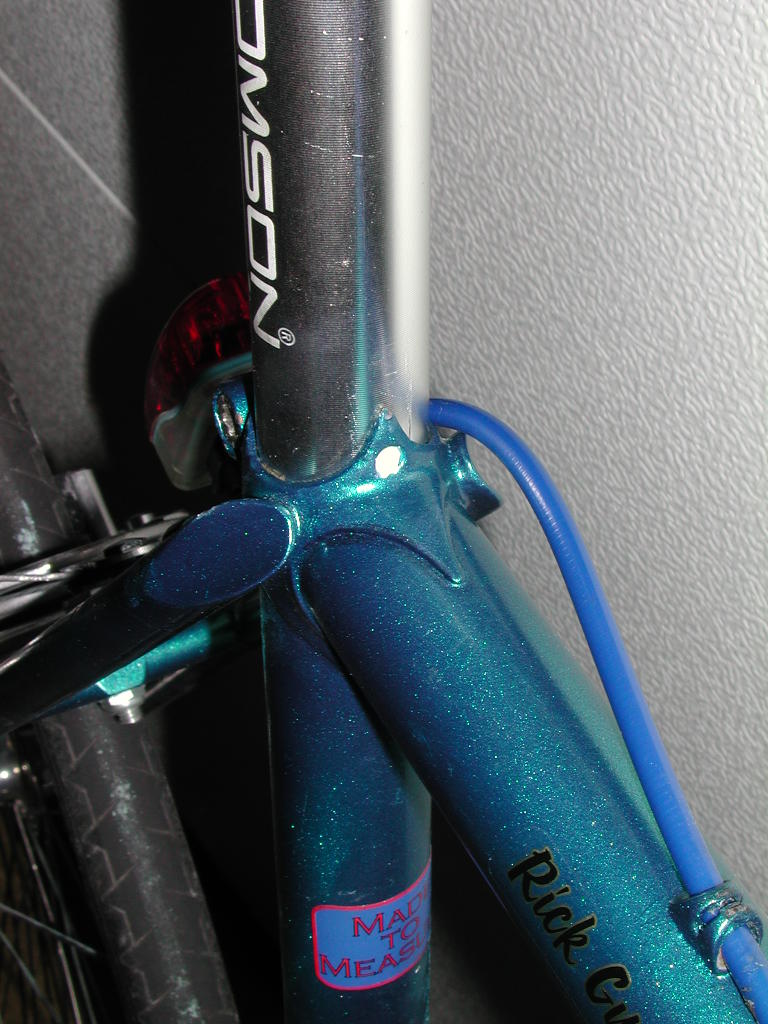
 Trying to show off by placing a dab of white paint into the hole drilled through the lug.
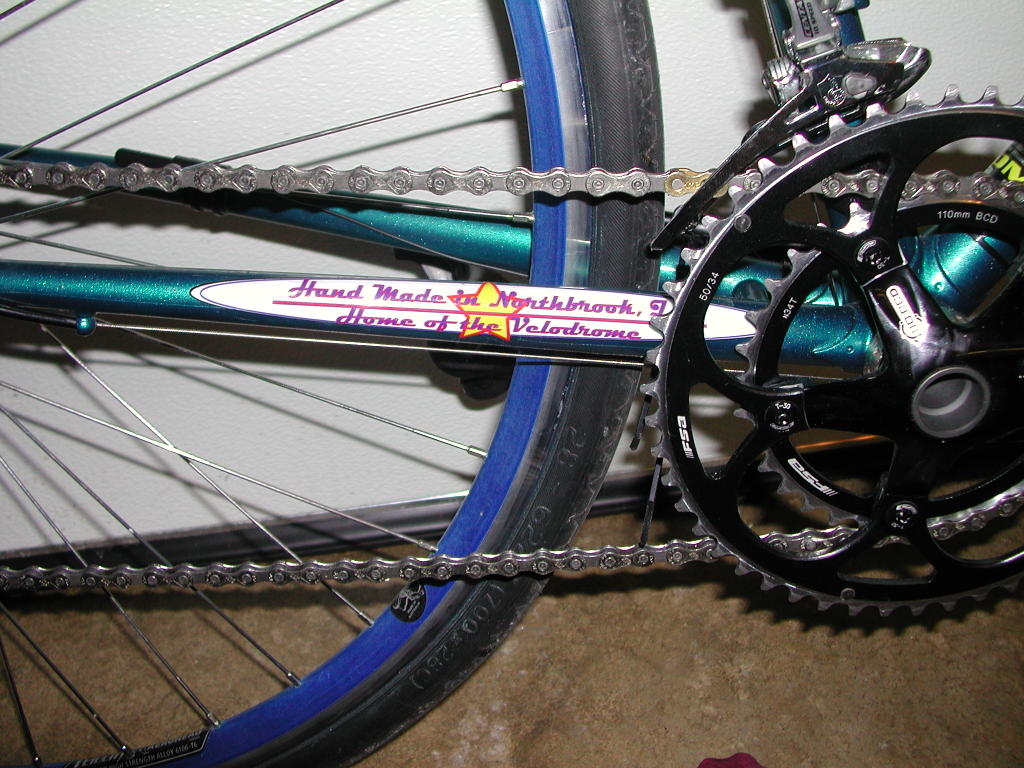
 Generally the rear triangle looks clean, but next time I'll put the cable stop on the other stay to simplify routing the cable away from the seat post bolt.
 And here's the story!
 A straight post and Brooks Conquest are a bad combo from a fit perspective. Time to dig out another post.
Well I couldn't wait any longer, I had to take a ride. Wednesday nite I built everything up (without having completed the paint) and yesterday morning Nick and I went for a ride with me on my new frame.First of all, the ride is a dream! I rides like an old fashioned Cadillac - smooth. This is probably due to the 28mm tires and the sprung saddle - but it really doesn't matter - this is a bike that won't beat me up on a Century. Charlie (my 6 year old) wants me to insert his name here - done.Back to the bike, it seems perfectly stiff - no noticeable flex anywhere. It responds nicely to my kick up a hill. The handling is steady, not twitchy, but seems to be capable of steering anywhere I want it to go to miss a bump, hole, or whatever.It looks and feels like the wheels track one another well. All of this said, there appears to be a slight misalignment of the rear triangle that causes the chainline to be slightly off center. Grumble.Well, I tuned a couple of items tonight and mounted the computer. I'll ride in the morning with my friends - hope they won't be too bummed out by the paint. Then, I'm thinking I'll keep riding it until its snows. That way, I can trash the current paint and keep learning about this frame. At that point, I'll get it bead blasted, straighten the rear end, and have it painted right.That's all for tonight.Cheers
My steerer reamer arrived today! It's another cheap Indian adjustable reamer from Enco. I couldn't wait to try it out.The tube only needs a tiny bit cleared off. Even so, its slow going. This reamer only lets me make the tiniest adjustments at a time. I'm guessing that this is because the tube diameter (7/8") is so small. The tighter circle probably makes it harder for the reamer to plane off nice smooth shavings. So far, the steerer has only been cleared down to the upper headset cup. There is 8" of steerer above the cup, so this is a bit of work already. On the other hand, I have a Nitto Technomic stem (can you say long) - and need to ream the tube down farther.All of that said, I couldn't wait to finally see how this bike rides. Remember, there's no chain on the bike yet, nor brakes. But, I popped the new Thompson stem in, mounted my Brooks conquest sprung saddle (guessing at the height), and the wheels with my nice 28mm tires.Putting my foot on the pedal was a little hard. When I tried to turn it right side up, the crank would spin away. Anyway, having got my left foot mounted, I pushed off several times with my right, the way we did when I was a kid - thus getting up some speed (maybe 5-7 mph) and coasted several times around the cul-de-sac. So far so good - nothing breaking, nothing rubbing, and no lack of control. So, it was launch again this time up the block. Then back down. A few more laps and I was done.Results: 1) It felt great. The ride over the bumps (old concrete street) were muted. I think this is more due to tires than seat, but I've accomplished one design goal. 2) It felt more comfortable no-handed than my Trek. I should qualify this. At some point (maybe less than 3 mph) wheel flop becomes excessive on the new bike. This is with a 73 degree head angle and 61mm of rake. The front tire is way out there. Above that, there is still some flop on center - but it feels predictable. The Trek has always felt skittish at all speeds - this bike feels much better even with its flop. And, when it is turning, the flop seems to go away. That is, it's an on center phenomena that seems to disappear as the bike tips and makes its way around a curve. Finally, with both hands on the bars, I don't feel the wheel trying to flop, even on center. Obviously, mounting an chain and some brakes will allow me to further explore handling - over a much broader range of speeds. 3) Wheee!!! It's fun to finally be on my bike - even though its incomplete. My decal paper has arrived, and I think my decal sheet is ready to print - so I'm positioned to finish finishing the bike. I'm also charged up again to make progress. The Steerer needs some more reaming. The paint work needs completion. I'd like to do some polishing of the dropout faces. And, then all the gear needs to be installed and fiddled to proper operation. Naturally, the paintwork will be the slowest part of all this. But, I'll be showing the complete product to my friends shortly. Yahoo!
Nick (my oldest son) and I spent a bit of time Saturday on shop organization.We extended the back of one bench top almost 10" for more surface area. This should result in our being able to put both the grinding wheel and the drill press at the end of the base of the L formed by the bench-top. That change alone will make a big difference in workspace, and give me more room around the grinder to manipulate large and awkward objects.We also mounted about 4 linear feet of peg board creating more tool storage locations. We have another 4 feet to do, but already much is out of the way. Now all the handles for my frame-reamers/facers/taps are hanging up, also the frame alignment tools. Further, other bike tools (brakes/BB/etc) are now consolidated here as well. Part of the need for putting up 4 more feet of peg board comes from files. I have amassed quite a collection - many more than I ever would have imagined when I began this venture. Partly this is due to sloppy brazing. As I learn to control the silver better, there is less to clean up. But, when there's silver to clean up, it takes a variety of files (including rotary) to do a nice clean job. Part of the mess comes from realizing that using the correct size file makes coping tubes easier, and similarly having different grades allows one to hog out metal quickly and then leave it with a nice finish. But, I have to admit that there's one other reason why my workbench is drowning in files. I don't know what to do with the old dull ones. Partly, I have a hard time saying: "Yep, this file is shot, time to replace it." So, I may get out a new file, but keep the old one around - never accepting it's fate. The other issue is: what to do with old files? I'm not aware of being able to have them sharpened or reconditioned - if any of you are, please let me know. Otherwise, what should I do with them? I suppose the recycle bin is the best alternative - and considering that many of my files were purchased cheaply, that shouldn't be a tough decision - but it is. It's not romance or love for the tool that holds me back. It's not clear what is holding me back. But if I can break through this barrier, I'll have a cleaner workbench and hence probably do finer work. I need to go into the shop with some focus this week and clear out this old steel.A related challenge is that I acquire files much more quickly than handles. Naturally, as old files die, their handles can be repurposed to new ones. But, the range of files used has grown faster than the number of handles as well. As a side note; too many handles don't necessarily fit files of the size they are rated to fit. Anyhow, its time to bite the bullet and buy another half dozen handles. On other fronts: 1) Work continues to be postponed on the external quill stem. I'm waiting until shop reorg is complete.2) My new threadless stem arrived - but it's a 1.125" and I ordered 1". I suppose I can find some shims, but this isn't proving to be the speedy solution I hoped for.3) My reamer for the Steerer hasn't arrived. Hopefully today so I can finish off frame #090105.I've been trying to find an economical source for a build-kit for my daughters bike. Its no doubt a market niche, hence it takes some research. So far, the cost of a good (not great) set of wheels in her size is the same as for an adult sized bike. And, I'm not looking for BMX wheels even though they have the same diameter. Either I need something based on hub gearing or on a multi-cog freewheel/freehub.It occurred to me that the place where the most construction takes place around small wheels is with 'bents. Considering this, I thought to look for web sites servicing bent builders. I found www.gaerlan.com, and sure enough, it looks like they can help me put together an "affordable" build kit. I'm probably still looking at $400 (despite having some pieces already in stock) but this seems like a workable number. Even more so because it involves parts which will be reusable when Sarah outgrows her frame. Sometime late this year or early next year, I'll make this investment.Well, enough for now. Gotta get back to work.
Slow but Expensive - that's my new motto. SLOW:Frame 090105 still isn't complete. Two issues are at hand: fitting a stem and re-painting the white panels. The latter can wait, but the former keeps the frame unrideable.Right now, the crank and derailers are installed. Interesting, for all the calculating done in advance, the hanger is a bit low. The derailer fits OK, but its at the top of the hangers slot. Have to remember that for next time.The headset is installed and working nicely. The seat-tube needs another reaming but that's small potatoes.So what's the holdup you ask?STEM: Nowhere have I heard of or read about reaming out the steerer to fit a stem. Now using a traditional stem in a threadless steerer might be stretching things a bit. But, I did expect it would slide in. No go. Went back to my books, and finally found something in the Proteus Guide to Framebuilding about reaming out a stem. OK, now I feel better about that solution - I just have to order a reamer. Meanwhile, I could finish my external stem (and will) but the shop is just to disorganized right now. My shop space is about 12'X10''. Lately, my wife has been parking her car further over so it may be more like 12'X9'. Anyhow, sometimes I move task to task without cleaning everything up. And after a while the accumulation gets in the way. So, my next task needs to be clean up - but first I need to plan some improvements in how to stash everything. Hence, procrastination. Just in case, I ordered a threadless stem which ought to be here by the weekend.PAINT: The white layers on thick no matter what I do. As a consequence, masking the decals leads to a distinct edge (cliff) when the tape is pulled. I haven't found a way to soften this without discoloring the white paint. It looks like I need to do a full white panel and re-apply decals. Not a biggie, except that I don't have any more. URG. A compromise solution: ordered some laser decal paper. I'll print my own. They may not last forever - but will probably last long enough for a test mule.Enough of slow.Expensive:I seem to spend when I can't build. Compared to pro, my material expenditures are probably miniscule, but they add up for me. I ordered a tube set for my Newvex lugs. It's Zero (aka SAT 16.5 I think). Nice thin wall tubing. Following the lead a serious builder, I'll be using Zero Uno (s/b COM 12.5) for the rear triangle. Right now I'm thinking of a black paint scheme with polished stainless lugs. The choice of decals is less clear at the point - probably have to build it and paint it first. This frame is probably 3-4 frames out, so not until sometime next year. Along with this I ordered some additional rear-end materials a BB and some castings. Then, there have been a few nabobs and such (like the stem mentioned above), some various minor frame-building bits. And, I need the new reamer and some allen sockets to put on the torque wrench to finish tightening down the crank arm.Add to all this my recent purchase of a set of SL, a BB and some track DOs from Kirk (his track DOs have a lot more style than just about anybody else's), some crowns on order from HJ, plus a couple of BBs and some small cast bits. Pretty soon it all adds up.Then there are decals. I've finally got two sets of decal designs firmed up w/ AJ and Victory Graphix. Have I mentioned that they do really good work? So, I ordered 40 sets (20 of each design). Am I nuts or what? That's probably a lifetime supply. Granted the price comes down with quantity, but its still not cheap. On the other hand, I think his prices for a one-off set are really reasonable and I'm not complaining about his volume prices - AJ earns what he charges in my book. So, I have to stop spending and get back to building. Better go start cleaning out the shop. Then maybe do a couple of house projects. And, fit in a couple of rides.Oh, one last thing, I'm very pleased with how my external quill stem works. To rehash, I'm using 1.125" tubing connected with a seat lug. The ears get ground off, and the gaps filled with silver to leave a nice looking lug. The top will get a stainless disk to set things off. Low on the quill, two clamps get brazed on. Because the tubing thickness is 0.58", it telescopes nicely over the steerer and clamps tightly.Below the stem goes a BTF Headset Adjuster from Calhoun Cycle in Minneapolis. This is basically two pieces which thread together. Turning them back and forth cause their overall length to grow or shrink. There is a lock screw to hold the adjustment. So. The external quill is clamped onto the steerer at the desired height with the BTF H/A (and as necessary a spacer), and the BTF H/A adjusts the slack in the headset.The only problem with this solution is that the stem tubes are thick and heavy. But, at least they'll be strong. If I were to do this in volume, I'd look at getting a custom lug made and having the tubes turned down to a lighter diameter. But, for a one off, its fine. Pictures when I have the handlebar clamp attached. :)