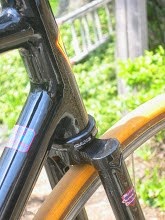
After lots of talk about carbon building technique, I thought it would make some sense to show some pix. So I'll be shooting some 'intermediate' stages of work to use in show and tell - stay tuned.
This season, I've been riding a prototype bike - designed to test some long reach brakes. The fork is straight-legged steel, but with fairly light weight legs - which lends it a nice ride. It's raked at about 53mm to shorten up the trail, because the bike is riding on 700Cx28mm tires.
Generally, I like the ride and handling quite well, but there is one funky handling quirk When rolling into turns at over 14-16 mph,it's sometimes necessary to turn my inside knee towards the apex in order to tighten my line. It appears that there's just a little too much tendency to hold the line, and that the bike may benefit from even less trail, but I'll have to try making another fork to test this out.
My tires have been a set of Hutchinson Top Speed. Lot's of folks look at them and don't believe that they are a real 28mm width, but true that. The key thing is that they're giving me a really cushy ride and they roll like anything. Part of the credit for rolling goes to a set of Record hubs, but note that these were purchased (as wheels) used, and haven't been serviced at all since I got them. Consequently, I think that the tires deserve their share of credit for low rolling resistance.
Anyhow, I didn't think too much about the tires when mounting them. They were in the equipment stash, and of the proper size - hence no cash outlay - good enough for my purposes. Recently, I was testing out a fixee with some nice Gran Bois 700Cx30mm tires. At about 10PSI lower pressure, the ride wasn't as good. Part of the difference is the fork. The fixee is built with an antique set of Reynolds 531, including pre-curved blades with the old English style profile. For those not familiar with this profile, it is longer and narrower at the top when it connects to the fork crown than the more common continental oval. Anyhow, these blades are definitely stiffer than what's on the prototype bike. That said, the frame is stiffer on the prototype.
The Gran Bois are great tires, and I can probably reduce their tire pressure some more. Also, they haven't had enough miles to break in. But the difference in rides between these two bikes is quite remarkable, despite my anticipation that the Gran Bois would ensure that the Fixee was more comfortable - leaving me with a riddle.
After searching online for more info on these Top Speed tires, it became clear that Hutchinson has stopped offering them in the 700Cx28mm size. What a Pity. Anyhow, digging in the equipment stash turned up another pair, same size (although different color) still in their packaging. The printed spec is for a carcass with 66TPI. This surprised me too. I don't usually think of 66TPI offering a very compliant carcass - but there you are, the ride of these is great.
Now I'm really mystified. It looks like it's time to try swapping front wheels on these bikes and riding them back to back. It's hard to believe that the tires are creating the difference in ride, and the wheel switch should help establish if this is true.
Meanwhile, its nice to have stumbled onto these tires and have a spare set, but its sad that they aren't made any more.
Changing topics, let's consider the evolution of handlebar shapes. Along with the evolution to 'anatomical' handlebars, we've seen a push away from long and deep (sometimes called Belgium drop) bars. I've never found an anatomical bar that seemed more comfortable to me than a traditional bar, especially when down in the hooks (which is where the 'anatomical' part of the design is typically located). Hence, they've never done much for me. But the loss of availability of a range in sizes of drop and reach has felt like a loss. So maybe I'm a luddite.
The very latest anatomical bar designs, however, seem to be onto something which may be indicative of modern riding styles. Several mfg's are now offering bars comprised of smooth curves, which quickly bend backwards under the brake levers. Like most anatomical bars, they have a very short ramp leading up to the brake lever.
Essentially, this leaves the rider with several riding positions: top of bars, on the brake hoods, in the hooks, and at the rear of the drops. Note that each of these positions is equally close, or closer, than their respective position on traditional bar (because the hooks pull backward more, and the drop tends to be less extreme than on a traditional bar). Meanwhile, they don't really offer a position on the ramp behind the hoods, because the ramp is so small.
So what's going on here? Are we trying to sit more upright while riding today, than did riders in the past? Absolutely not. But, many riders today seem to stress long and low stems. Often this situation is exacerbated by the use of a threadless headset without the compensation of a longer head tube. Hence, to keep the brakes in reach (not to mention the hooks), it helps to have a shorter handlebar. And to keep the drops in reach, it helps if they don't drop as far as traditional bars, plus having them extend backwards more.
"So what?" you may say, the stem goes one way, the bars in another, and we end up in the same place. But that's just it, we don't really end up in the same place. We lose the ramp as a hand position, and in my experience its a great position - with a low likelihood of aggravating the ulnar nerve. In my book, that's worth thousands of dollars by itself. Also, the difference in body position is reduced when moving the hands from the tops to the drops. Old bars had the tops closer to the seat, and the drops lower and farther away from the seat, as compared to the latest examples of anatomic bars. So, one's body position is less likely to change as much on an anatomical bar when moving between these grips - and that's the first reason to change grips.
Does anyone besides me care about these changes? I don't know, but it's food for thought when trying to tailor your position on the bike.
Finally, in another ludditish (word?) rage, let me take on cassettes (cogs not music). It took me a long time to understand the fascination with cassettes using 11 or 12 tooth small cogs. Let's face it those are for speeds in excess of 40mph, which very few people will achieve except going down hill. You may point out that we all spend our share of time going downhill, some would say I go downhill at an ever accelerating rate. But, pedaling down hill is largely a waste of energy. The exponential growth of wind resistance means that pedaling will add very little to your speed and is unlikely to decrease your elapsed time.
Yes the pros pedal down hill in the Giro, TdeF, and Vuelta - and you should plan to do so also, when you're riding for a pro team in the Grand Tour. But, that's probably not likely to happen (if only because you're reading this instead of training), therefore you shouldn't worry about pedaling down hill or about having an 11, 12 or even 13 tooth cog.
This leaves the question of why the big 3 push these over-geared cassettes on us? I think its because we're all weight-weenies at heart. Lower the size of each cog by 2-4 teeth and you'll lower the weight of your cassette. Have you seen what folks will pay for a Ti cassette just to save a little weight? And the mfg can save weight just by using smaller cogs, which probably also reduce the cost to mfg (less material). Hence most cassettes start with an 11 or 12 tooth cog. Ugh. I wish SRAM would come up with a 13 or 14 by 27 tooth Red cassette. That would be cool. But that wish isn't likely to be granted soon.
Ok, carbon pix soon, and maybe some more surprises.
Cheers!
Tuesday, July 29, 2008


Thursday, July 10, 2008
Quickee
Here's just a little update. I'm getting ready to sag a bunch of my riders on RAIN (Ride Across INdiana) on Saturday. We'll leave town about noon tomorrow with two sag vehicles and 8 (I think) riders. Tonight I've been pulling together my pit gear. I won't be able to replace shifters, bottom brackets, headsets, or anything but 10 speed Shimano compatible cassettes, but should be set to tackle anything else. Either the variety of standards, or size of tools required, were my two criteria for what not to bring. It's not that I expect problems, but being prepared is the best defense against having to fix anything.
Moving on, my new Ti parts arrived this week. So sexy. Between the BB and head tube I expect to remove about 200 grams from my typical carbon frame with these parts. They're also beautifully made.
My current build is coming along nicely. If you're a long time reader, you know that I'm a keel builder. That is, focus on the head tube, down tube, & chainstays, to ensure a straight keel between the wheels. Then fill in the rest. The reality is, however, that I usually connect the seat tube to the BB first - and then let it just wave in the wind until the keel is done.
With a bagged carbon frame, there are a number of ways to do things, and I chose a sequence slightly different from how I build steel. I begin by mitering the chain stays (which have a mono-yoke) to the BB, then glue them together in a jig with aerospace epoxy adhesive. Once this sets up, 8 layers (more will be added latter in the process) of uni-carbon are wrapped around this joint - five run straight and form a 'U' when viewed from the side, the remaining layers are angled about plus/minus 25 degrees. Each angled layer includes both plus and minus angles - as I'm using narrower strips of carbon - so the layer has a crossing of the two angles, but nets about the same amount of fabric as one of the straight layers. As a final step, three layers are wrapped around the yoke of the chain stays (90 degrees to the main reinforcement). After fiddling to make sure that all is flat and smooth, the yoke portion gets wrapped with heat shrink tape. This serves to flatten this area nicely, indicate if there are problems in the wrap around the BB shell, and helps hold the rest of the layers in place until the vacuum is applied. Note, there is a concave space where the top and bottom of the chain stay butt up to the BB shell. If the main wraps are too tight, they will lift out of this area - making a bubble and potential stress riser. So with gloved hand, I check to make sure that the tension on the wraps is correct.
This then gets put into a vacuum bag, and as the air is evacuated, I work the bag to lay as flat as possible all the way around the BB/chain stay joint. The uni-carbon comes with something (it varies) on the back to hold the threads together and in parallel. With a good vacuum job, its possible to see this backing through the carbon when the joint is later unwrapped.
The finished assembly is inspected, and then sanded with 180 grit to prepare to bond tubes and more CF. Note, I could use a peel-ply that leaves a thicker layer on epoxy on the surface, with the pattern of the fabric embossed in the epoxy. This makes a good surface for bonding other bits too. However, I find this fabric a bit stiff and unwieldy for working around this sort of joint. Hence the sanding of the finished surface.
Next (reverting to my old habits), I miter and bond the seat tube into place. With steel, I'd just use a pattern from Bike Cad to mark the miter. This works here, as well, but only up to a point. At the rear, the yoke of the chain stay interferes with the fit of the seat tube, and the seat tube therefore needs to be trimmed down carefully. Once the proper fit is established, all surfaces are cleaned up with rubbing alcohol and allowed to dry. The fit over everything is checked one more time in the jig. Then a layer of aerospace epoxy adhesive is applied around the base of the seat tube, and the tube is put into place, and the jig is closed down on the seat tube to hold it in place. Supposedly the parts can be worked within two hours of bonding, but I generally give them overnight.
Meanwhile, I've been preparing the head tube. This one gets my traditional aluminum head tube with a CF wrap. Actually, a fine layer of fiberglass goes down first, then the CF. In this case, I used some 5.7 oz plain weave CF. Over the CF goes a plastic peel layer in which I've punched a lot of small holes (pin pricks actually). Over this goes a layer of synthetic cotton batting - which serves to suck up any epoxy squeezed out of the CF. Finally, I give it a tight wrap of heat-shrink tape. Once its all stabilized (tape on the ends or whatever), I use an electric heat gun (like some folks use to remove paint) to quickly shrink the tape. With a head tube set up for cure, I usually put it in the oven at about 175 degrees for 30 minutes. This speeds up the cure, but also helps to bleed off excess epoxy.
This process seems to work because the whole piece is evenly coated in epoxy (which shows as a glossy sheen), but very little of the texture of the CF cloth is lost. On the final layer (once joints are done), we'll want a thicker top coat of epoxy to provide a smooth base layer for the painter - but until then, we want to use the least epoxy possible to do the job - and this method seems to work very well at meeting the goal.
Now its time to do some measurements to mount the head tube in the jig, and position it correctly relative to the BB. Key issues are, of course, the head tube angle, effective top tube length, height of the bottom of the head tube. The later are designed around the fork and headset which will be employed, to ensure that the prescribed head tube angle is realized in practice. After a bit of fiddling, a satisfactory positioning is achieved.
Then, its time to begin mitering and fitting the down tube. On a lugged steel bike, its possible to make the down tube a half inch long, fit things up in the jig, then mark the excess from within the BB. That doesn't work here with a solid BB. So, I start by fitting the down tube to the head tube first - using a protractor to check that my angle is correct. Then the BB end is mitered, but it's left intentionally long. Now I fiddle to see that my down tube/seat tube angle appears correct. If not, there's something wrong with the head tube positioning. This is just a double check, but nonetheless an important step.
If positioning looks good, I carefully start to carve the BB miter back until I can fit the tube into place. If all has gone well, both ends have nice tight fits and I don't have to recycle an expensive piece of CF.
At this point, I once again check all fits on the jig, then clean the down tube, head tube, BB, and seat tube with alcohol. Again, adhesive gets applied, this time to both ends of the down tube. At the bottom it is fitted to the BB and to the seat tube. Once more, the jig and fits are double checked - before anything can set up.
OK, that's how far the current frame is. We'll next have to modify the BB joint to ease the process of draping layers of CF thereon. So stay tuned to learn more about finishing this important joint.
Cheers.
Post ride update... The only mechanical I had to deal with was.... a bottom bracket. At the first stop, one rider had a crunchy dragging BB. Fortunately it was a cup and cone style, as I hadn't brought any spares. The bike was borrowed, and both the axle and one cup had some damage in the races. Also the bearings were caged, which are easier to keep track of, but which I find to offer less good results than loose bearings.
Anyway, I was able to repack the BB and adjust it so that it would spin smoothly. Then I drove off to purchase a spare (just a basic 113mm Shimano cartridge square taper BB). Anyhow, the rider made it through the ride without further issues and I never had to install the spare.
Congratulations to all the riders who completed RAIN!
Moving on, my new Ti parts arrived this week. So sexy. Between the BB and head tube I expect to remove about 200 grams from my typical carbon frame with these parts. They're also beautifully made.
My current build is coming along nicely. If you're a long time reader, you know that I'm a keel builder. That is, focus on the head tube, down tube, & chainstays, to ensure a straight keel between the wheels. Then fill in the rest. The reality is, however, that I usually connect the seat tube to the BB first - and then let it just wave in the wind until the keel is done.
With a bagged carbon frame, there are a number of ways to do things, and I chose a sequence slightly different from how I build steel. I begin by mitering the chain stays (which have a mono-yoke) to the BB, then glue them together in a jig with aerospace epoxy adhesive. Once this sets up, 8 layers (more will be added latter in the process) of uni-carbon are wrapped around this joint - five run straight and form a 'U' when viewed from the side, the remaining layers are angled about plus/minus 25 degrees. Each angled layer includes both plus and minus angles - as I'm using narrower strips of carbon - so the layer has a crossing of the two angles, but nets about the same amount of fabric as one of the straight layers. As a final step, three layers are wrapped around the yoke of the chain stays (90 degrees to the main reinforcement). After fiddling to make sure that all is flat and smooth, the yoke portion gets wrapped with heat shrink tape. This serves to flatten this area nicely, indicate if there are problems in the wrap around the BB shell, and helps hold the rest of the layers in place until the vacuum is applied. Note, there is a concave space where the top and bottom of the chain stay butt up to the BB shell. If the main wraps are too tight, they will lift out of this area - making a bubble and potential stress riser. So with gloved hand, I check to make sure that the tension on the wraps is correct.
This then gets put into a vacuum bag, and as the air is evacuated, I work the bag to lay as flat as possible all the way around the BB/chain stay joint. The uni-carbon comes with something (it varies) on the back to hold the threads together and in parallel. With a good vacuum job, its possible to see this backing through the carbon when the joint is later unwrapped.
The finished assembly is inspected, and then sanded with 180 grit to prepare to bond tubes and more CF. Note, I could use a peel-ply that leaves a thicker layer on epoxy on the surface, with the pattern of the fabric embossed in the epoxy. This makes a good surface for bonding other bits too. However, I find this fabric a bit stiff and unwieldy for working around this sort of joint. Hence the sanding of the finished surface.
Next (reverting to my old habits), I miter and bond the seat tube into place. With steel, I'd just use a pattern from Bike Cad to mark the miter. This works here, as well, but only up to a point. At the rear, the yoke of the chain stay interferes with the fit of the seat tube, and the seat tube therefore needs to be trimmed down carefully. Once the proper fit is established, all surfaces are cleaned up with rubbing alcohol and allowed to dry. The fit over everything is checked one more time in the jig. Then a layer of aerospace epoxy adhesive is applied around the base of the seat tube, and the tube is put into place, and the jig is closed down on the seat tube to hold it in place. Supposedly the parts can be worked within two hours of bonding, but I generally give them overnight.
Meanwhile, I've been preparing the head tube. This one gets my traditional aluminum head tube with a CF wrap. Actually, a fine layer of fiberglass goes down first, then the CF. In this case, I used some 5.7 oz plain weave CF. Over the CF goes a plastic peel layer in which I've punched a lot of small holes (pin pricks actually). Over this goes a layer of synthetic cotton batting - which serves to suck up any epoxy squeezed out of the CF. Finally, I give it a tight wrap of heat-shrink tape. Once its all stabilized (tape on the ends or whatever), I use an electric heat gun (like some folks use to remove paint) to quickly shrink the tape. With a head tube set up for cure, I usually put it in the oven at about 175 degrees for 30 minutes. This speeds up the cure, but also helps to bleed off excess epoxy.
This process seems to work because the whole piece is evenly coated in epoxy (which shows as a glossy sheen), but very little of the texture of the CF cloth is lost. On the final layer (once joints are done), we'll want a thicker top coat of epoxy to provide a smooth base layer for the painter - but until then, we want to use the least epoxy possible to do the job - and this method seems to work very well at meeting the goal.
Now its time to do some measurements to mount the head tube in the jig, and position it correctly relative to the BB. Key issues are, of course, the head tube angle, effective top tube length, height of the bottom of the head tube. The later are designed around the fork and headset which will be employed, to ensure that the prescribed head tube angle is realized in practice. After a bit of fiddling, a satisfactory positioning is achieved.
Then, its time to begin mitering and fitting the down tube. On a lugged steel bike, its possible to make the down tube a half inch long, fit things up in the jig, then mark the excess from within the BB. That doesn't work here with a solid BB. So, I start by fitting the down tube to the head tube first - using a protractor to check that my angle is correct. Then the BB end is mitered, but it's left intentionally long. Now I fiddle to see that my down tube/seat tube angle appears correct. If not, there's something wrong with the head tube positioning. This is just a double check, but nonetheless an important step.
If positioning looks good, I carefully start to carve the BB miter back until I can fit the tube into place. If all has gone well, both ends have nice tight fits and I don't have to recycle an expensive piece of CF.
At this point, I once again check all fits on the jig, then clean the down tube, head tube, BB, and seat tube with alcohol. Again, adhesive gets applied, this time to both ends of the down tube. At the bottom it is fitted to the BB and to the seat tube. Once more, the jig and fits are double checked - before anything can set up.
OK, that's how far the current frame is. We'll next have to modify the BB joint to ease the process of draping layers of CF thereon. So stay tuned to learn more about finishing this important joint.
Cheers.
Post ride update... The only mechanical I had to deal with was.... a bottom bracket. At the first stop, one rider had a crunchy dragging BB. Fortunately it was a cup and cone style, as I hadn't brought any spares. The bike was borrowed, and both the axle and one cup had some damage in the races. Also the bearings were caged, which are easier to keep track of, but which I find to offer less good results than loose bearings.
Anyway, I was able to repack the BB and adjust it so that it would spin smoothly. Then I drove off to purchase a spare (just a basic 113mm Shimano cartridge square taper BB). Anyhow, the rider made it through the ride without further issues and I never had to install the spare.
Congratulations to all the riders who completed RAIN!
Wednesday, July 02, 2008
What's new
Let's see, he said as he stroked his chin. "Hmmmm.....
Now that the weather is warm, I'm working hard to catch up on my backlog. Carbon has been at the fore of my efforts as noted in the last post. Along these lines, I'm having some fun and showing great progress in a number of dimensions.
I've begun working with Edge Composites for tubing and rear triangles, and they're great. They'll build to my spec, and can turn around custom requests in pretty short order. A very simple example, I can now spec a tube a either plain uni-directional fiber, or any of several weaves of overweaves (from the traditional burlap look to the newer 12k checkerboard looks). So riders get a choice of aesthetics and performance. On the front triangle, plain uni carbon saves about 10% in weight, on the rear triangle it's closer to 20%. Not bad. But, for those who don't worry about fractions of an ounce, there is the option to choose their favorite fiber look. We can even turn the weaves on an angle for one more dimension of customization.
Speaking of rear-triangles, Edge molds the cable casing stop into the chain stay - so that eliminates holes and rivets - which is a good thing.
They've also provided their input into my plans for CF dropouts. This option is especially appealing to me for track frames where no one is manufacturing a carbon compatible dropout. That may be changing as there is another player getting ready to announce some super neat metal dropouts for CF rear triangles. I can't say any more for now, but I'm getting excited about that.
I've also been exploring various options for BBs and head tubes. Eventually, I think these will be pure CF, with the option for BB30 bottom brackets. In the meantime, I will shortly have some nice Ti BBs. These are thinner gauge metal than what you would see on a welded Ti bike, and will be reinforced by the CF over-wrap, rather than having that merely be a surface to which other tubes are bonded onto the BB. I think this will be lighter than my current wrapped Aluminum BBs, and have longer lasting threads. Plus, Ti resists electro chemical interactions with CF better than just about any other available metal. In a related move, I'm moving to CF head tubes with Ti rings bonded into each end. The Ti gets reamed and faced for the headset, but the CF tube provides the structure for the front end. Much less weight than a wrapped aluminum head tube, and again the chemical stability of Ti. So, all of these parts represent steps forward - and will help distinguish my CF frames from the run of the mill
On a different front, I've been constantly refining my vacuum bagging technique. It's easy to shove some parts in a bag, turn on the vacuum, and wait for them to cure. What gets tricky is maintaining the layers of wet CF in alignment and snuggly wrapped around the tube. A loose piece can easily create a bubble between layers that will become a source of failure. Even tricker is doing this in a manner where we get a nice smooth finish on the outside of the part. Many forms of vacuum bagging work against a mold - which is highly polished. The CF surface that lays against the mold (often with a layer of gel-coat between) is essentially finished when done.
I could create molds for my joints - some manufactures do. But, that limits the combinations of angles and tubing sizes I can use (either that or have a nearly infinite range of molds available).
Instead, I'm wrapping the joint with a layer of smooth plastic release layer. The plastic has small holes that allow excess epoxy to weep out into the bleeder felt. This layer of plastic has to be fashioned to follow the contours of the joint - so it doesn't wrinkle and cast the wrinkle into the epoxy. The bleeder felt also has to be arranged so as not to wrinkle. I've taken to fitting multiple pieces of felt to the joint - because it won't stretch to fit. Finally, it's important to arrange the 'bag' around the joint in a fashion similar to the release layer - again to avoid wrinkle. The net of practice is that my joints are coming out of the bag much better finished - and needing much less touch up before they're ready for paint. Cool.
Anyhow, thats enough words for tonight. See you next time.
Now that the weather is warm, I'm working hard to catch up on my backlog. Carbon has been at the fore of my efforts as noted in the last post. Along these lines, I'm having some fun and showing great progress in a number of dimensions.
I've begun working with Edge Composites for tubing and rear triangles, and they're great. They'll build to my spec, and can turn around custom requests in pretty short order. A very simple example, I can now spec a tube a either plain uni-directional fiber, or any of several weaves of overweaves (from the traditional burlap look to the newer 12k checkerboard looks). So riders get a choice of aesthetics and performance. On the front triangle, plain uni carbon saves about 10% in weight, on the rear triangle it's closer to 20%. Not bad. But, for those who don't worry about fractions of an ounce, there is the option to choose their favorite fiber look. We can even turn the weaves on an angle for one more dimension of customization.
Speaking of rear-triangles, Edge molds the cable casing stop into the chain stay - so that eliminates holes and rivets - which is a good thing.
They've also provided their input into my plans for CF dropouts. This option is especially appealing to me for track frames where no one is manufacturing a carbon compatible dropout. That may be changing as there is another player getting ready to announce some super neat metal dropouts for CF rear triangles. I can't say any more for now, but I'm getting excited about that.
I've also been exploring various options for BBs and head tubes. Eventually, I think these will be pure CF, with the option for BB30 bottom brackets. In the meantime, I will shortly have some nice Ti BBs. These are thinner gauge metal than what you would see on a welded Ti bike, and will be reinforced by the CF over-wrap, rather than having that merely be a surface to which other tubes are bonded onto the BB. I think this will be lighter than my current wrapped Aluminum BBs, and have longer lasting threads. Plus, Ti resists electro chemical interactions with CF better than just about any other available metal. In a related move, I'm moving to CF head tubes with Ti rings bonded into each end. The Ti gets reamed and faced for the headset, but the CF tube provides the structure for the front end. Much less weight than a wrapped aluminum head tube, and again the chemical stability of Ti. So, all of these parts represent steps forward - and will help distinguish my CF frames from the run of the mill
On a different front, I've been constantly refining my vacuum bagging technique. It's easy to shove some parts in a bag, turn on the vacuum, and wait for them to cure. What gets tricky is maintaining the layers of wet CF in alignment and snuggly wrapped around the tube. A loose piece can easily create a bubble between layers that will become a source of failure. Even tricker is doing this in a manner where we get a nice smooth finish on the outside of the part. Many forms of vacuum bagging work against a mold - which is highly polished. The CF surface that lays against the mold (often with a layer of gel-coat between) is essentially finished when done.
I could create molds for my joints - some manufactures do. But, that limits the combinations of angles and tubing sizes I can use (either that or have a nearly infinite range of molds available).
Instead, I'm wrapping the joint with a layer of smooth plastic release layer. The plastic has small holes that allow excess epoxy to weep out into the bleeder felt. This layer of plastic has to be fashioned to follow the contours of the joint - so it doesn't wrinkle and cast the wrinkle into the epoxy. The bleeder felt also has to be arranged so as not to wrinkle. I've taken to fitting multiple pieces of felt to the joint - because it won't stretch to fit. Finally, it's important to arrange the 'bag' around the joint in a fashion similar to the release layer - again to avoid wrinkle. The net of practice is that my joints are coming out of the bag much better finished - and needing much less touch up before they're ready for paint. Cool.
Anyhow, thats enough words for tonight. See you next time.
Saturday, June 14, 2008
Playing
I get to try and test a variety of things bike-wise as part of being a builder. After all, its important to understand what works, and what doesn't. Lately my focus has been on brakes. Looking at alternatives that work in various situations. One challenge, in particular, is fitting brakes over fenders and wide tires - especially if the rims are on the narrow side.
I set up a prototype bike with a fork sized to use the longer armed Tektro double pivot brakes, and the brake bridge is set to test the Paul center pull brakes. For testing, the wheels are Mavic MA3 on Record hubs - something purchased used (cheaply) on eBay a couple of years ago. The tires are a pair of 700C x 28 Hutchinson Top Speed - which no longer appear to be in their catalog (nor is there anything else like it). Which is a pity.
This has been a favorite tire of mine lately. It's not an expensive or fancy tire. Some folks look at it and don't believe it's a 28 - but that's just the cross-section (egg like) at the top of the rim throwing them off. In reality, it's an easy rolling tire despite having low thread count and an anti-puncture layer. Typically, I run them at about 90 psi - which seems to sag about right under my weight. As we've discussed before, a compliant tire reduces rolling resistance on the road (as opposed to a test drum). So I've used these tires many times in roll offs to try and convince the reluctant of the benefits of soft and fat (tires, not bellies).
The Top Speed corners very nicely, as wider tires are wont to do. Hands and butt feel much better after hours on these tires than they do when riding on 23s. Very comfy is my official rating. And these two factors are often forgotten when folks evaluate tires. If you're riding for long periods, faith in road holding and physical comfort make a big difference, and probably allow you to gain more speed than a new set of expensive aero wheels.
My test setup is Campy based, which means that there are two (2) quick releases for each brake. One is in the brifter, and one at the brake. Theoretically, one can open the brakes wider for wheel removal. The theoretical part relates to how wide the brakes open when they have no cable tension on them. The Paul appears to do a bit better than the Tektro in this regard, but both open plenty wide for a set of 700C x 28s. They should handle 700c x 32s as well, and it looks like the Paul's will also clear 35s or even 38s.
Both brakes are positioned so that the brake shoes are at the bottom of their slots. This isn't the ideal location, but it's what demonstrates the greatest tire/fender clearance. The Paul's, again, offer more clearance. Having said that, my preference is to use cantilever brakes with fenders.
With fenders, its ideal to set the hight of the fork crown or brake bridge based on where you want the fender to sit relative to the wheel/tire. When using crown or bridge mounted brakes, the position of the crown/bridge is dependent on the needs of brake in order to get a good interface between the rim and the brake pads. Sure, there's a slot where the brake pad can be raised or lowered on the brake arm. But this still offers only limited range with which to work - and ideally (if only for aesthetics) we'd like to have the brake pad centered in its slot.
The net of this is that two different factors want to determine the distance from the axle to the crown/bridge - and sometimes these factors disagree as to the proper position. Back in the old days, there were many more lengths of brake arms available - making this particular fitting issue less difficult. Because we don't have those choices today, a cantilever (or other frame mounted brake) makes life easier. It is fitted to assure good rim/pad fit, while leaving the crown/bridge to be set at a distance that works well for the tire/fender combo chosen. And, that's why I feel partial to cantilevers for fenders.
It should be noted that the Paul center pull brakes are available for mounting on pivots brazed to seat stays/fork legs - making this another good combo.
But, what about the brakes I tested? Are they any good? A couple of points that should be noted. First, both act very rigid, avoiding brake squeal. This is impressive given the length of these brakes from the pivot to the brake pad (again this was maximized on the test bike). They also feel very firm under hand, and grab harder the stronger one squeezes them. This is an area where many modern brakes are superior to many of the older brakes. Too many older brakes seemed to flex more as more pressure was applied. Not these two.
Neither was the hardest grabbing brake that I've ever tried, but both did fine for me, and under these extreme circumstances (note that bike and rider all up are approaching 240 lbs, while the wide tires provide great braking traction). Having said that, brake grab can be tuned with various brake pads, and different riders like firmer or sticker pads. Stock, these worked fine for me, but some riders will want softer pads.
Taken as a whole, its clear I prefer other solutions for mounting fenders. But, having said that, either of these is a great brake - and I'd be happy to have a pair of either one under me out on the road.
Often, the press pans Tektro (or private label versions thereof). But I think that this is marketing bias. They are nicely finished, smooth operating, easy to fit and adjust, and have the fundamental key attribute of good brakes - they're stiff. And, again, we're talking about the long arm version. The more common short arm version can only be better for stiffness. Yes, lighter brakes are available, but this isn't a critical component for weight reduction. And typically, Tektros are so nicely priced that I have to encourage folks to give them fair consideration if the need arises to replace their brakes.
That's it for now. See ya soon
I set up a prototype bike with a fork sized to use the longer armed Tektro double pivot brakes, and the brake bridge is set to test the Paul center pull brakes. For testing, the wheels are Mavic MA3 on Record hubs - something purchased used (cheaply) on eBay a couple of years ago. The tires are a pair of 700C x 28 Hutchinson Top Speed - which no longer appear to be in their catalog (nor is there anything else like it). Which is a pity.
This has been a favorite tire of mine lately. It's not an expensive or fancy tire. Some folks look at it and don't believe it's a 28 - but that's just the cross-section (egg like) at the top of the rim throwing them off. In reality, it's an easy rolling tire despite having low thread count and an anti-puncture layer. Typically, I run them at about 90 psi - which seems to sag about right under my weight. As we've discussed before, a compliant tire reduces rolling resistance on the road (as opposed to a test drum). So I've used these tires many times in roll offs to try and convince the reluctant of the benefits of soft and fat (tires, not bellies).
The Top Speed corners very nicely, as wider tires are wont to do. Hands and butt feel much better after hours on these tires than they do when riding on 23s. Very comfy is my official rating. And these two factors are often forgotten when folks evaluate tires. If you're riding for long periods, faith in road holding and physical comfort make a big difference, and probably allow you to gain more speed than a new set of expensive aero wheels.
My test setup is Campy based, which means that there are two (2) quick releases for each brake. One is in the brifter, and one at the brake. Theoretically, one can open the brakes wider for wheel removal. The theoretical part relates to how wide the brakes open when they have no cable tension on them. The Paul appears to do a bit better than the Tektro in this regard, but both open plenty wide for a set of 700C x 28s. They should handle 700c x 32s as well, and it looks like the Paul's will also clear 35s or even 38s.
Both brakes are positioned so that the brake shoes are at the bottom of their slots. This isn't the ideal location, but it's what demonstrates the greatest tire/fender clearance. The Paul's, again, offer more clearance. Having said that, my preference is to use cantilever brakes with fenders.
With fenders, its ideal to set the hight of the fork crown or brake bridge based on where you want the fender to sit relative to the wheel/tire. When using crown or bridge mounted brakes, the position of the crown/bridge is dependent on the needs of brake in order to get a good interface between the rim and the brake pads. Sure, there's a slot where the brake pad can be raised or lowered on the brake arm. But this still offers only limited range with which to work - and ideally (if only for aesthetics) we'd like to have the brake pad centered in its slot.
The net of this is that two different factors want to determine the distance from the axle to the crown/bridge - and sometimes these factors disagree as to the proper position. Back in the old days, there were many more lengths of brake arms available - making this particular fitting issue less difficult. Because we don't have those choices today, a cantilever (or other frame mounted brake) makes life easier. It is fitted to assure good rim/pad fit, while leaving the crown/bridge to be set at a distance that works well for the tire/fender combo chosen. And, that's why I feel partial to cantilevers for fenders.
It should be noted that the Paul center pull brakes are available for mounting on pivots brazed to seat stays/fork legs - making this another good combo.
But, what about the brakes I tested? Are they any good? A couple of points that should be noted. First, both act very rigid, avoiding brake squeal. This is impressive given the length of these brakes from the pivot to the brake pad (again this was maximized on the test bike). They also feel very firm under hand, and grab harder the stronger one squeezes them. This is an area where many modern brakes are superior to many of the older brakes. Too many older brakes seemed to flex more as more pressure was applied. Not these two.
Neither was the hardest grabbing brake that I've ever tried, but both did fine for me, and under these extreme circumstances (note that bike and rider all up are approaching 240 lbs, while the wide tires provide great braking traction). Having said that, brake grab can be tuned with various brake pads, and different riders like firmer or sticker pads. Stock, these worked fine for me, but some riders will want softer pads.
Taken as a whole, its clear I prefer other solutions for mounting fenders. But, having said that, either of these is a great brake - and I'd be happy to have a pair of either one under me out on the road.
Often, the press pans Tektro (or private label versions thereof). But I think that this is marketing bias. They are nicely finished, smooth operating, easy to fit and adjust, and have the fundamental key attribute of good brakes - they're stiff. And, again, we're talking about the long arm version. The more common short arm version can only be better for stiffness. Yes, lighter brakes are available, but this isn't a critical component for weight reduction. And typically, Tektros are so nicely priced that I have to encourage folks to give them fair consideration if the need arises to replace their brakes.
That's it for now. See ya soon
Saturday, May 31, 2008
Carbon Carbon Everywhere
Look around, carbon fiber is everywhere. For only $269 you can get a decorative CF panel to stick on the pillar between the front and rear doors of your Scion! Yep it seems to be ubiquitous.
Only a year ago, prognosticators in the composites industry were predicting a major CF shortage. Looking around at suppliers, not all of them have all products in stock. That said, it's easy to find the materials I use in frame building. So that's a good thing.
A little known fact outside of the industry is that carbon fiber tubes cost about the same as high end steel tubes, such as from Columbus or Reynolds. True that. Oh and yeah, I said tubes. In fact I source my tubes from the same place as Trek. Did you know that Trek and many other bike manufacturers assemble their frames from tubes? For the consumer, that's not an important issue. But marketers have done a good job of selling the idea that CF frames are built of a a single carbon fiber monocoque - not assembled from tubes. So consumers don't like the idea of joined tubes and manufacturers don't talk about using CF tubes.
Well I'm not afraid to admit to working with tubes. The fact is, filament wound tubes can be manufactured to tighter specifications than a complex molded part. Which means that tubes offer the opportunity to build stronger and lighter! Yipee!
How these tubes are joined together is the real heart of the building process. And, for many manufacturers and frame builders, joining offers the potential for product differentiation. And I too have been working on my proprietary methods - with some success.
Most builders & manufactures use some form of wrapping the joint in CF and epoxy. Within this method, there are two primary approaches: a) wet wrapped CF vacuum-bagged until cured; b) pre-preg CF wrapped, heated under pressure in an autoclave until cured. The second approach is heavily used by manufacturers. It's an easier method to control the amount of epoxy in the CF (because it comes pre-impregnated), and pre-preg is relatively easy to handle while setting it up to cure. Two problems exist for this method in small volume production: a) Autoclaves are expensive; b) the product is molded - molds are expensive and limit dimensional flexibility. So, pre-preg is ideal for volume production.
Wet wrapping involves several steps. First, the layers of CF need to be cut out with the fibers oriented to plans. CF has little compression strength, so it requires fibers to be aligned in a variety of directions so that any force on the joint will be compensated for by fibers working in tension. In fact, if CF had the same strength in compression as in tension, we could make much lighter frames - using much less CF.
Anyhow, CF we use (except for cosmetic out layers) is unidirectional. That is, it isn't woven, all the fibers run in one direction. Various methods are used to hold the fibers together prior to being laid up with epoxy. None of these methods are perfect. So just cutting out the patterns on the dry CF can be difficult and requires a sharp scissor.
After the layers are cut out, we prep the tubes. This means lightly sanding the surfaces and then cleaning them with rubbing alcohol or acetone. The goal is to have clean bare CF on the tubes for bonding.
Then we mix up some epoxy. There are various approaches to mixing including: a) Electronic scales; Graduated cups; Calibrated pumps. Any of these approaches will work if care is taken. Once the epoxy base and hardener and dispensed, we have to mix them together thoroughly. This usually has the result of infusing oxygen bubbles into the CF - which we will address later.
The mixed epoxy has a limited pot life. By choosing different hardeners, and being sensitive to the ambient temperatures, it's possible to adapt the pot life for the task at hand. Note that there is a general rule that the longer the pot life, the longer the cure time. So we want to limit pot life to what we really need to assemble a joint and get it ready for curing.
Next we need a flat surface, which can be covered with saran wrap or wax paper (to keep the surface clean). We take our CF pieces and lay them down one at a time. Pour some epoxy on top and use a scraper or squeegee to spread the epoxy between the fibers. We want to avoid having the CF be soaked in and dripping with epoxy, but we want it to be full of epoxy. Depending on the setup, we may do this to all the CF pieces first, and them layer them on the joint. Or, we may apply each piece of CF as it gets wetted out. In either case, we end up with our tubes wrapped in layers of epoxied CF.
Over this we put a layer of material that won't stick to the epoxy. A mylar film can be used to get a very smooth finish, or a teflon coated polyester fabric can be used. The later gives a rough surface, but is better at allowing excess epoxy to flow through. And we want it to flow through to the next layer - which is a synthetic cotton batting. This batting performs two tasks. We will put this whole contraption in a sealed plastic bag, and use a vacuum pump to suck out all the air. The external air pressure will act as a giant clamp holding things together during curing, but more importantly, it will compress the layers of carbon fiber in the joint. In so doing, excess epoxy will be squeezed to the surface, and the batting will catch and hold this excess so that it doesn't enter the pump (which would be a disaster). Also, the batting provides a channel through which the pump can continue to suck air even as the bag collapes. Otherwise, the bag opposite the vacuum fitting would get sucked into the fitting and stop it from evacuating the rest of the bag - which would do us no good.
In the process of sucking epoxy through the layers, we hope to make sure that any voids in the CF are filled with epoxy and any air bubbles are pumped out. The reality is that this will never occur perfectly, but with good vacuum pressure we can eliminate enough voids and bubbles to ensure a strong, quality joint.
A key to making all of this work is holding the tubes together, in the proper position, as the CF is wrapped on, and until the epoxy cures. A number of approaches work, from fixturing the tubes to gluing them together.
I like the later approach, as it's possible to assemble a full front triangle and then vacuum the joints one at a time. But the bonds are fairly delicate and this got me thinking of a better way to join tubes. I've developed a proprietary method that I call full surface bonding. Without giving away too much, bond a solid surface, not a hollow tube to the adjoining tube.
How strong is this? Well, I wouldn't ride a bike so built without CF wraps around the joints. But, the point of failure is delamination of a tube surface. Think of it like this. We have a plain tube and one that is mitered. The mitered tube is bonded to the plain tube. When this joint fails, it is the surface of the plain tube that is failing - not the adhesive and not the mitered tube. In other words, this joint is as strong as it can be given lamination strength of the tube to which it is bonded.
One notable feature of this method is that it adds negligible weight to the joint. As implied above, I've been doing destructive testing of my joints. So far, with full surface bonding, I'm still using the same schedule of CF laminations on the joint. This ultimately produces a stronger joint, with a weight difference that is hard to measure. The goal, is to establish a joint that is as strong as a normal wet wrapped joint, but which has fewer laminations of CF and epoxy to save weight. When testing indicates that this is ready for market, I'll be sure to let you know.
In the mean time, I can miter and jig assemble my frames similar to steel frames, when these are set (and naturally in super alignment), I come back and vacuum one joint at a time - allowing for perfectly laminated joints.
Well, that's it for tonight. Gotta run, so we'll see you soon.
Only a year ago, prognosticators in the composites industry were predicting a major CF shortage. Looking around at suppliers, not all of them have all products in stock. That said, it's easy to find the materials I use in frame building. So that's a good thing.
A little known fact outside of the industry is that carbon fiber tubes cost about the same as high end steel tubes, such as from Columbus or Reynolds. True that. Oh and yeah, I said tubes. In fact I source my tubes from the same place as Trek. Did you know that Trek and many other bike manufacturers assemble their frames from tubes? For the consumer, that's not an important issue. But marketers have done a good job of selling the idea that CF frames are built of a a single carbon fiber monocoque - not assembled from tubes. So consumers don't like the idea of joined tubes and manufacturers don't talk about using CF tubes.
Well I'm not afraid to admit to working with tubes. The fact is, filament wound tubes can be manufactured to tighter specifications than a complex molded part. Which means that tubes offer the opportunity to build stronger and lighter! Yipee!
How these tubes are joined together is the real heart of the building process. And, for many manufacturers and frame builders, joining offers the potential for product differentiation. And I too have been working on my proprietary methods - with some success.
Most builders & manufactures use some form of wrapping the joint in CF and epoxy. Within this method, there are two primary approaches: a) wet wrapped CF vacuum-bagged until cured; b) pre-preg CF wrapped, heated under pressure in an autoclave until cured. The second approach is heavily used by manufacturers. It's an easier method to control the amount of epoxy in the CF (because it comes pre-impregnated), and pre-preg is relatively easy to handle while setting it up to cure. Two problems exist for this method in small volume production: a) Autoclaves are expensive; b) the product is molded - molds are expensive and limit dimensional flexibility. So, pre-preg is ideal for volume production.
Wet wrapping involves several steps. First, the layers of CF need to be cut out with the fibers oriented to plans. CF has little compression strength, so it requires fibers to be aligned in a variety of directions so that any force on the joint will be compensated for by fibers working in tension. In fact, if CF had the same strength in compression as in tension, we could make much lighter frames - using much less CF.
Anyhow, CF we use (except for cosmetic out layers) is unidirectional. That is, it isn't woven, all the fibers run in one direction. Various methods are used to hold the fibers together prior to being laid up with epoxy. None of these methods are perfect. So just cutting out the patterns on the dry CF can be difficult and requires a sharp scissor.
After the layers are cut out, we prep the tubes. This means lightly sanding the surfaces and then cleaning them with rubbing alcohol or acetone. The goal is to have clean bare CF on the tubes for bonding.
Then we mix up some epoxy. There are various approaches to mixing including: a) Electronic scales; Graduated cups; Calibrated pumps. Any of these approaches will work if care is taken. Once the epoxy base and hardener and dispensed, we have to mix them together thoroughly. This usually has the result of infusing oxygen bubbles into the CF - which we will address later.
The mixed epoxy has a limited pot life. By choosing different hardeners, and being sensitive to the ambient temperatures, it's possible to adapt the pot life for the task at hand. Note that there is a general rule that the longer the pot life, the longer the cure time. So we want to limit pot life to what we really need to assemble a joint and get it ready for curing.
Next we need a flat surface, which can be covered with saran wrap or wax paper (to keep the surface clean). We take our CF pieces and lay them down one at a time. Pour some epoxy on top and use a scraper or squeegee to spread the epoxy between the fibers. We want to avoid having the CF be soaked in and dripping with epoxy, but we want it to be full of epoxy. Depending on the setup, we may do this to all the CF pieces first, and them layer them on the joint. Or, we may apply each piece of CF as it gets wetted out. In either case, we end up with our tubes wrapped in layers of epoxied CF.
Over this we put a layer of material that won't stick to the epoxy. A mylar film can be used to get a very smooth finish, or a teflon coated polyester fabric can be used. The later gives a rough surface, but is better at allowing excess epoxy to flow through. And we want it to flow through to the next layer - which is a synthetic cotton batting. This batting performs two tasks. We will put this whole contraption in a sealed plastic bag, and use a vacuum pump to suck out all the air. The external air pressure will act as a giant clamp holding things together during curing, but more importantly, it will compress the layers of carbon fiber in the joint. In so doing, excess epoxy will be squeezed to the surface, and the batting will catch and hold this excess so that it doesn't enter the pump (which would be a disaster). Also, the batting provides a channel through which the pump can continue to suck air even as the bag collapes. Otherwise, the bag opposite the vacuum fitting would get sucked into the fitting and stop it from evacuating the rest of the bag - which would do us no good.
In the process of sucking epoxy through the layers, we hope to make sure that any voids in the CF are filled with epoxy and any air bubbles are pumped out. The reality is that this will never occur perfectly, but with good vacuum pressure we can eliminate enough voids and bubbles to ensure a strong, quality joint.
A key to making all of this work is holding the tubes together, in the proper position, as the CF is wrapped on, and until the epoxy cures. A number of approaches work, from fixturing the tubes to gluing them together.
I like the later approach, as it's possible to assemble a full front triangle and then vacuum the joints one at a time. But the bonds are fairly delicate and this got me thinking of a better way to join tubes. I've developed a proprietary method that I call full surface bonding. Without giving away too much, bond a solid surface, not a hollow tube to the adjoining tube.
How strong is this? Well, I wouldn't ride a bike so built without CF wraps around the joints. But, the point of failure is delamination of a tube surface. Think of it like this. We have a plain tube and one that is mitered. The mitered tube is bonded to the plain tube. When this joint fails, it is the surface of the plain tube that is failing - not the adhesive and not the mitered tube. In other words, this joint is as strong as it can be given lamination strength of the tube to which it is bonded.
One notable feature of this method is that it adds negligible weight to the joint. As implied above, I've been doing destructive testing of my joints. So far, with full surface bonding, I'm still using the same schedule of CF laminations on the joint. This ultimately produces a stronger joint, with a weight difference that is hard to measure. The goal, is to establish a joint that is as strong as a normal wet wrapped joint, but which has fewer laminations of CF and epoxy to save weight. When testing indicates that this is ready for market, I'll be sure to let you know.
In the mean time, I can miter and jig assemble my frames similar to steel frames, when these are set (and naturally in super alignment), I come back and vacuum one joint at a time - allowing for perfectly laminated joints.
Well, that's it for tonight. Gotta run, so we'll see you soon.
Saturday, May 24, 2008
I've missed you guys
How ya'll doing?
I'm back, in more than one way. Time to resume blogging. And I'm getting over a bad bug that's laid me low for a week - but gives me some free time to post.
The winter was slow, as it was hard and long weather-wise. Next year will require some better solutions to keep the shop fit for working. As those get sorted out, I'll be sharing them with you.
Being a slow winter gave me the opportunity to do a few other things, some of which have be referenced in other posts. One we haven't discussed much is reflecting on frames and frame-building. All my thinking hasn't lead me to many firm, absolute conclusions. But it all helps me refine my thinking and goals. So I'm going to share some of these thoughts starting here with something about which I feel strongly.
It's not for me to tell other builders what to do, so let's be clear about this up front. But my belief is that too many custom builders are working too hard to be visually different, or even to create visual art rather than bikes. Each of us has a different approach to our visual aesthetic. Some work hard to achieve certain common elements throughout their work. Others strive to make each build unique. And all of this is good, from where I sit. But, when the decoration appears to somehow impede functionality - it disturbs me.
This year's Handmade Bike Show offered many examples. I don't really want to point fingers at anyone in particular - after all some of the worst examples come from very capable and successful builders. And some of these touches looked cool. But if you go to http://www.handmadebicycleshow.com/2008/, and look through the galleries, you can probably figure out I'm talking about. One bike, being shown for the second year in a row, isn't even ridable. Adding unnecessary, dysfunctional components or accessories, or significant (as in physically big, unnecessary, flashy) frame details aren't my piece of cake. Moreover, its likely to take buyers mind off of the more important aspects of bicycles and custom frame-building.
Richard Sachs probably represents the more Zen-like end of the scale. He's not into chrome or polished stainless. He works with a limited pallet of paint colors (or is that just his riders?), applied in traditional schemes. He doesn't do a lot of lug carving. But, he may put more than the average number of hours into a build - because he is obsessive about detail and functionality.
Farther down the scale are Curtlo's with their curved stays, or Kirk's Terraplane model with his curved stays. Without having ridden either, I'm comfortable conjecturing that these have no discernible performance effects. They do visually set these frames off, and don't impede the functionality of these frames. As such, they seem like fair approaches to incorporate style with functionality. Just like the Hetchin's curly frames that preceded them.
Personally I like a little flash in the form of polished stainless, and for dropouts, stainless is a functional improvement. Fancy paint is a cool thing, and long established as an aesthetic element of fine bikes. You, I and the next guy will have different opinions as to when these elements enhance or detract from the look of a bike - and I won't try to determine what other builders should do with these factors.
On the other hand, if you're building a fully equipped Rando bike, and can't fit the fenders concentric to the wheels, then who cares if you thread the dynamo wiring through the frame and rack tubes or not. And yet one respected name has advertising showing featuring such a bike. Schwinn (the real made in Chicago Schwinn) got this right, so top custom builders ought to as well.
Then there is the practice of penetrating tubes with tubes. The first time it looked kind of cool. And it probably didn't hurt too much other than to make the tube heavier (assuming the main tube itself wasn't very light,or that it had a very long butt). However, afterwards, repeating this practice is just derivative, non-functional, and a potential source of later problems for the rider. Some builders prefer to build exactly what the rider asks for - and if its pierced tubes, so be it - who can fault them for responding to their clients. But, the bike that Lance bought for his new store just wasn't likely to be ridden in any meaningful way, regardless of who purchased it.
I believe that all of this overlaps other behavior we see, such as the guys who buy a custom chopper and then trailer it to events. I just don't get this behavoir. If you're one of these guys, no problem - I'm not suggesting that you stop. But, it just doesn't make sense to me if either the rider or bike aren't up for the trip to the event - what are they good for? Showing off a fancy *purchased* chopper only says the rider was able to buy (finance?) the bike - it represents no skill in building, or aesthetic judgment, or riding ability. Look at me I have money?
The above isn't meant to pick on chopper guys, because this is just one example of a larger phenomena - that some frame-builders may have fallen into with their more outrageous designs.
The truth is that we live in a consumer society. Mere consumption doesn't ever satisfy anyone's needs. I can't prove this, and haven't done any scientific study of the issue. But, look around you and I think the statement proves itself.
If you doubt this, consider a few examples: We're drowning in the problem of too little oil. It doesn't matter if we're at peak oil of not. Prices around here are over $4/Gal. And most folks can't afford that - at least not without substantially changing their lifestyle. Should we be surprised about this turn of events when automotive sales for the last 10-15 years have returned to a focus on size of vehicle and amount of horsepower. No one needs 300-400 or more horsepower. No one can reasonably use that kind of power. Yet how many folks will stretch their budgets in order to have a huge powerful engine.
Yeah, we're putting a lot of emotional energy into our consumerism - trying to feel better, without consideration of functionality. And no, car sales aren't unique in this way. If they had any money left, American's would still be buying bigger and fancy houses - that they make less and less use thereof.
I'm a map freak - so Google Earth is just a great thing. It's interesting to look a rivers, lakes, and ocean front. Man, there's a lot of invested in boats, sitting in the water, with their covers buttoned up tight, doing nothing. Maybe the folks that take the pictures don't do so on weekends or holidays - but I bet even then, only a small fraction of the fleet is used on any weekend. This doesn't slow folks down from buying boats. And like cars and choppers, the bigger, fancier, and more powerful, the better.
It's long been said that the two best days for a boater are when he buys his boat and when he sells it. This suggests, awfully strongly, that the benefit of a boat is primarily the act of consumerism - and thereafter the best thing one can do clean their hands of their purchase. Now let's face it, there are folks who really use boats (and motorcycles/houses/cars). I'd suggest that in many cases, it is the owner of a small boat or a sailboat who is most likely to make significant use of their craft. There, the activities around using the boat are more accessible, and a source of enjoyment. When things get too fancy, boat ownership becomes just about posturing. And posturing isn't a very satisfying activity, if only because there's always someone who has more than you or I or the next person.
This probably sounds like a screed against consumerism - and likely it is. But, my point is that activity is where we find personal rewards. Hanging a bike on the wall doesn't really bring one much satisfaction. Riding a nice bike, properly fitted, is a joy. And by focusing too much on being visually different, IMO, some builders are helping push cycling too close to mass consumerism rather than pushing riders to be active.
Again, I'm not trying to bust anyone's chops here. But, this thinking does help me solidify the limits I impose on the builds that I do. Functionality has to be the driver for fine frame-building.
Hopefully I haven't PO'd all my readers. But, it is one of my convictions as a frame-builder - and I thought you should know.
I'm back, in more than one way. Time to resume blogging. And I'm getting over a bad bug that's laid me low for a week - but gives me some free time to post.
The winter was slow, as it was hard and long weather-wise. Next year will require some better solutions to keep the shop fit for working. As those get sorted out, I'll be sharing them with you.
Being a slow winter gave me the opportunity to do a few other things, some of which have be referenced in other posts. One we haven't discussed much is reflecting on frames and frame-building. All my thinking hasn't lead me to many firm, absolute conclusions. But it all helps me refine my thinking and goals. So I'm going to share some of these thoughts starting here with something about which I feel strongly.
It's not for me to tell other builders what to do, so let's be clear about this up front. But my belief is that too many custom builders are working too hard to be visually different, or even to create visual art rather than bikes. Each of us has a different approach to our visual aesthetic. Some work hard to achieve certain common elements throughout their work. Others strive to make each build unique. And all of this is good, from where I sit. But, when the decoration appears to somehow impede functionality - it disturbs me.
This year's Handmade Bike Show offered many examples. I don't really want to point fingers at anyone in particular - after all some of the worst examples come from very capable and successful builders. And some of these touches looked cool. But if you go to http://www.handmadebicycleshow.com/2008/, and look through the galleries, you can probably figure out I'm talking about. One bike, being shown for the second year in a row, isn't even ridable. Adding unnecessary, dysfunctional components or accessories, or significant (as in physically big, unnecessary, flashy) frame details aren't my piece of cake. Moreover, its likely to take buyers mind off of the more important aspects of bicycles and custom frame-building.
Richard Sachs probably represents the more Zen-like end of the scale. He's not into chrome or polished stainless. He works with a limited pallet of paint colors (or is that just his riders?), applied in traditional schemes. He doesn't do a lot of lug carving. But, he may put more than the average number of hours into a build - because he is obsessive about detail and functionality.
Farther down the scale are Curtlo's with their curved stays, or Kirk's Terraplane model with his curved stays. Without having ridden either, I'm comfortable conjecturing that these have no discernible performance effects. They do visually set these frames off, and don't impede the functionality of these frames. As such, they seem like fair approaches to incorporate style with functionality. Just like the Hetchin's curly frames that preceded them.
Personally I like a little flash in the form of polished stainless, and for dropouts, stainless is a functional improvement. Fancy paint is a cool thing, and long established as an aesthetic element of fine bikes. You, I and the next guy will have different opinions as to when these elements enhance or detract from the look of a bike - and I won't try to determine what other builders should do with these factors.
On the other hand, if you're building a fully equipped Rando bike, and can't fit the fenders concentric to the wheels, then who cares if you thread the dynamo wiring through the frame and rack tubes or not. And yet one respected name has advertising showing featuring such a bike. Schwinn (the real made in Chicago Schwinn) got this right, so top custom builders ought to as well.
Then there is the practice of penetrating tubes with tubes. The first time it looked kind of cool. And it probably didn't hurt too much other than to make the tube heavier (assuming the main tube itself wasn't very light,or that it had a very long butt). However, afterwards, repeating this practice is just derivative, non-functional, and a potential source of later problems for the rider. Some builders prefer to build exactly what the rider asks for - and if its pierced tubes, so be it - who can fault them for responding to their clients. But, the bike that Lance bought for his new store just wasn't likely to be ridden in any meaningful way, regardless of who purchased it.
I believe that all of this overlaps other behavior we see, such as the guys who buy a custom chopper and then trailer it to events. I just don't get this behavoir. If you're one of these guys, no problem - I'm not suggesting that you stop. But, it just doesn't make sense to me if either the rider or bike aren't up for the trip to the event - what are they good for? Showing off a fancy *purchased* chopper only says the rider was able to buy (finance?) the bike - it represents no skill in building, or aesthetic judgment, or riding ability. Look at me I have money?
The above isn't meant to pick on chopper guys, because this is just one example of a larger phenomena - that some frame-builders may have fallen into with their more outrageous designs.
The truth is that we live in a consumer society. Mere consumption doesn't ever satisfy anyone's needs. I can't prove this, and haven't done any scientific study of the issue. But, look around you and I think the statement proves itself.
If you doubt this, consider a few examples: We're drowning in the problem of too little oil. It doesn't matter if we're at peak oil of not. Prices around here are over $4/Gal. And most folks can't afford that - at least not without substantially changing their lifestyle. Should we be surprised about this turn of events when automotive sales for the last 10-15 years have returned to a focus on size of vehicle and amount of horsepower. No one needs 300-400 or more horsepower. No one can reasonably use that kind of power. Yet how many folks will stretch their budgets in order to have a huge powerful engine.
Yeah, we're putting a lot of emotional energy into our consumerism - trying to feel better, without consideration of functionality. And no, car sales aren't unique in this way. If they had any money left, American's would still be buying bigger and fancy houses - that they make less and less use thereof.
I'm a map freak - so Google Earth is just a great thing. It's interesting to look a rivers, lakes, and ocean front. Man, there's a lot of invested in boats, sitting in the water, with their covers buttoned up tight, doing nothing. Maybe the folks that take the pictures don't do so on weekends or holidays - but I bet even then, only a small fraction of the fleet is used on any weekend. This doesn't slow folks down from buying boats. And like cars and choppers, the bigger, fancier, and more powerful, the better.
It's long been said that the two best days for a boater are when he buys his boat and when he sells it. This suggests, awfully strongly, that the benefit of a boat is primarily the act of consumerism - and thereafter the best thing one can do clean their hands of their purchase. Now let's face it, there are folks who really use boats (and motorcycles/houses/cars). I'd suggest that in many cases, it is the owner of a small boat or a sailboat who is most likely to make significant use of their craft. There, the activities around using the boat are more accessible, and a source of enjoyment. When things get too fancy, boat ownership becomes just about posturing. And posturing isn't a very satisfying activity, if only because there's always someone who has more than you or I or the next person.
This probably sounds like a screed against consumerism - and likely it is. But, my point is that activity is where we find personal rewards. Hanging a bike on the wall doesn't really bring one much satisfaction. Riding a nice bike, properly fitted, is a joy. And by focusing too much on being visually different, IMO, some builders are helping push cycling too close to mass consumerism rather than pushing riders to be active.
Again, I'm not trying to bust anyone's chops here. But, this thinking does help me solidify the limits I impose on the builds that I do. Functionality has to be the driver for fine frame-building.
Hopefully I haven't PO'd all my readers. But, it is one of my convictions as a frame-builder - and I thought you should know.
Sunday, March 16, 2008
Brief Update
Sorry I've been gone so long. Lots going on, and we'll be doing some catching. One thing is that I've developed a web store for bike parts that I like. Check it out at www.FixeesBikeShop.com
More soon,
More soon,
Tuesday, January 15, 2008
Broken Record
Unfortunately work and weather has limited my shop time. No more work on chain stays or the Path Racer - no more pictures for the moment - sorry.
But, my new Sapim spokes came in and I was able to finish lacing and truing the light-rando wheels. They look pretty good. With the weight coming in so low, I'm considering using velo-plugs instead of rim tape. They're supposed to reduce weight a bit. But, I'm wondering if a light tape (not rim tape) might accomplish the same thing. The low pressure tires don't work so hard on the spoke holes, and the spokes are sized so that they don't stick out past the nipples. So, I guess that its time to experiment and weigh (literally) the options.
The other big news is Craig's List. I've been watching it and eBay looking for a lathe and a drill press - not thinking that I could possibly buy both. I have a small counter-top drill press, but it isn't heavy enough for the table to hold an angle while I miter a tube (using Joe Bringheli's miter jig). I know that the jig works, because I used one in his shop on one of his drill presses. So that's want #1. Everywhere I look, anything that looks adequate is outside of my budget, considering I can continue mitering with a hacksaw, grinder & files. But, I have a good space for it in the shop.
A lathe is a beautiful thing. That's a famous saying (started by Darrell Llewllyn - a great frame-builder in Australia). Ultimately, what we need is like a 12-13" swing and 24-30" between centers. This allows one to mount a fork, and cut the crown race seat on the lathe, which is more accurate than using a hand seat cutter. But that's just one thing the lathe can do. It can be used to cut miters, with the right fittings it can be used as a small milling machine, one can turn down tubes, and make a variety of parts and tools.
A big lathe like that needs a lot of space, often takes a 240v circuit or even 3 phase 240v - which would mean rewiring the shop and getting a whole new feed & panel installed for the house. It'd probably cost a grand for an old one with a little life left for frame building - but $3,000 would probably be a better amount to invest. And, it'd be hard to move around or ship. Right now, that's not in the cards for me.
However, somebody right here in town, had a 6" and a 9" lathe for sale on Craig's List. The first is a Sears/Dunlap, the second is a Central Machinery (Chinese - not the best brand of same, IMHO). The prices seemed attractive, so I called and visited 'Otto' (his Craigslist name). Otto takes me down to the basement, and it turns out that he likes to 'putter'. In his shop he has a beautiful Southbend Heavy 10. Very nice!!!! But, he has a variety of tools he's collected and tuned up - for sale. In fact, we haven't even made it down the stairs and he asks if I'm interested in a drill press?
Now, aside from not being able to fit or afford a big lathe, I have no experience with a metal lathe and will have to learn to use one. My first goal is to turn down (thin or reduce the gauge) some tubing - maybe 6" long. The small lathe is plenty big for that. Plus to learn on and make some small fittings, maybe even some tools etc.
It's got a new motor, probably over-powered by the size. The beds look nice, and there doesn't appear to be any lash in the cross slide. No center for the tailstock, but two sizes of jacobs chucks (one may work on the headstock). No face plate or 3 jaw chuck, but a nice 4 jaw chuck. Not a lot of change gears, but I can fill them out over time from eBay. A few other little bits and such. All tuned up, fresh paint, mounted on a nice board. It's low speed isn't very low, but I can probably come up with countershaft and slow it down a bit - plus with the small swing, the speed of the face is already sorta low. Small enough for the garage shop or basement. Asking $350 - let's me know it's negotiable.
So we talk, and look at stuff and I ask about the drill press. It's out in the garage, we go back up stairs and its tucked in tightly between a big Buick and the wall. It's from Taiwan. I don't recognize the brand (which is Taiwanese), but it's a nice, heavy sturdy piece of iron. Not new, but obviously well cared for. Looks like the best I could find for much under a Grand (I see a big jump up from what is available for $300 and what's available for a grand - lots in between with very incremental improvement - but I may be proved wrong). Anyhow, this looks very cool.
I ask him how much for both the lathe and the drill press, he thinks and says how about $300? I was figuring he'd want $500 or more and I'd be stuck. But... for this price, how can I go wrong? The drill press obviously won't fit in my car, but he has a mini-van. So tomorrow, I'll become the owner of a nice drill press and a good small engine lathe. How cool is that? Well, unless you're a bike building geek like me, it might not seem all that hot. But believe me, in my world, this is a grand slam. Yipee!
Anyhow, I'll be busy but try to keep you all updated and get the Path Racer pictures up here soon. Cheers
But, my new Sapim spokes came in and I was able to finish lacing and truing the light-rando wheels. They look pretty good. With the weight coming in so low, I'm considering using velo-plugs instead of rim tape. They're supposed to reduce weight a bit. But, I'm wondering if a light tape (not rim tape) might accomplish the same thing. The low pressure tires don't work so hard on the spoke holes, and the spokes are sized so that they don't stick out past the nipples. So, I guess that its time to experiment and weigh (literally) the options.
The other big news is Craig's List. I've been watching it and eBay looking for a lathe and a drill press - not thinking that I could possibly buy both. I have a small counter-top drill press, but it isn't heavy enough for the table to hold an angle while I miter a tube (using Joe Bringheli's miter jig). I know that the jig works, because I used one in his shop on one of his drill presses. So that's want #1. Everywhere I look, anything that looks adequate is outside of my budget, considering I can continue mitering with a hacksaw, grinder & files. But, I have a good space for it in the shop.
A lathe is a beautiful thing. That's a famous saying (started by Darrell Llewllyn - a great frame-builder in Australia). Ultimately, what we need is like a 12-13" swing and 24-30" between centers. This allows one to mount a fork, and cut the crown race seat on the lathe, which is more accurate than using a hand seat cutter. But that's just one thing the lathe can do. It can be used to cut miters, with the right fittings it can be used as a small milling machine, one can turn down tubes, and make a variety of parts and tools.
A big lathe like that needs a lot of space, often takes a 240v circuit or even 3 phase 240v - which would mean rewiring the shop and getting a whole new feed & panel installed for the house. It'd probably cost a grand for an old one with a little life left for frame building - but $3,000 would probably be a better amount to invest. And, it'd be hard to move around or ship. Right now, that's not in the cards for me.
However, somebody right here in town, had a 6" and a 9" lathe for sale on Craig's List. The first is a Sears/Dunlap, the second is a Central Machinery (Chinese - not the best brand of same, IMHO). The prices seemed attractive, so I called and visited 'Otto' (his Craigslist name). Otto takes me down to the basement, and it turns out that he likes to 'putter'. In his shop he has a beautiful Southbend Heavy 10. Very nice!!!! But, he has a variety of tools he's collected and tuned up - for sale. In fact, we haven't even made it down the stairs and he asks if I'm interested in a drill press?
Now, aside from not being able to fit or afford a big lathe, I have no experience with a metal lathe and will have to learn to use one. My first goal is to turn down (thin or reduce the gauge) some tubing - maybe 6" long. The small lathe is plenty big for that. Plus to learn on and make some small fittings, maybe even some tools etc.
It's got a new motor, probably over-powered by the size. The beds look nice, and there doesn't appear to be any lash in the cross slide. No center for the tailstock, but two sizes of jacobs chucks (one may work on the headstock). No face plate or 3 jaw chuck, but a nice 4 jaw chuck. Not a lot of change gears, but I can fill them out over time from eBay. A few other little bits and such. All tuned up, fresh paint, mounted on a nice board. It's low speed isn't very low, but I can probably come up with countershaft and slow it down a bit - plus with the small swing, the speed of the face is already sorta low. Small enough for the garage shop or basement. Asking $350 - let's me know it's negotiable.
So we talk, and look at stuff and I ask about the drill press. It's out in the garage, we go back up stairs and its tucked in tightly between a big Buick and the wall. It's from Taiwan. I don't recognize the brand (which is Taiwanese), but it's a nice, heavy sturdy piece of iron. Not new, but obviously well cared for. Looks like the best I could find for much under a Grand (I see a big jump up from what is available for $300 and what's available for a grand - lots in between with very incremental improvement - but I may be proved wrong). Anyhow, this looks very cool.
I ask him how much for both the lathe and the drill press, he thinks and says how about $300? I was figuring he'd want $500 or more and I'd be stuck. But... for this price, how can I go wrong? The drill press obviously won't fit in my car, but he has a mini-van. So tomorrow, I'll become the owner of a nice drill press and a good small engine lathe. How cool is that? Well, unless you're a bike building geek like me, it might not seem all that hot. But believe me, in my world, this is a grand slam. Yipee!
Anyhow, I'll be busy but try to keep you all updated and get the Path Racer pictures up here soon. Cheers
Monday, January 07, 2008
Brief Post
Only a little to report today. Yesterday I brazed the track forks to the stays and threw them into water to soak off the flux. The day job limited progress today, but I got the basement cleaned out, and reorganized, to prepare for doing carbon work inside (where its warm). Keep tuned for more info and related pictures of some test layups.
Speaking of warm, it hit 60 degrees farenheit yesterday, and today was darn close to that. Hard to believe it was 10 degrees only a few days ago, and I should make hay while the sun shines. Tomorrow looks to be another busy work day, but i hope to make it into the shop yet.
Meanwhile, my Grand Bois tires arrived, so it's time to finish the path racer and then get some pix of the completed bike. I have to say, the new Grand Bois look and feel the part of a fast, supple tire. Along with the 700Cx30s for the Path Racer, there is a pair of 650Bx32s for upcoming rando bike.
My next task is to clean up the chain stays, and some pix of same to share with you. From there, I have to miter the chainstays for Paul's bike, then set up the jig and tack it all together.
So with luck, we'll have some more pictures to view before the end of the week, then it'll be on to completing Paul's bike.
See ya soon
Speaking of warm, it hit 60 degrees farenheit yesterday, and today was darn close to that. Hard to believe it was 10 degrees only a few days ago, and I should make hay while the sun shines. Tomorrow looks to be another busy work day, but i hope to make it into the shop yet.
Meanwhile, my Grand Bois tires arrived, so it's time to finish the path racer and then get some pix of the completed bike. I have to say, the new Grand Bois look and feel the part of a fast, supple tire. Along with the 700Cx30s for the Path Racer, there is a pair of 650Bx32s for upcoming rando bike.
My next task is to clean up the chain stays, and some pix of same to share with you. From there, I have to miter the chainstays for Paul's bike, then set up the jig and tack it all together.
So with luck, we'll have some more pictures to view before the end of the week, then it'll be on to completing Paul's bike.
See ya soon
Sunday, January 06, 2008
New Pictures
Vote on the right for your favorite frame material. BTW, hemp only works when its encased in epoxy (like carbon). :)
I've promised some pix from the build of Paul's new track bike. The tubing is SLX, which is like SL with reinforcing rifling in key joints. Below on the left is the end of the chain stays, and on the right is the bottom of the seat tube. In both pictures the rifling is pretty obvious. The yellow dust in the stays is paint from the hack saw blade, I took about a CM off of each end. The stays themselves are ROR (round/oval/round), so it shouldn't be necessary to crimp them to make room for the tire to fit. It is important, however, to position the forks so that the tire fits nicely in the ovalled rand for the stays across the full range of rear axle positions.


The bottom bracket shell is a Cinelli road shell with spoiler., If you enlarge the pictures and look closely, you'll see the filler in the cable tunnel. What you won't find is the casing stop that used to be their.
Next comes a rear and front view of the stainless fork crown. Originally the front had a flat land for the brake, like on the back. I'm almost finished rounding off the front, which I think will look better on a track crown. Then its the slow process of polishing the crown.
Finally you can see the the track fork being fit up to the chain stay. The fork has a bend in it near the end of the stay, so that the faces will be parallel. As a consequence, the inside miter is much shorter than the outside on. As you can see, the stays have a large overlap with the forks. In face, the overlap is more than an inch long. This probably isn't necessary, but on a track bike it's nice to make this intersection as rigid as possible.
At this point, I have one miter left to clean up. Then it'll be time to set up the jig, tack things in place, and get ready to braze this up. More pictures once we have more progress.
I've promised some pix from the build of Paul's new track bike. The tubing is SLX, which is like SL with reinforcing rifling in key joints. Below on the left is the end of the chain stays, and on the right is the bottom of the seat tube. In both pictures the rifling is pretty obvious. The yellow dust in the stays is paint from the hack saw blade, I took about a CM off of each end. The stays themselves are ROR (round/oval/round), so it shouldn't be necessary to crimp them to make room for the tire to fit. It is important, however, to position the forks so that the tire fits nicely in the ovalled rand for the stays across the full range of rear axle positions.


The bottom bracket shell is a Cinelli road shell with spoiler., If you enlarge the pictures and look closely, you'll see the filler in the cable tunnel. What you won't find is the casing stop that used to be their.
Next comes a rear and front view of the stainless fork crown. Originally the front had a flat land for the brake, like on the back. I'm almost finished rounding off the front, which I think will look better on a track crown. Then its the slow process of polishing the crown.
Finally you can see the the track fork being fit up to the chain stay. The fork has a bend in it near the end of the stay, so that the faces will be parallel. As a consequence, the inside miter is much shorter than the outside on. As you can see, the stays have a large overlap with the forks. In face, the overlap is more than an inch long. This probably isn't necessary, but on a track bike it's nice to make this intersection as rigid as possible.
At this point, I have one miter left to clean up. Then it'll be time to set up the jig, tack things in place, and get ready to braze this up. More pictures once we have more progress.
Subscribe to:
Posts (Atom)