Wednesday, August 29, 2007

OOPs

Should posted this before the last posting - but I forgot to upload it.

What’s new?

I’m recently back from a family trip to the Eastern Sierras around Mammoth Lakes, CA. It’s a lovely part of the country and a great place to visit. With my lungs, however, I could never live there. We took 5 days to acclimate to the base altitude (8000’). This got me to the point of being comfortable, as long as there were no stairs to be seen. Then we packed in to camp for a few nights at 11,500’. We were on the shore of a beautiful blue lake rimmed with mountains – the sights couldn’t be beat. But, walking up from the lake to our camp (maybe 25’ of elevation) was enough to wind me. Ugh.

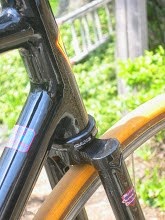
Many projects have been on hold for a while, but I’m beginning to finish them. The path racer is ready for paint except for some final filing around the track forks (dropouts). I’m pleased with how it looks, and it should be in the painter’s hands within a week. Janet’s randonneur frame is done and will go to paint at the same time. Charlie’s carbon frame is designed now. See picture below. It will be carbon (from an old trek 2500) w/ a steel bottom bracket shell, chainstays, dropouts and front fork. Charlie wants Gordon to paint this to look like my bike – which sounds like fun to me.

On Charlie’s bike, the BB will be lugged so that the down and seat tubes can be bonded in. This will involve filet brazing and I’ll try to get some pictures posted of the process. The head tube and seat cluster will be wet wrapped carbon that is vacuum-bagged to pull out excess epoxy. The seat cluster will be complicated because I’m using traditional stays (carbon of course) on either side of the seat tube. So four tubes come together in one place and need to be wet wrapped, then wrapped with a material through which the epoxy can pass, but which will not stick to the finished work. All of this then gets wrapped in a bleeder felt which allows air to be pulled out by the vacuum pump and which sucks up and holds the excess epoxy. Then, a plastic ‘bag” has to be put around all of this and sealed up (especially where the tubes pass through) so that the bleeder felt can do its job while the epoxy cures.

For the initial connection of the stays to the seat tube, I’ll be using my old reliable Scotchweld 420. This sets up in about 20 minutes, and should hold things together through the process of wrapping the joint up. A balsa plug will be located in the rear of the top tube so that the top tube can be similarly affixed to the seat tube before wrapping and bonding. All in all, I expect this process to take about an hour from first gluing until the bag is being vacuumed. This setup will be left to cure for 36 hours, then the vacuum is shut off, the bag removed, and the felt and transmission layer peeled off. Using a Mylar transmission layer (generally with perforations) can yield a very nice smooth looking outer surface. Given the complexity of the seat cluster, I’m not planning to use Mylar. Instead a specially treated polyester cloth (woven) will better follow the contours of the tubes. Even then, I expect to see some ridges, creases, and thick spots in the epoxy. My goal will be to sand these down to something presentable before shipping the frame off for paint.

Assuming that Charlie’s bike goes well, I’ll build a full scale prototype for me to ride. This will continue to use steel chain stays as an economy move. I have plenty of experience bonding carbon rear triangles – so I’m not worried about how that works. With two finished bikes in the bag with lugged bottom brackets and vacuum bagged head tubes/seat clusters, it should be time to apply this method to a production bike. I may apply this to Tim’s prize bike. It is a small frame size – which presents a builder with certain challenges in both design and construction. This system takes me away from the constraints of pre-built lugs which will make Tim’s bike easier to get right.

With Tim’s bike, we may also go with an aluminum bottom bracket. Bottom brackets are made in both aluminum and steel with a lug for bonding in a carbon seat stay. This would require outsourcing the TIG work of putting lugs socket son the bottom bracket for the seat and down tubes, but should reduce the overall frame weight. Similarly, I may look at milling grooves in the aluminum head tube. Because it will be carbon wrapped, it may be possible to take a little weight off of the aluminum. And, when we’re all done, Tim’s going to have a great frame!

I’ve also nearly finished a fork for an old project bike. Actually, the fork could go to paint right now. But it has a stainless crown and tips – and polishing takes a long time. I was pleased to find out that other builders have the same challenge as me. This is, to see a remaining scratch from one level of grit (be it sand paper or buffing compound) requires polishing down a couple of more levels. So it’s a two step forward and one step back kind of process. I find that it’s important to be in the right frame of mind.

When working the stainless, pressure has an equal impact to grit. It’s possible to work a piece for a while, and with one stroke of two much pressure, scratch a layer that needs to be sanded out before proceeding down the levels of grit. This plays out especially with oddly shaped pieces (can you say lugs, crowns, and dropouts?) where an even pressure needs to be applied around varying contours. On a nice flat surface, I can work through a series of grits with a flap wheel sander and have few problems. The flap wheel sander works fast, which is nice. But through in a corner or a curve and it may be possible to sand through the piece before getting it uniformly ready to work down to the next level of grit.

So, I’m about halfway, maybe a little more, through polishing this fork. But it takes a peaceful/patient frame of mind to get through this work. With what’s in front of me, the fork is being set to the side until I catch up a little. Anyway, when it’s done, another frame will go to the painter.

Finally, I’ve been filing (on my trip) some old Cinelli pressed lugs and have them almost ready to go. This is for a track frame I’m building for my neighbor. He want’s something very traditional. He’s got a Record Pista crankset, some nice pedals, a Cinelli steel stem (and soon a matching bar). He’s working on building up a set of wheels with some Record Pista high-flange hubs and some nice old Campy rims.

The Cinelli lugs are more symmetrical than some of the pressed lugs that I’ve used. But, in the weld area, near the edges, there is some porosity. We’re going with a cast Cinelli bottom bracket which should arrive this week. Hopefully it’s in a little better shape.

For tubing, I’ve been considering lots of options. The rider prefers to stick with Columbus – which is fine with me. However, there is a limited variety of standard-sized tubing available in the newer metals and these tend to have thin walls. As a consequence we’ll probably use one of the old sets of SL that I have kicking around. While I grew up thinking that SL was dangerously thin and whippy, it’s seriously a heavy gauge tube compared to modern tubing. If an SP downtube can be found, that will probably get subbed in. Also, we’ll look at the option of going to a heavier gauge chainstay. Together, this should provide the rider with the stiffness he desires while sticking to traditional tubing diameters.

My plate is full, eh? Also, I need to do some reconfiguration of the shop to make my space more efficient, and I’m starting to look at lathes. There’s lots to do so I’ll stop writing for now and get back to work. See you soon.

Tuesday, August 28, 2007

Fork & Crown

Fork & Crown. Could be the name of Pub, eh? Anyhow, I've had forks and crowns on my mind lately and there are a few pictures to share.

The last post contained a bit of blather about the difficulties of polishing stainless - enough that you might wonder why I or anyone else does it. Hopefully this picture answers the question. The crown on this fork is nearly done. Click on the pic to enlarge it. This was taken with an older 2 mega-pixel camera, without flash, this evening at my kitchen table. You can clearly see the camera and towel (on which the fork lies) in the finish of this crown. Just a little more touch up here, and a bit of work on the dropouts (also stainless) and this can go to the painter.

Here is a view of the complete fork. It's straight legged and the dropout sockets have a similar shape and cutout as the crown.


Along with polishing, this evening was spent filing the intersection of some seat stays and a seat cluster.
The cluster is rather unique (in my experience) in that it is fastback with legs coming off of the binder bolt tabs all as one casting. These are designed to fit a bi-conical stay, and start rather square, then shift towards round where they mate with the stays. Anyhow, the legs needed a little tuning to make a smooth transition into the stays. I think the overall effect will look very nice under paint.

This seat cluster above is on the Path Racer I'm making for myself. This frame is built with an old set of Reynolds 531 using Prugnat lugs. The fork crown is an old full-sloping casting, and was very rough when I started. The most
frustrating part of the crown was that the spigots (over which the fork legs slide) were very asymmetrical, with one side of each being thick and one very thin. And, the thin side of each was facing the same side of the crown. So, it was impossible to file them to fit the fork legs while maintaining an equal distance from the center of the steerer tube for each leg. The difference probably won't be visually apparent - and the fork with is well aligned and will steer nicely. Still I didn't like the result.

Just to quantify things, I'm close to having an old set of pressed steel lugs prepared for use - maybe 4-5 hours worth of work. But the old sloping crown has already taken at least twice as much effort and I'm still working on its final finish. The problem is that the fork legs are Imperial Ovals.

Richard Sachs makes a point that new builders, working with todays high quality castings, just don't appreciate what long-time builders have gone
through as part of their learning curve. He's right, until one works with old time castings and pressed parts, its hard to understand how much goes into preparing these, parts prior to building.

One also loses some of the opportunities to develop ones eye, and tool skills, that comes from doing significant fabrication work on these parts. This is one of the reason for my recent focus on old lugs and components. The modern stuff is undoubtedly better, but working with the old stuff is improving my skills.

Because I have another set of 531 w/ Imperial Oval blades, and I prefer a flat topped crown, I contacted Richard to see if he had any kicking around in his shop. He was gracious enough to send me one gratis - and its a Nervex to boot.

You can see that the old Nervex crown is considerably narrower in overall width than the newer Continental Oval crown (today, crowns and legs are made almost exclusively in the Continental Oval style). These two crowns have the same spacing between the fork legs, but the Continental crown is clearly wider. overall.


Many folks hear Nervex and think of the Nervex Professional lug set. No wonder, with its intricate design, it was a builders favorite for top end frames including the Schwinn Paramount. But Nervex made a variety of styles of lug, fork crowns, and bottom brackets. The crown that Richard sent me is not the Professional, although I'm not sure what model it is. Suffice it to say that it is an example of a quality crown of its time. Here's a picture.

What may not be clear are some file or grinder marks just to the left of the center bulge and just to the left of the right hand socket. At first I thought that Richard had sent me a crown that he had previously started to work. I related to him that it was difficult to start in on a crown that showed his handy-work. He let me know that this crown, complete with these marks, was as-delivered by Nervex. Perhaps this is where the mold connected to the sprue, and the channel for steel to enter the mold. But its interesting, especially given the rough nature (compared to today) of the casting, that someone had to perform some manual clean
up before the crown was shipped.

In the picture of two crowns, the second on is a Sachs Newvex in stainless. Because it will be polished, and because it has some complex shapes, it takes more preparation time then most newly manufactured crowns.
But, make no mistake, this is a very nicely made crown - any builder would be happy to work with materials of this quality!

As we look more closely, its easy to
see how much thinner the walls are on the newer crown. The old castings required significant thinning by the builder before they could be assembled into a bike. This is of course all done by hand with a file. And, in the process, the builder has to maintain fidelity to the shape of the crown. Curves must remain smooth and even, for example. And, in some places, its not possible to move the file around the crown on the desired path without hitting or rubbing another part of the crown. So a builder needs to employ creative approaches for getting his/her file into and around all the complex shapes of the crown.

Another difference between these crowns is that the old one has built-in reinforcing tangs on the inside of the blades, whereas the new one has
pockets into which separate tangs can be place prior to brazing. One advantage of the modern approach is that the tangs can be prepared with cutouts apart from the rest of the crown - which makes things easier.

Going back to the first picture of the pair of crowns, the Newvex crown has
an extended area that has been throttled in preparation for cutting the crown race. If the builder is using a crown race cutter (as opposed to a lathe), then this will need to be further reduced with a file prior cutting the race. Skipping this step forces the cutter through too much material, with the consequence that it wanders some from side to side. In the process, the crown becomes too narrow and the headset won't be held firmly.

On the Nervex crown, the throttled section must be continued down to an appropriate depth by the builder prior to filing and cutting for the headset race. Depending on a builders skill, this could take a considerable bit of
time.

Here's a side view. The Newvex crown is based on the old Nervex
Professional and you can see all the frilly detail for which the Professional is and was known. By comparison the Nervex crown is rather simple. I may yet shape it to place more emphasis on the outer two points. On the Newvex crown its easy to see the pocket (indent) for its add-on reinforcing tangs. Also, if you look at the bore for the steering tube, the Newvex crown has a ledge on the bottom providing a hard stop for the steerer prior to brazing. The Nervex crown is open on the bottom, which gives to builder the option to have it stick out a little as a platform for applying filler. Then when the brazing has cooled off, the builder can file off the excess steering to be flush with the crown itself. Finally, the Newvex crown has a breather hole. By putting a matching vent hole in the fork leg, the vent hole is: a) out of sight; b) surrounded by, and brazed to, the crown - providing more strength to this invasion of the fork leg. The Nervex crown has a huge opening that can act in the same way as a breather hole. Because of the limits of old-time casting, however, the fork leg gets much less support on this side than with the newer crown. Furthermore, because the bottom of this opening terminates in a sharp V shape, there is the possibility of inducing a stress riser. Is the crown or leg likely to fail due to this rise? Probably not. On the other hand, modern casting abilities prevent us from having to test this assertion.

Ah, once again its late. So I'm going to sign off here. Happy Trails!


Saturday, July 14, 2007

Hey there


My apologies for being gone so long. I've been meaning to start posting again for a while, but life is busy. Anyhow, I've been sick in bed for 3 days and figured I ought to use the time to catch up on a few things.

I took pictures of my current build, but the macro wasn't working right. You'll have to settle for one teaser until I can borrow another camera.

My last couple of bikes have been very traditional. Columbus SL or Reynolds 531 tubing, pressed steel lugs (Prugnat in one case), forged steel ends. On the one hand, these materials (apart from the tubing) take more work. They're not as well finished as
modern parts. But, they are much easier to manipulate and they encourage one to express some artisitic license. The tubing itself seems much easier to cut and file than even basic CroMo tubing of recent vintage. So, if you're willing to work slowly, its a very rewarding process.

One of thes bikes is a randonneuse for my wife. It should be back from the painter in a couple of weeks and I'll
post pictures here. This bike is built around 650b wheels w/ Gran Bois tires. Janet took it for a short ride prior to paint and remarked "It's so light" That's not what a scale would say - but a reflection of how good fit and frame design rides. So I'm very happy for the recognition.

The picture from today is of a bottom
bracket. It's my first cut-out BB. You will clearly see that it's hand made - but that's part of the charm. No one will think that the holes were cast in place or punched out on a machine. They will know that someone laboring over a bench with some simple tools created them by hand. As always, you can click to enlarge.

I've used this frame to try some different styles for finishing off the tips and track-ends. You'll have to wait for the photos to see how they came out, but I'm pretty satisfied.

The bike is set up for 700Cx32 tires, and there's a nice old set of white Pirelli tires with terracotta treads waiting to go on the finished bike. The crank will probably be a set of old Nervar arms with the little bolt circle that most folks recognize from TA Cyclotourist cranks. On it will go a pretty polished Stronglight chain-ring with their traditional star-pattern spider. Naturally, the seat will be a Brooks B-17.

The bike is built with a low trail design, which should work well with a front bag. Interestingly, I've seen specs on some old high-end British path-racers - the kind that always have their luggage hanging from the seat. And some of these use very low-trail designs. So, maybe there's more flexibility to this approach than I realize.

I haven't sorted out colors yet. One would be a Cabernet metallic with gold lug lines. Another would be sea-foam green and periwinkle as in the picture at the head of the post (Sorry, it won't move down here for me).

Anyhow, that's it for now. I'll get pix up as soon as I can. Until next time, happy travels!


Monday, April 16, 2007

Latest Update

I spent the weekend at the Chicago Bike where I shared a booth with another Chicago builder - Owen Lloyd. We had a great time and met lots of nice people.

Saturday night, I had an email from Gordon with pictures of Linda's freshly sprayed frame. To see them head over to www.lindasnewbike.blogspot.com

Owen's father took a couple of pictures of our booth Sunday afternoon - thought you might like to see them as well (click to see large versions).


First up is Owen with his first frame (created at UBI Bike School). It's a pure track geometry, but with a brake hole in the fork crown. It's finished old school in pure chrome, and set up for city riding.


Next is the row of our other bikes. On the front is my fillet brazed (except the BB) trackie. It's built oversized with a 35mm 9/6/9 downtube. After the chrome, this seemed to be the next best eye-catcher in the booth. Behind it in lavender is a trackie that Owen built using Kavalinka castings. Then is the randonneur that I'm building for my wife. Primer on it is to help find dings and file marks. Parts are being test fitted - you can see that I haven't got a front fender installed - nor the chain or front derailer cable. Behind that is a nude frame with Hellenic stays, just brazed up by Owen last week. It also has its kit on for test fitting. Finally, at the back, is one of my carbon frames - in fact it is my daily rider.

From the next angle, you can see of attempt to 'decorate' our booth.
Some pictures of other builds on the back curtain (and a Cycles Noir sign). Also, you can see our table where we had a selection of tubes/lugs/etc on display in 'the raw'. Also, we had our business cards, give away head-tube stickers, and signup for an electronic news letter.


Again, we had a great time and we're hopefull of getting some business out of this. Thanks for all who attened and supported us.

Sunday, March 18, 2007

See Linda's Blog

We have a design for the paint on Linda's new bike - and are awaiting her ok. Take a peek over at lindasnewbike.blogspot.com.

I've been busy readying some bikes for the Chicago Bike Show, which is held out on Navy Pier on April 14 & 15 (chicagobikeshow.com). I should have a nice track bike, a randonneur, possibly Linda's carbon racer, and maybe one other bike on display. I'll be sharing the space with Owen Lloyd who is another emerging builder in Chicago.

I'll have some pictures up soon of some construction aspects of one frame that has been expanding my skill set.

More soon.

Friday, December 01, 2006

Snowy Day

It's a snowy day, so I'm stealing some time to update the blog.

My first rider (bike that I rode instead of cutting up) came back from the sand-blaster. These folks are local, but I need to find someone cheaper - they charged their minimum ($100) for what should be maybe a $25-50 job.

Overall it looks pretty good, but they blew through the edge of one seat-stay cap. Out came the torch. This is a perfect application for Freddy's Filet-Pro. Fill the spot a little high, cool and clean flux, then file it down with a half-round and it's as good as new. Some could do that with 56% silver, but Filet-Pro makes it soo much easier.

Anyhow, over to the Ace to select colors and decided on Colonial Blue (a very soft grey-blue) with white (head-tube and maybe seat-tube). I think it will be subtle but very attractive, and in keeping with the French character of this bike. I gave a test shot of primer to see how it took to the blasted frame. It looks like a course of sandpaper will be in order before priming, to knock down the worst of the texture left behind by the blaster.

There's another new bike in the queue - a track frame based on Colubus SLX tubes and an old lug set that I picked up on EBay. I'll have to post lug pictures soon - they're sort of interesting.

Henry James sent me some of their Gas Flux brass rod and a pound of flux. I'm going to do a little more brass work and see how I like it. I'm moving to the point where: 1) I believe that the heat of brass brazing doesn't hurt tubing - if the brazing is done well; 2) Some parts of the frame benefit from being done in brass. I'll keep you all posted on the progress. An interesting aspect of the Gas Flux rods is that they're 2-3 times as long as Freddy's rods. On the one hand, this could be a lot to handle (unless I cut them up). On the other, it could limit the losses related to the short end that can't be held and flowed at the same time.

I had what was to be my first rolling frame (mentioned in a prior post) that I'll call Old Number 1 or ON1 for short. It turned out that it had a marvelously aligned front triangle and a well aligned rear triangle which weren't in alignment with each other. Hmmm.

The new rear triangle is now fitted for ON1. Grinding out the BB ports was interesting. If you're not careful, the spigots can end up with very thin walls. The key is that its a 3 dimensional puzzle, and one has to keep checking to make sure that excess material is being removed from the right places. The dropouts are HJ stainless, and naturally they had to be thinned to fit into the chain and seat stays. The seat stays fit into ports the seat-cluster - which had to be ground out like the BB. However, as these are considerably smaller in diameter, it required a much smaller rotary file - making for a slower job.

Anyhow, all are fitted and cut to length. All that's left is to clean, flux, and braze - which might happen this weekend. Yea, I miss the torch time.

The storm has brought cold with it, although its actually a little above freezing. Anyway, it's delaying the spray out of Frame 1. If this cold continues, I may accelerate my plans to practice vacuum bagged carbon joints. This will be done in the house anyway - where its warm. With luck, I may even have a prototype frame with bagged joints by January. That would be fun.

Well, that's all for now. See ya soon.


Friday, November 17, 2006

Catching Up Again

Tonight I put the last filler of epoxy into the filets on Linda's bike. After a little sanding, it'll be ready to head to Gordon for paint. Naturally, it wasn't possible to sand tonight, so I spent time on several other projects.

First, I've organized a work space in the basement. It's well lit and has two good-sized work surfaces. This is where I'll do my vacuum bagging. It close to the furnace, and so tends to be warmer than the rest of the house - which is good for curing epoxy. There is a little more organizing of tools and materials to do, but things are just about ready here.

Second, I attacked the first frame that I built with the intention of being painted and built up. After dropping it off, the painter got back to me with the information that the rear triangle was out of alignment - and so its sat in his shop for a couple of years. This fall we arranged to get it back to me. I should note that this frame is the one that convinced me to buy a jig - it was just too hard to build the rear-end without. The funny thing is, knowing what I do now (how to pin or tack joints), a straight, aligned, rear triangle seems quite doable without a jig.

Looking this beast over, the front triangle seems fine. It passed the check on the alignment table - and so is deemed worthy. The rear triangle was beyond repair. Out came the hack saw and I cut each chain stay about 2 inches from the BB. It was pleasing to see that the stays held their alignment even after being cut. Then I cut the first seat stay about half an inch from the seat lug. It too held alignment, so I cut the final seat stay similar to the first.

The seat lug has ports for mounting the seat stays, sort of a fast back style. These stays were cut short because they needed to be ground out of the lug. The chain stay stubs were left longer so that they can be heated and pulled out of the BB.

The now disconnected rear triangle is held together by the brake bridge and the dropouts. And, it looks good and in alignment with itself. Yea. This is now set aside for a while

Third, it was organization time. And this will take some time. To begin with, I inventoried tubing and reorganized its storage to save some space. For the record, I have 4 Metax front triangles, 2 sets of 653 (1 std, 1 OS) w/ 725 rear triangles, 2 full sets of SLX and 1 full set of SL (11 tubes), 1 set of LIFE sized for SL6 lugs, 3-4+ sets work of Deda & True Temper std & OS tubes, 4 pair of Reynolds pre-raked fork blades, 2 pair of Nivachom blades, 4 pair of ZeroTre blades, 2 pair of round track blades, a variety of seat stays (including Metax, Biconical, and normal 14 & 16mm) and chain stays (oval, round, round-oval-round), a bunch of head tubes, and a small supply of steerers. That's a lot more tubing than I realized. Everything is now organzied, labeled, and put away, and many boxes have been collapsed and put in the recycle bin.

With one frame and fork now in the car's trunk (so it can go for blasting), one frame about to be cut up to liberate its carbon tubes for practice joints, and the frame mentioned above in play - there are many fewer stray frames hanging around and in the way.

Next steps include: creating more hanging space for parts and tools, making more holder blocks for small files, and rotary tool items (sanding drums, flap wheels, buffers, grinders, etc.). Then I need a better system for storing (and making accessible) the various sand papers.

One disadvantage of my garage is that it has a very low ceiling. The tracks for the garage door use a special short radius piece so that the door fits. This means that its hard to go up for storage. Therefore, more bicycle parts need to find a place in the basement to free up more space for tools and materials. As you can see, this is going to be an ongoing project for quite some time.

Anyhow, my building priorities have shifted to: a) install the new rear triangle on Bike #1, then paint it (using rattle cans); b) Get the blue bike back from blasting and give it a good paint job; c) Finish Aram's track bike; d) Build a townie bike using some nice Tange lugs I've been hording and a set of SLX, build a Metax roadster - after that the world is too fluid to plan.

It looks like my hands will be full with re-orging the shop, refining my carbon vacuum bag builds, and a bunch of steel bikes. Stay tuned for the fun.

Tuesday, November 14, 2006

Dateline Tuesday December 15

Just a quick update.

Linda's bike is coming along and should get packed off to the painter within two weeks. I'm currently cleaning up joints and spilled epoxy from bonding the front triangle and the chain-stays. Then the seat-stays get fitted, bonded and a little cleanup, and we can ship.

Brigette's bike is held up waiting on a stencile. He name decals weren't opaque enough against the carbon tubes - so Gordon is painting her name. He lays out the name, and has a shop computer-cut a stencil from mylar. But, until the shop gives them up, we're stuck.

I got a couple of packages from FiberGlast today. I've been assembling materials from a number of sources to start practicing vacuum bagged joints on carbon tubes. This should allow me to make a stronger & lighter carbon frame while allowing my more flexibility in frame design compared to using tubes and lugs. I hope to have a production version on display in time for the Chicago Bike Show.

I'm also waiting for some more stainless tubing to arrive. I've assembled three frames worth of Metax tubing, except for the chainstays. And, I may have found a source (which is next to impossible) for one or more sets of single-bend Metax chainstays. At least one set of this tubing will be combined with Richissmo lugs, and hopefully this frame will also be ready for the show. By the time Linda's frame is gone, everything necessary will be in stock and ready to go.

I want to do another stainless frame using Slant 6 lugs and the new Columbus XCr tubing. Unfortunately, they are only offering a 38mm down-tube to start, and the SL6 needs a 35mm. It would be possible to use a Reynolds 953 downtube, but this formulation of stainless is more sensitve to staining in the presence of salt (sweat).

I am definately doing a Slant 6 frame using a set of Columbus Life tubing. This should be pretty light. Its being created to fit a friend who rides a Serrotta Ti frame. Nice bike. But with the right paint job, I think the Slant 6 will look much sexier.

Meanwhile, I've found a blaster to strip my steel road frame. I've decided to fix a couple of cosmetic issues and give it a decent paint job. The blasting is more expensive than I expected (quote of $150) so I may need to find another source long-term. But this will get me going for now. Then I have the first steel frame I ever built with a did a beautifully aligned rear triangle, it just isn't aligned to the front triangle. This was built pre-jig. The front looks good, so the back will come off and a new one will go on in its place. Oh, and Aram's track frame is close to having its filets cleaned up and being ready for paint.

Wow... that's a lot of projects. I better break the log jam and start completing some of them.

More soon.

Thursday, October 26, 2006

BikeCad

I finally broke down and bought BikeCad.

It's earned its keep already. I just did a new DCS frame design. The challenge here is to work within the available lug angles. This covers a pretty broad range of fits, but sometimes finding the right compromise takes a bit of trial and error.

BikeCad can display angles as different variables are fiddled allowing me to quickly zero in on the best lug set for properly fitting a given rider. Cool.

That said, I think a better answer is to develop a system where any angles are feasible at any joint. The theory of how to do this is relatively simple, and involves composite construction techniques that I've used in other contexts. But, the real key is making sure that the joint is stronger than the tubes. After all, no rider wants to find him/herself suddenly riding a pair of unicycles, eh?

From my perspective, the most feasible method is to miter tubes closely, and bond them with epoxy. Then layer additional carbon fiber on layers using a vacuum system with bleeder felt to extract excess epoxy and air.

So, there's a need to test this process to ensure that I get: 1) enough strength; 2) consistent results. Which means that I need some practice tube.

"Fortunately" if you look at Linda's blog, you'll see I had a little problem with a front triangle. So... I'm going to cut out the tubes and make them my first sacrificial "test tubes." After that I'll get some tubes from McLean and try to build myself a frame. So, stay tuned on this front too.

In a different vein, I've found some sources for Metax stainless tubes fro the front triangle. So, some stainless projects are on about to come online very soon.

Expect to see activity starting to pick up again.

Cheers

Wednesday, October 18, 2006

Catching Up

Hey, it's only been a month. A month!!!! Yowza!

Work and the first bug of the year. It's been pretty much 7 days a week for the day job of late. And, the kids shared a virus from school. So I missed the Missouri MS ride and the Apple Cider Century. Boo on that.

Meanwhile the garage has been filling with parts (build kits and one-off treasures from EBay).

Add it all up, and I've been highly unproductive on the framebuilding front. It actually reached the point where I couldn't reach tools and parts in the garage. Ugh!!!

Last weekend I got back on the bike (34 & 32 degrees F on Sat & Sun at 6:30am).

I'm slow but it felt good. Last week I hoped to start reorganizing the garage and basement - but, some out of town clients came into town and it got busy. This week, I've finally got past the o-load and made some progress making space.

Tonight, I got back to work on Linda's frame. More on the other blog about that. The key thing is progress is being met.

One other thing that's taken time has been beginning to form up an organization that (for want of any better name) I'm calling the Lake Michigan Chapter of The Cycle Design Group. The intent is to create professional group that can advance the interests of custom/hand-built framebuilders. To few riders have exposure to what's available. Very few recognize or appreciate the incredible bargains a true custom handbuilt frame represents compared to a manufactured bike. And, there really are some legislative issues that could benefit from our input. So, onward with the LMCTCDG. More on this later.

Hopefully, there will be more pix to post in the next week or two.

Cheers,