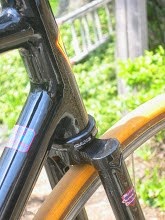
Sarah's bike came back from the painter yesterday. Gordon did his usual good job, and it looks so nice. The light color paint shows off every errant file stroke - but its good for learning what to improve upon.
I don't know who's more excited, Sarah or me. Anyhow, I was up until 11:30PM last night getting it built. Then I took it for a spin. It tracks great and turns easily. With a very short stem, and wide flat bars, it's very easy to turn the front wheel, so the tracking is especially important for a 7 year-old. Despite the fact that my knees would hit the handlebar if I pedaled and turned at the same time, it was a hoot.
This morning I checked the size on Sarah. We need to cut an inch off the seat-post (originally a Mtn-bike post), so we can lower the seat to her proper height. Otherwise, everything checked out.
The build looks like this: Ritchey Scuzzy Logic head-set and Ritchey riser stem, Syncros aluminum flat bar, SRAM 5.0 rear shifter w/Lizard Skin grips, SRAM 12-34 9 speed cassette, SRAM X0.7 rear derailer, HKK 9 chain, Tektro brake-levers, Shimano Altus cantilever brakes, Performance Forte seat-post, Sella Royal (some old brand?) black suede saddle, Shimano 105 hubs, laced straight gauge 2X to Alex rims (BMX size), with 406x1.25" tires.
The net is a strong (easily can carry me at 205 lbs), light bikes that spins easily and fits (subject to seat-post as above) Sarah great and looks very cool IMHO.
Thursday, August 31, 2006


Monday, August 21, 2006
General Update
Lots has been going on with little documentation. Let's fix that now.
After making a slight alignment tweek on the chain-stays, I installed the top tube on the track frame. I used a smaller tip on the torch which gave me better control, so these joints went faster than any of my prior filet joints. Also, cleanup of the joint was faster. In various places, different builders have suggested smaller or bigger tips for filet joints. My vote is smaller. Next step is an alignment check, then install seat-stays. After that a brake bridge, cleanup, and off to the painter.
I've been preparing to build a DCS carbon frame. The design is done and approved by the rider. We've figured out the build kit and she's forming her ideas on paint. The build has been held up waiting for the track frame to be done with the jig. I'll probably start the build by next weekend. I anticipate this to go fairly fast.
I've got a new client for another carbon frame. For this, we're going to use a Deda Corsa Nero. After going through the analysis, she fits it beautifully. Again, the build kit is decided on, so I'll be ordering that soon.
I've also ordered a new batch of 20 Cycles Noir decals. This will feature a more traditional design. I've also made the font bigger to take advantage of the real estate available on a carbon frame.
So, September should be a busy month with the delivery of a steel track bike and two carbon road frames. Yea!
After that, I'll get my new steel road frame finished and then move to building myself a steel track frame and see what comes next.
After making a slight alignment tweek on the chain-stays, I installed the top tube on the track frame. I used a smaller tip on the torch which gave me better control, so these joints went faster than any of my prior filet joints. Also, cleanup of the joint was faster. In various places, different builders have suggested smaller or bigger tips for filet joints. My vote is smaller. Next step is an alignment check, then install seat-stays. After that a brake bridge, cleanup, and off to the painter.
I've been preparing to build a DCS carbon frame. The design is done and approved by the rider. We've figured out the build kit and she's forming her ideas on paint. The build has been held up waiting for the track frame to be done with the jig. I'll probably start the build by next weekend. I anticipate this to go fairly fast.
I've got a new client for another carbon frame. For this, we're going to use a Deda Corsa Nero. After going through the analysis, she fits it beautifully. Again, the build kit is decided on, so I'll be ordering that soon.
I've also ordered a new batch of 20 Cycles Noir decals. This will feature a more traditional design. I've also made the font bigger to take advantage of the real estate available on a carbon frame.
So, September should be a busy month with the delivery of a steel track bike and two carbon road frames. Yea!
After that, I'll get my new steel road frame finished and then move to building myself a steel track frame and see what comes next.
Saturday, August 19, 2006
Sarah's Frame is Almost Done
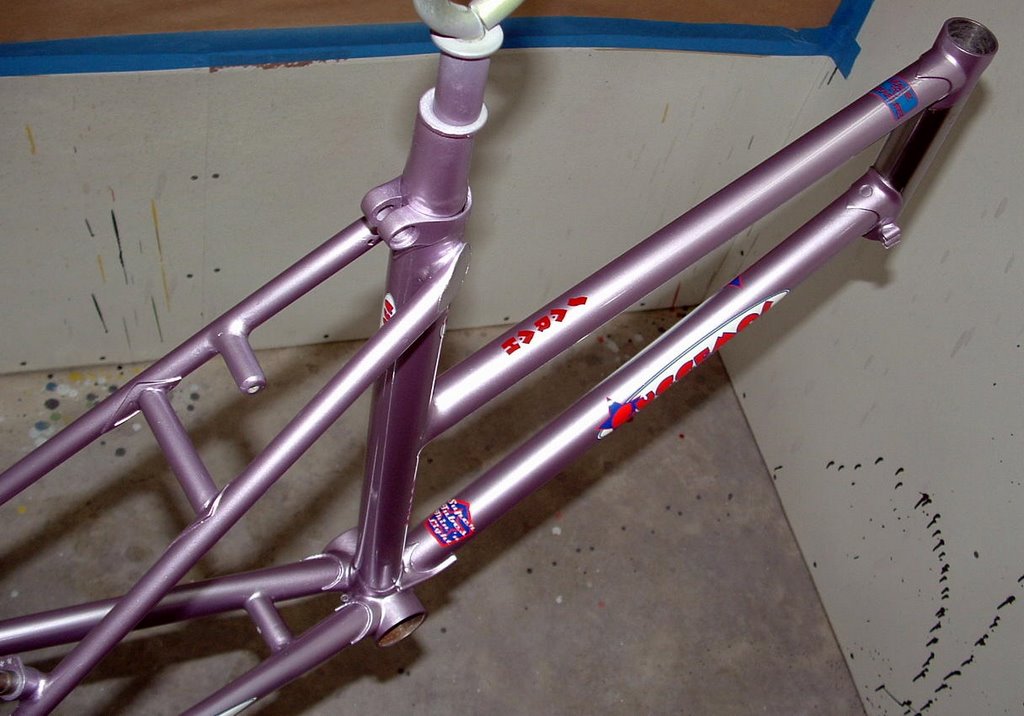
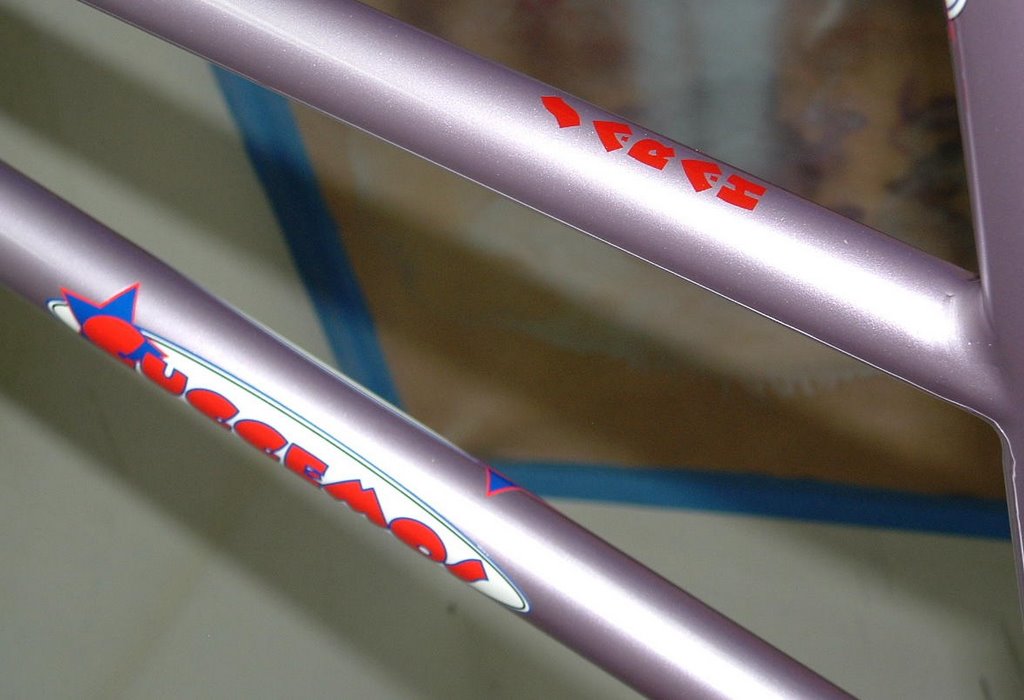
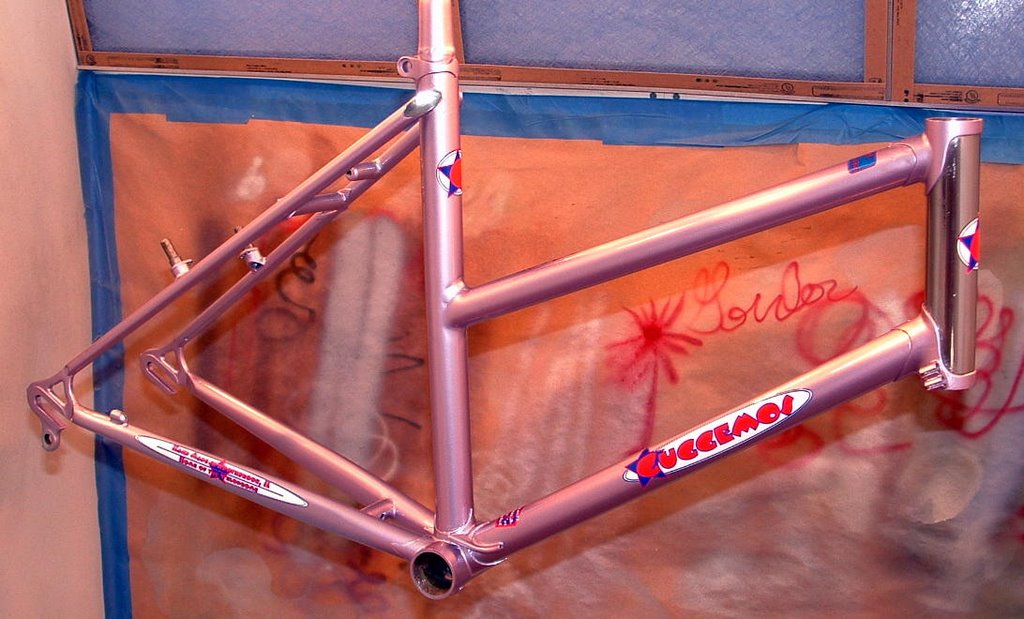


Gordon is almost done with Sarah's frame, and shared some pictures on his flickr site (www.flickr.com/photos/bikedelic). Now they're posted here as well.
You can see his usual outstanding work. I can see a couple of my mistakes, and anticipate seeing a few more when the frame comes back. Still, I think it looks great and I'm sure that Sarah is going to be very proud to ride it.
BTW: Gordon hand painted Sarah's name onthe top-tube.
Thursday, August 17, 2006
Dedacciai
I know I know, I'm late posting pictures. But soooon.
Meanwhile, I have to tell you that I have my first frame based on the new Corsa Nero from Dedacciai. It is a thing of beauty!!! You're going to love it.
Meanwhile, I have to tell you that I have my first frame based on the new Corsa Nero from Dedacciai. It is a thing of beauty!!! You're going to love it.
Wednesday, August 02, 2006
Keel is Laid
I'm on the road rather than in the shop. The last week was a blur, with so many activities that it was hard to keep track what day it was. My hope was to finish Aram's frame and get it off to paint, but there was simply too much else going on.
Still, I stayed up late a few nights and made some progress. First, the chainstays were mounted in the bottom-bracket. The bottom bracket spigots required some grinding to allow for the 120mm rear end. After pinning, alignment was checked with the Bringheli table and looked good, so it was on to brazing. Post brazing, the stays were pulling together a bit. This was probably caused by more heat on the inside of the stays whiling pulling filler around the joints. A little cold set fixed this, along with a final check-out on the table.
Then everything when back into the jig to fit up the front and back ends together. When all looked good, the down-tube and BB where sanded and cleaned with some of Freddy's Al-Tife. Everything got fluxed up, the joint was put back together on the jig, and the pins were set.
Checking this on the alignment table, I began to see the limits of my cheap surface gauge. I'll probably want to get a good height gauge someday.
Anyhow, after a bit of fussing, things looked good, so I hung the assembly from the track-forks and brazed up the joint. This came out looking clean and neat - which is nice because cleaning filler around the bottom bracket is especially difficult.
Onto the table to find that the downtube was drooping by 1/2mm at the end, and that there was a slight twist to the head-tube. Bending a 35mm down-tube takes some work - but in short order the droop was gone.
Joe supplies a nice jack with his table. This was set below the head-tube in line with the axis of the down-tube. Then a long bar was fitted to the head-tube and the twist eliminated.
After re-checking everything we have a complete straight keel. By then it was 2AM, and that was time to quit.
More when we make progress again.
Still, I stayed up late a few nights and made some progress. First, the chainstays were mounted in the bottom-bracket. The bottom bracket spigots required some grinding to allow for the 120mm rear end. After pinning, alignment was checked with the Bringheli table and looked good, so it was on to brazing. Post brazing, the stays were pulling together a bit. This was probably caused by more heat on the inside of the stays whiling pulling filler around the joints. A little cold set fixed this, along with a final check-out on the table.
Then everything when back into the jig to fit up the front and back ends together. When all looked good, the down-tube and BB where sanded and cleaned with some of Freddy's Al-Tife. Everything got fluxed up, the joint was put back together on the jig, and the pins were set.
Checking this on the alignment table, I began to see the limits of my cheap surface gauge. I'll probably want to get a good height gauge someday.
Anyhow, after a bit of fussing, things looked good, so I hung the assembly from the track-forks and brazed up the joint. This came out looking clean and neat - which is nice because cleaning filler around the bottom bracket is especially difficult.
Onto the table to find that the downtube was drooping by 1/2mm at the end, and that there was a slight twist to the head-tube. Bending a 35mm down-tube takes some work - but in short order the droop was gone.
Joe supplies a nice jack with his table. This was set below the head-tube in line with the axis of the down-tube. Then a long bar was fitted to the head-tube and the twist eliminated.
After re-checking everything we have a complete straight keel. By then it was 2AM, and that was time to quit.
More when we make progress again.
Saturday, July 29, 2006
Bringheli
I made it out to see Joe Bringheli yesterday and he's doing fine.
Joe's really busy. He's been selling (and building) four frame jigs a month, plus assorted other tools and jigs. Likewise, orders for steel tubing keep coming in. Joe says that he's working to train his daughter to help with parts of the business, just so he can keep up with everything. Yea Joe, it's a good problem to have.
Joe showed me the new Corsa Nero frame set from Deda. Very pretty. It has the newly fashionable large check weave in the outer carbon layer. The tube shapes are nice - very aero-profile looking. It is a complete frame. There's no building involved - so there's no customization either. Corsa Nero will be replacing Black Pearl (which continues to be available for a short while), and offers one improvement: Corsa Nero comes in more sizes than Black Pearl. So, for off the peg fitting, it offers more options. I think it should be popular.
Since my last visit Joe has done 4 frame builds. He clearly enjoys this side of the business, but with all of his other work, he finds it hard to fit more framebuilding into his schedule. It's interesting to note, Joe's custom frame and fork packages are priced as a real bargain. He prices to his local market, and doesn't reflect what a custom steel frame and fork would cost across the rest of the country. So, if you're looking for a frame, you're on a limited budget, and have the patience to wait 3-4 months for it to be built, you might try giving Joe a call.
Joe's really busy. He's been selling (and building) four frame jigs a month, plus assorted other tools and jigs. Likewise, orders for steel tubing keep coming in. Joe says that he's working to train his daughter to help with parts of the business, just so he can keep up with everything. Yea Joe, it's a good problem to have.
Joe showed me the new Corsa Nero frame set from Deda. Very pretty. It has the newly fashionable large check weave in the outer carbon layer. The tube shapes are nice - very aero-profile looking. It is a complete frame. There's no building involved - so there's no customization either. Corsa Nero will be replacing Black Pearl (which continues to be available for a short while), and offers one improvement: Corsa Nero comes in more sizes than Black Pearl. So, for off the peg fitting, it offers more options. I think it should be popular.
Since my last visit Joe has done 4 frame builds. He clearly enjoys this side of the business, but with all of his other work, he finds it hard to fit more framebuilding into his schedule. It's interesting to note, Joe's custom frame and fork packages are priced as a real bargain. He prices to his local market, and doesn't reflect what a custom steel frame and fork would cost across the rest of the country. So, if you're looking for a frame, you're on a limited budget, and have the patience to wait 3-4 months for it to be built, you might try giving Joe a call.
Friday, July 28, 2006
Checking in
Aram's new fork is part way built, but I've run out of O2. I knew it was about due, but haven't had time to refill. Nick going to run over tomorrow and trade the tank in for me.
Already its clear that I'm going to like this fork with a flat crown better than the slopers. The tips are Henry James SS, which will leave some nice looking faces.
It's possible to get tugs for aluminum forks (the name for a rear dropout on a track frame) which should fit over my steel forks with the stainless plates. Nonetheless, I've decided to remove the one plate and just go with plain forks and the standard MKS NJS tugs.
This weekend should see the frame assembled. There's a little work left on the front fork, the removal of one SS plate, and the filing of the tops of seat stays, all of which should be done tomorrow.
Meanwhile, my Bringheli alignment table just arrived. It looks good, and fits in the shop - which is a big issue for me. If there was more space, I'd probably have just purchased a reject granite counter top - but there's no place to put on. The Bringheli stand is made of heavy angle steel (about 2" x 2") in a configuration and size much like a saw horse. It's very rigid and has holes in the feet to mount it in the floor. Because the table is long and narrow, one has to work one tube at a time. Joe points out to be careful and fully loosen the BB before turning the frame so that the machined face of the BB post doesn't get damaged.
Tomorrow, while I take care of the clean-up tasks, the head photographer will get some pictures of the seat-stays with their plates brazed on, the head-tube/down-tube joint, the seat-post binder, and the new alignment table. We'll post them here for all to see. Then it will be on to brazing up the frame.
More soon.
Already its clear that I'm going to like this fork with a flat crown better than the slopers. The tips are Henry James SS, which will leave some nice looking faces.
It's possible to get tugs for aluminum forks (the name for a rear dropout on a track frame) which should fit over my steel forks with the stainless plates. Nonetheless, I've decided to remove the one plate and just go with plain forks and the standard MKS NJS tugs.
This weekend should see the frame assembled. There's a little work left on the front fork, the removal of one SS plate, and the filing of the tops of seat stays, all of which should be done tomorrow.
Meanwhile, my Bringheli alignment table just arrived. It looks good, and fits in the shop - which is a big issue for me. If there was more space, I'd probably have just purchased a reject granite counter top - but there's no place to put on. The Bringheli stand is made of heavy angle steel (about 2" x 2") in a configuration and size much like a saw horse. It's very rigid and has holes in the feet to mount it in the floor. Because the table is long and narrow, one has to work one tube at a time. Joe points out to be careful and fully loosen the BB before turning the frame so that the machined face of the BB post doesn't get damaged.
Tomorrow, while I take care of the clean-up tasks, the head photographer will get some pictures of the seat-stays with their plates brazed on, the head-tube/down-tube joint, the seat-post binder, and the new alignment table. We'll post them here for all to see. Then it will be on to brazing up the frame.
More soon.
Tuesday, July 25, 2006
Overdue reporting
Life's getting busy again....
Pictures soon, but here's a status update.
The first joint is faired in and looks nice. The fit and angle are on the money. The seat-post binder is mounted on the seat-tube. The seat-tube, down-tube, and chain-stays are mitered to the BB. The bottom bracket itself needs cleanup. In particular the edges of the spigots need to be squared up and the chain-stay sockets adjusted to accommodate the 120mm rear spacing of a track bike. The rear forks (aka dropouts on a road bike) are installed on the chain-stays and cleaned up. The top-tube is rough fitted, but needs a few more file strokes prior to brazing. I've installed concave plates at the top of the seat-stays and just need to do the final filing of the edges to flow smoothly into the tube. So.... we're almost ready to braze things up.
But first, I decided to install stainless plates on the sides of the rear forks. The idea is to avoid paint here where it will get damaged from installing and removing wheels.
In fitting things up, a couple of issues came up: a) the plate isn't as long as the slot; b) the end of the plate sticks out beyond the top and bottom of the fork at its rear end; c) the axle tug (MKS) fits on the fork, but has no room to accommodate the plate. So, I figured to shorten the plates just a bit so the tug can fit on the end of the fork. Also, to trim the end of the plate to echo the curves of the rear fork. Then, another problem came up: if the inside plate is installed, then the tug won't work. The piece that goes around the axle has a guide that rests on the side of the fork. The rear of the tug fits snuggly on the rear of the rear fork, and won't twist to allow this guide to ride along a plate installed on the inside of the fork.
I decided to try mounting the outside plate only. Not ideal, but at least everyone passing by doesn't need to see paint damaged by axle nuts. Using three small clamps to hold the plate in place, it was time to braze.
Looking at the results, it doesn't look all that good. While others have found ways to use these stainless plates, I find them problematic. It seems like the best solution is a stainless rear fork.
In the meantime, I have to decide whether to remove the one plate, or build a new chain-stay. While I think about that, I'm going to concentrate on building a new fork. It's got a flat crown that will look much better than either of the sloping crown forks that I made. The crown has been fitted to the steerer, and the brake mounting has mostly removed. I've started fitting blades. Their sockets in the crown need to be opened up a bit.
This piece needs a good edit, but no time for that now. So let me summarize: The BB shell needs to be cleaned up and fitted for the chain-stays. I need to finish a new fork. The tops of the seat-stays need to be finished, and the right chain-stay needs to be resolved w/o stainless. Then everything can be brazed up, cleaned up, and shipped to Gordon for paint.
Pictures soon, but here's a status update.
The first joint is faired in and looks nice. The fit and angle are on the money. The seat-post binder is mounted on the seat-tube. The seat-tube, down-tube, and chain-stays are mitered to the BB. The bottom bracket itself needs cleanup. In particular the edges of the spigots need to be squared up and the chain-stay sockets adjusted to accommodate the 120mm rear spacing of a track bike. The rear forks (aka dropouts on a road bike) are installed on the chain-stays and cleaned up. The top-tube is rough fitted, but needs a few more file strokes prior to brazing. I've installed concave plates at the top of the seat-stays and just need to do the final filing of the edges to flow smoothly into the tube. So.... we're almost ready to braze things up.
But first, I decided to install stainless plates on the sides of the rear forks. The idea is to avoid paint here where it will get damaged from installing and removing wheels.
In fitting things up, a couple of issues came up: a) the plate isn't as long as the slot; b) the end of the plate sticks out beyond the top and bottom of the fork at its rear end; c) the axle tug (MKS) fits on the fork, but has no room to accommodate the plate. So, I figured to shorten the plates just a bit so the tug can fit on the end of the fork. Also, to trim the end of the plate to echo the curves of the rear fork. Then, another problem came up: if the inside plate is installed, then the tug won't work. The piece that goes around the axle has a guide that rests on the side of the fork. The rear of the tug fits snuggly on the rear of the rear fork, and won't twist to allow this guide to ride along a plate installed on the inside of the fork.
I decided to try mounting the outside plate only. Not ideal, but at least everyone passing by doesn't need to see paint damaged by axle nuts. Using three small clamps to hold the plate in place, it was time to braze.
Looking at the results, it doesn't look all that good. While others have found ways to use these stainless plates, I find them problematic. It seems like the best solution is a stainless rear fork.
In the meantime, I have to decide whether to remove the one plate, or build a new chain-stay. While I think about that, I'm going to concentrate on building a new fork. It's got a flat crown that will look much better than either of the sloping crown forks that I made. The crown has been fitted to the steerer, and the brake mounting has mostly removed. I've started fitting blades. Their sockets in the crown need to be opened up a bit.
This piece needs a good edit, but no time for that now. So let me summarize: The BB shell needs to be cleaned up and fitted for the chain-stays. I need to finish a new fork. The tops of the seat-stays need to be finished, and the right chain-stay needs to be resolved w/o stainless. Then everything can be brazed up, cleaned up, and shipped to Gordon for paint.
Monday, July 17, 2006
Lower Head Tube
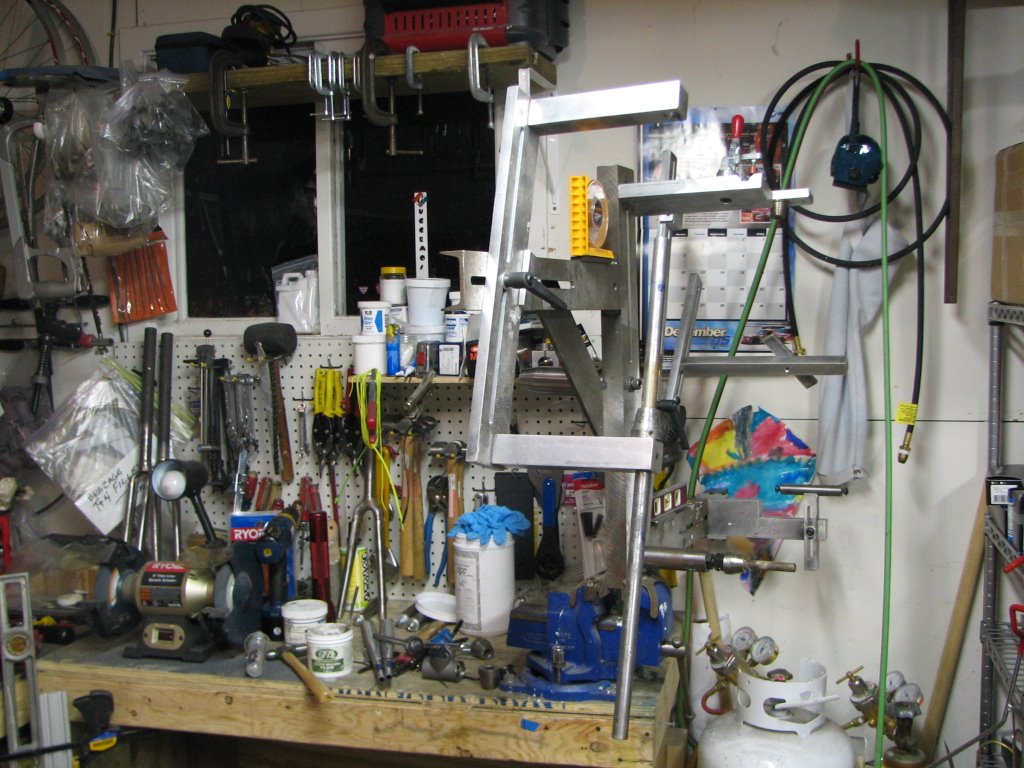
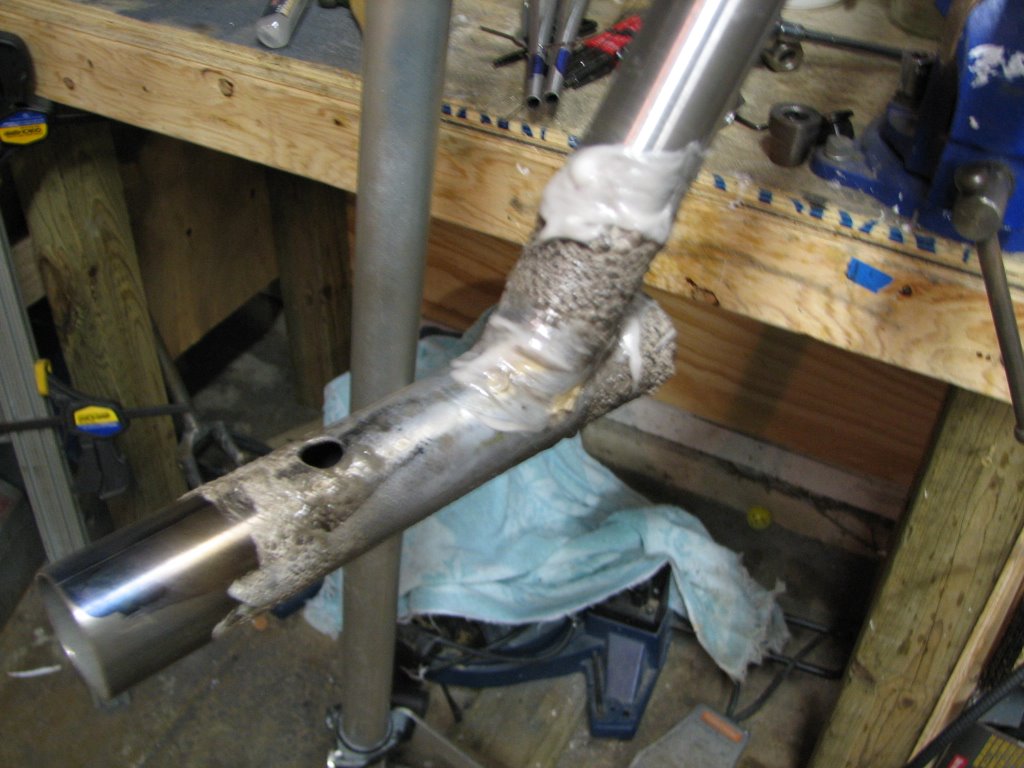
Blogger isn't wysiwyg, so it's not clear the order in which you'll see these images. The first should show the jig, after removing the combined head-tube/down-tube. My vice can swivel, which is great. In this position, it's easy to put tacks on both sides of the joint.

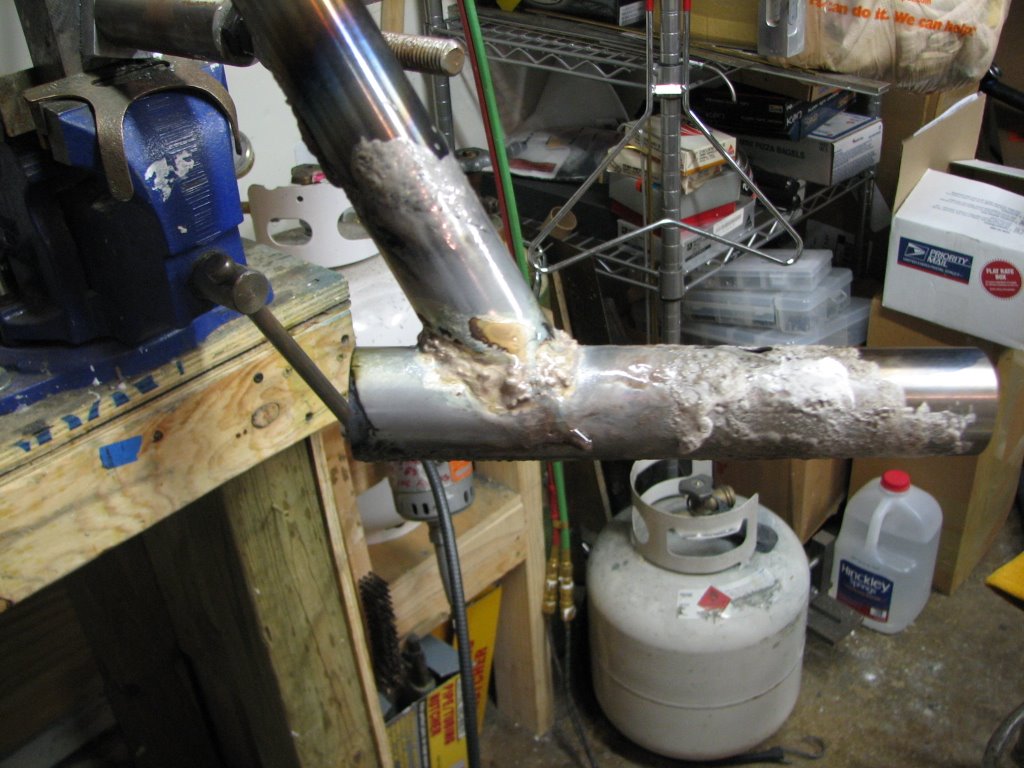
The next two shots show the tacked joint. Sorry, should've taken the pic before beginning to smear more flux on. In any case, there is a tack on each side, and one at the top.
After cooling, The angle and fit of the joint were double checked. All looked good, so it was on to more flux. The joint is held upside down because it seems to be easier to control the flow of filler, plus the flux inside the joint tends to stay at the joint instead of sliding away from it.
The last pic is post-braze. I'm using Fred Parr's Fillet pro. It's a little lumpier than I'd like - but I find it sands down easily to a smooth filet.
Because the down-tube is about 0.8mm thick at the joint, and the head tube is closer to 1mm, the direction of the torch is critical. Instead of pointing straight into the line of the joint, I point the flame a little towards the head-tube to balance the heat between the two tubes. Experience has show that failing to to this causes scorching of the flux on the down-tube.
That's all for tonight.
Sunday, July 16, 2006
More Pix
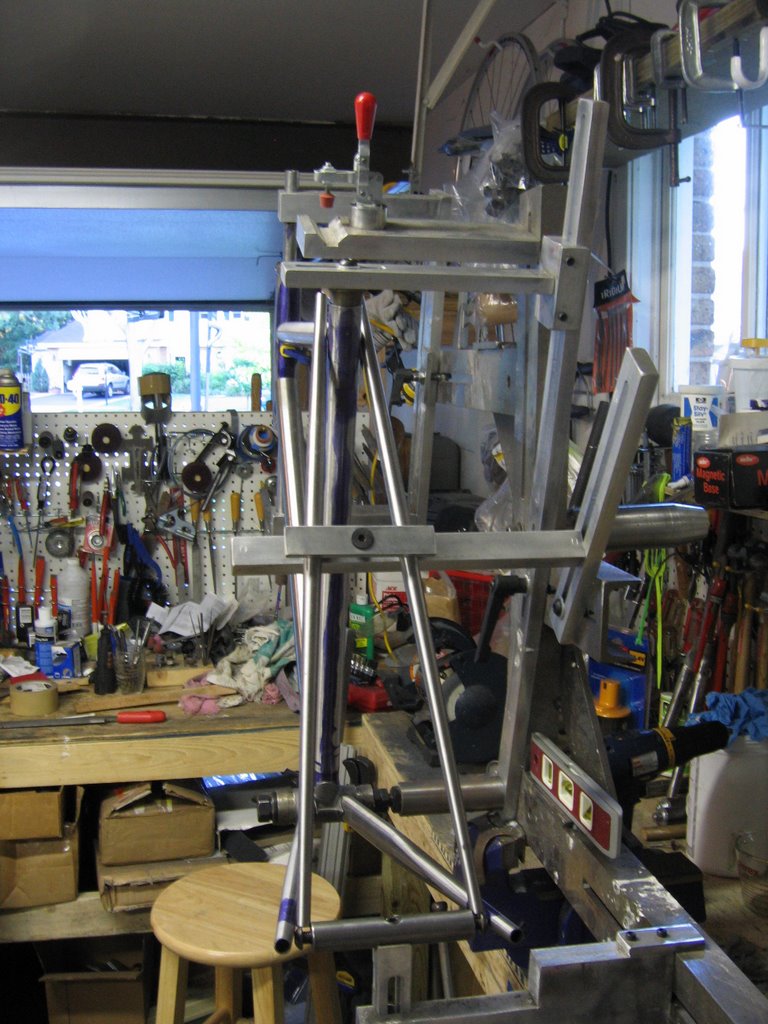
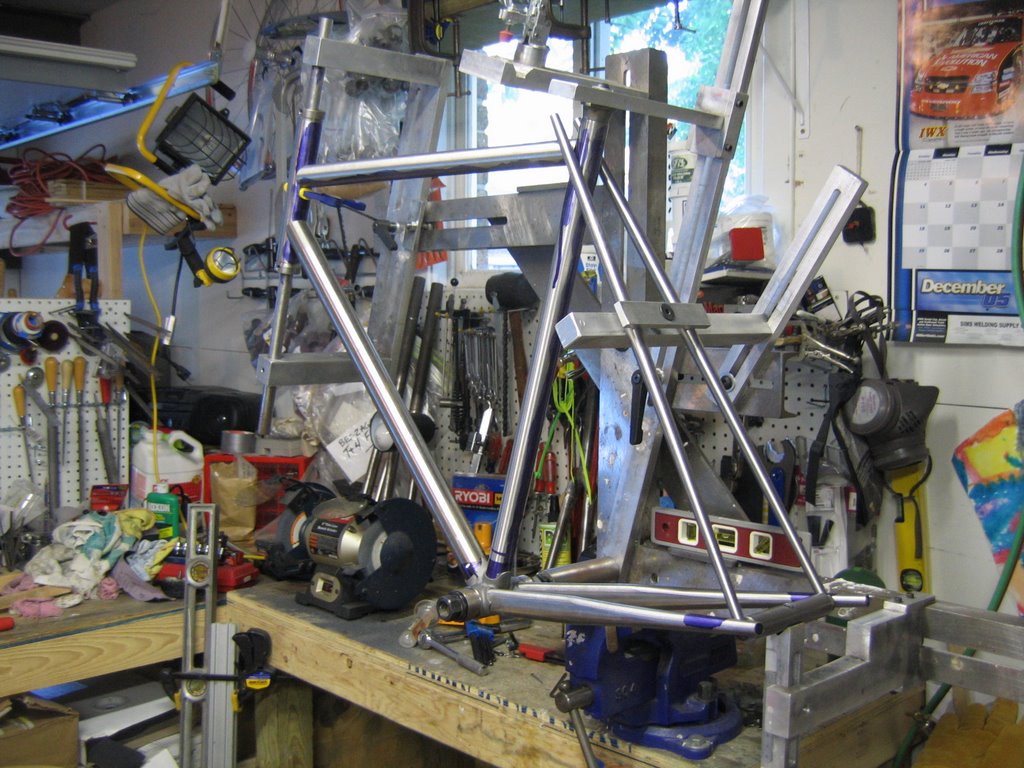
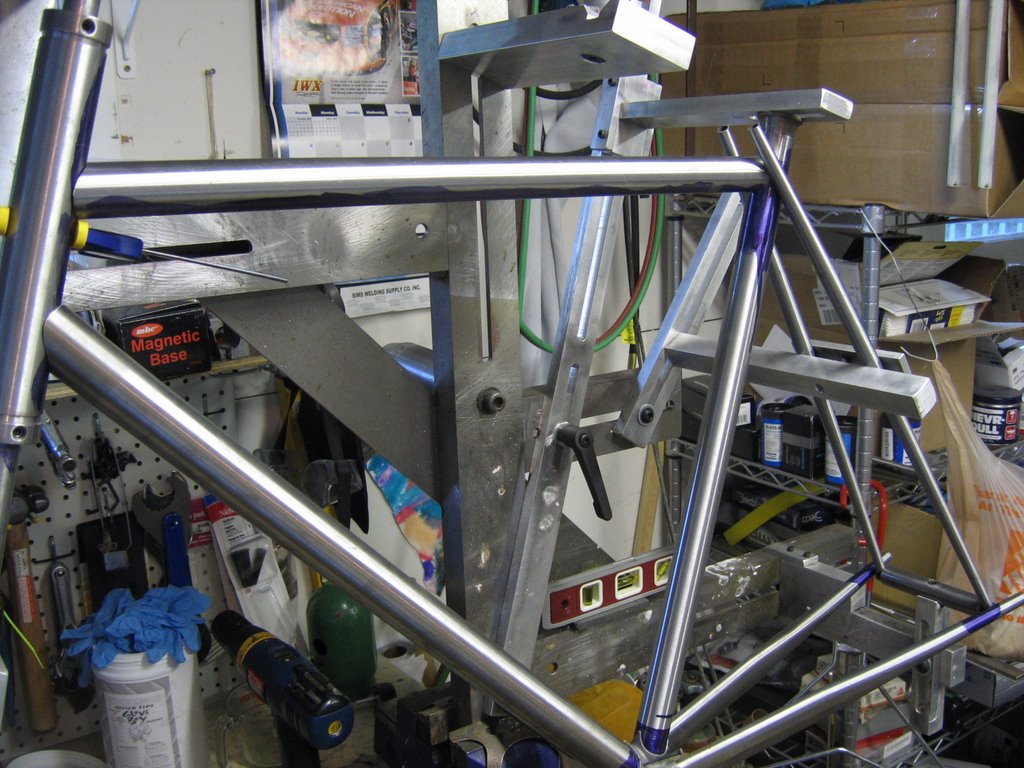 The down tube is fitted (one of the pins is located in the BB to hold it in place). The top tube is mitered - final filing to be done after the rest of the front triangle is brazed up. The seat tube is cut to length and mitered on the bottom. The chain stays are mitered and marked for length. The seat stays are just sitting there to see how I like the look of them - they're a narrow biconical stay. The downtube is 35mm .8/.5/.8. The headtube is 35.5mm. Top tube is a conical 31.7mm front, 28.6mm rear with a .7/.5/.7 profile. The seat tube is a standard 28.6mm with an external butt (1.2mm wall thickness) at the top to avoid ovalizing from heat. Chainstays are oval w/ .9 wall thickness for stiffness. The Walter bottom bracket has a built-in chain stay bridge.
 Angles are 74.5 head tube, 74 seat tube. Bottom Bracket drop is 60mm (our local velodrome is relatively flat).
Apart from the lugged bottom bracket, joints will be filet - most being with silver. The bottom bracket has loose fits so will be joined with brass, as will the connection of the track forks to the chain stays. The stays will have stainless faces brazed on - but the ends will be bare to fit the tugs (MKS njs).

Subscribe to:
Posts (Atom)