Well, there's still been no reply from Cecil at Renaissance. Urg. I really need my BB taps.
But, a new package arrived on Friday. It was my fork jig from Joe Bringheli. It looks nice and solid - hope it helps make it easier to build a fork. I put my first fork in to check it out. The fit on the dummy axle is slightly tight, but the width of my fork opening is slightly sung. I locked down the steerer while allowing the axle to float. Then I checked for tube twist (none) and locked down the axle. It looks like about 62mm of rake. So, I'm right on spec for my design. Cool.
After lots of fiddling with my dropouts, it seemed that they weren't going right. It looks like one has a little twist in it. So, I took them back out, filed the stays and reinstalled them. Now they are straight, parallel, and good. Like this, its much easier to align the chainstays. Yea!
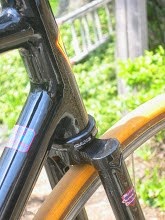
With the CS good, its time to go after the seatstays. The seat cluster has receiving holes for the stays - simplifying this part of the job. I probably won't use this style again, but it does speed things up a bit. After working the top miter, it was time to trim and slot the bottoms. Then clean up, flux up, squeeze in, and braze. This was a mostly uneventful process. After cooling, the rear wheel was reattached. Things looked good.
What's left? 2 top tube cable stops, 1 chainstay derailer stop, the brake bridge, the chainstay bridge (there's one on the BB, but the stays are long enough that a traditional tubular bridge fits and makes sense), drilling the brake hole in the fork, filing, sanding, and milling/tapping everything. Then it's off to the painter.
Last night I spent a couple of hours on cleanup. Its amazing what good (Nicholson) sharp small files can do. There's still a little to do, and there'll be a need for bondo before paint, but things are starting to look good now.
Pictures soon.
Tuesday, June 28, 2005


Sunday, June 19, 2005
Fiddling Around
I sent another email off to Cecil at Renaissance (aka bananabrain on eBay) inquiring about my BB tapping set. It's been months, I think maybe 3, since I ordered it. Hopefully he's back from vacation and will get it in the mail. I need to clean up the BB. My other purchases from Cecil have always resulted in good experiences - but I'm having to put off buying anything else from him until I can get this problem resolved.
Speaking of vendors, I should put in a plug for Yellow Jersey up in Madison. I went to them looking for a build kit that was slightly idiosyncratic (Centaur w/ FSA compact crank, Brooks sprung saddle, threadless headset w/ quill stem, no brakes 'cuz I'm using NOS Mafacs - that sort of thing), needed competitive pricing, and wanted good hand-built wheels. While I haven't ridden the wheels yet, it looks like they delivered on all counts. There don't seem to be many places that can do all this. They did. And they were quick. Recommended.
Today was spent largely on non-bicycle activities, but after the kids went to bed I got about an hour in the garage. After doing some tidying up, I noticed how many hits my full scale drawing has taken. It won't be around for another frame. That said, it'll only be needed for one or two more checks on this frame.
In profile everything looks fine including the chainstays. When the frame is set upright, and the top tube is leveled, the headtube and seattube are within half a degree of their spec, which is the limit of precision of my measuring. Using a level, the stays don't twist over their length (yeah). But the Dropouts themselves needed a little work. A tap with the Ball Peen hammer on the left took the curve out of it. A tweak in the vice got the right properly plumb.
Getting the stays aligned horizontally is another matter. Next time I'm building a jig to build the stays aligned. Anyway, using the backbone of that future jig (made of 80:20), its possible to measure alignment to within a millimeter (or maybe less). Based on this, the ends of the stays were leaning way to the right.
Starting with the BB mounted in the vice between pieces of plywood, I took a pull on the left stay. It took a couple of tries, then scared me when it seems to shift a foot all at once. Checking on the jig indicated that it was just a couple of mm to far. So, back in the vice and a light adjustment. Then, it was right at 65mm from center - urg, I'd hoped to have a little extra room for removing/mounting wheels. Maybe this is where one of those screw based adjusters pays off.
Then it was on to the right stay. This one moved more easily, and went too far. It took several further attempts at adjustment to get it right. Then one last tweak of the left for space and I tried a wheel in it. It still seems like one stay is too long, although measuring with a tape to the BB says otherwise. Maybe its time to measure to the headtube? Eyeballing, with the axle adjusted to be square in the dropouts, the wheel is centered in between the front of the stays, and measures vertical on both the front and back surface of the rim. Maybe I'll have to mount the fork and another wheel to really know if this is correct. Hmmm.... I need to think about this some more before mounting the seatstays.
Then it was on to the fork. The tips are now parallel and plumb, so I mounted the wheel. Horrors!!! How did one leg get longer than the other? Pull the wheel, look at the tips, and see I didn't clean the flux very well. One tip still had a good bit in its slot - so this got cleaned.
Then the fork got mounted on its side in v-blocks. A square checked the crown for alignment while the fork got clamped tightly. Then the square went down the legs looking for twists. None noted. Using a surface gauge, I checked the height of the left leg from the table. Then turning the fork over, and repeating the process, found that the right leg was running wide - accounting for my 110+ mm width at the tips. Fork in vice, pull on leg, pull harder, pull harder - whoops something gives. It looked like the crown itself that bent. I could see that this one went too far, so pushed it back some. Tested again, pushed back again and tested again. Ended up with a pretty balanced setup. Put the wheel in and all looks good. Now I can file and sand the tip joints. Yeah.
Well, that's it for tonight. If I can sort out my chainstays and decide what (if anything) I want to do, it won't take me long to wrap up the remaining bits. There's still some cosmetic work to do, especially filing, but I found another new set of small files. As these should be sharp, they should speed up the process.
Good Night
Speaking of vendors, I should put in a plug for Yellow Jersey up in Madison. I went to them looking for a build kit that was slightly idiosyncratic (Centaur w/ FSA compact crank, Brooks sprung saddle, threadless headset w/ quill stem, no brakes 'cuz I'm using NOS Mafacs - that sort of thing), needed competitive pricing, and wanted good hand-built wheels. While I haven't ridden the wheels yet, it looks like they delivered on all counts. There don't seem to be many places that can do all this. They did. And they were quick. Recommended.
Today was spent largely on non-bicycle activities, but after the kids went to bed I got about an hour in the garage. After doing some tidying up, I noticed how many hits my full scale drawing has taken. It won't be around for another frame. That said, it'll only be needed for one or two more checks on this frame.
In profile everything looks fine including the chainstays. When the frame is set upright, and the top tube is leveled, the headtube and seattube are within half a degree of their spec, which is the limit of precision of my measuring. Using a level, the stays don't twist over their length (yeah). But the Dropouts themselves needed a little work. A tap with the Ball Peen hammer on the left took the curve out of it. A tweak in the vice got the right properly plumb.
Getting the stays aligned horizontally is another matter. Next time I'm building a jig to build the stays aligned. Anyway, using the backbone of that future jig (made of 80:20), its possible to measure alignment to within a millimeter (or maybe less). Based on this, the ends of the stays were leaning way to the right.
Starting with the BB mounted in the vice between pieces of plywood, I took a pull on the left stay. It took a couple of tries, then scared me when it seems to shift a foot all at once. Checking on the jig indicated that it was just a couple of mm to far. So, back in the vice and a light adjustment. Then, it was right at 65mm from center - urg, I'd hoped to have a little extra room for removing/mounting wheels. Maybe this is where one of those screw based adjusters pays off.
Then it was on to the right stay. This one moved more easily, and went too far. It took several further attempts at adjustment to get it right. Then one last tweak of the left for space and I tried a wheel in it. It still seems like one stay is too long, although measuring with a tape to the BB says otherwise. Maybe its time to measure to the headtube? Eyeballing, with the axle adjusted to be square in the dropouts, the wheel is centered in between the front of the stays, and measures vertical on both the front and back surface of the rim. Maybe I'll have to mount the fork and another wheel to really know if this is correct. Hmmm.... I need to think about this some more before mounting the seatstays.
Then it was on to the fork. The tips are now parallel and plumb, so I mounted the wheel. Horrors!!! How did one leg get longer than the other? Pull the wheel, look at the tips, and see I didn't clean the flux very well. One tip still had a good bit in its slot - so this got cleaned.
Then the fork got mounted on its side in v-blocks. A square checked the crown for alignment while the fork got clamped tightly. Then the square went down the legs looking for twists. None noted. Using a surface gauge, I checked the height of the left leg from the table. Then turning the fork over, and repeating the process, found that the right leg was running wide - accounting for my 110+ mm width at the tips. Fork in vice, pull on leg, pull harder, pull harder - whoops something gives. It looked like the crown itself that bent. I could see that this one went too far, so pushed it back some. Tested again, pushed back again and tested again. Ended up with a pretty balanced setup. Put the wheel in and all looks good. Now I can file and sand the tip joints. Yeah.
Well, that's it for tonight. If I can sort out my chainstays and decide what (if anything) I want to do, it won't take me long to wrap up the remaining bits. There's still some cosmetic work to do, especially filing, but I found another new set of small files. As these should be sharp, they should speed up the process.
Good Night
Saturday, June 18, 2005
Thursday, not Wednesday
Well, Wednesday came and passed without building. Thursday morning I called the painter to say that I wasn't going to have a frame to him on Friday.
Thursday it was time to install the top tube. It's a real trial and error struggle to make sure that the miters both fit without making the tube too short. I've learned not to miter the top tube according to the lugs. Instead, I fit the tube to the headtube and seattube. Then the lugs are trial fit. If the toptube still fits, we're good. Otherwise its time to scratch one's head and figure out what's wrong.
The upper head lug (as with the lower) is substantially big on the headtube. I don't know why, none of the other Walter pieces seem to have fit problems. But the fit dictated the use of bronze. This was another someone messy braze. I since spoke with Fred Parr. He says that with bronze, one basically is sweating a joint. Its important to heat up the whole joint at once, then add filler and let is run through. I've been trying to generally heat things up, then heat the point where the filler is being added, and pulling the filler through with heat. Next time I'll try Freddy's technique.
Once things had cooled off and been cleaned up, it was time to check alignment. Eureka!!! The front triangle is as aligned as is possible to measure with my primitive setup.
Friday night I stayed up until 2:30 getting the chainstays built and installed. The bottom line is that alignment is a real nut if one doesn't have a jigxture (jig or fixture) to hold things together for pinning. For this frame, I used a version of Suzy Jackson's beam to the dropout. The problem I had was that this was giving me a good vertical plane for the dropout, it wasn't giving me a fore/aft or angle (sideway or up/down) reference. Maybe I can build that into the beam next time.
In the end, I got one stay too far into the BB while getting its angle set and pinned. So the left stay is about 2mm shorter than the right. I have horizontal stays so this can be adjusted for, but it bugs me. I'm going to be thinking about pulling the right dropout, cutting the slot deeper, and reinstalling the dropout. This should solve the problem, but is probably harder to do than to say.
I can also enlarge the slot on the left side, but I'm not sure that 2mm is feasible.
This morning, after I finally woke up, it was time to start doing the next level of cleaning things up on the frame. Lots of filing and sanding trying to get result that is semi-presentable for painting. The results are coming along.
Setting on the stand, all the frame is missing is seatstays and brake cable hardware. I haven't decided on: a) bare cable from headtube to seat tube; b) cable and housing over same distance. As a result, I need to hold off brazing. DA!
Anyhow, I still have some more lug cleanup to do, and decide on how to align the rear dropouts, install seatstays, and put on the brake cable hardware. Then its off to the painter.
BTW I'm waiting on AJ to determine a decal estimate. I should have got the info to him sooner, but I still hope to get the decals in time to go under clearcoat now that the build is behind schedule.
Other news: I bought a BB tool for my FSA exo-skeleton BB. May have said this before, but I don't like the idea of external BB bearings. I'd rather have the weight of a heavier traditional solid BB axle. The wheels and all parts are here (thank you Yellow Jersey both for accommodating my eclectic parts tastes, and hand building some nice looking wheels.
Assuming that I solve the chainstay alignment shortly, I should be ready for the painter by next week. Cool!
Thursday it was time to install the top tube. It's a real trial and error struggle to make sure that the miters both fit without making the tube too short. I've learned not to miter the top tube according to the lugs. Instead, I fit the tube to the headtube and seattube. Then the lugs are trial fit. If the toptube still fits, we're good. Otherwise its time to scratch one's head and figure out what's wrong.
The upper head lug (as with the lower) is substantially big on the headtube. I don't know why, none of the other Walter pieces seem to have fit problems. But the fit dictated the use of bronze. This was another someone messy braze. I since spoke with Fred Parr. He says that with bronze, one basically is sweating a joint. Its important to heat up the whole joint at once, then add filler and let is run through. I've been trying to generally heat things up, then heat the point where the filler is being added, and pulling the filler through with heat. Next time I'll try Freddy's technique.
Once things had cooled off and been cleaned up, it was time to check alignment. Eureka!!! The front triangle is as aligned as is possible to measure with my primitive setup.
Friday night I stayed up until 2:30 getting the chainstays built and installed. The bottom line is that alignment is a real nut if one doesn't have a jigxture (jig or fixture) to hold things together for pinning. For this frame, I used a version of Suzy Jackson's beam to the dropout. The problem I had was that this was giving me a good vertical plane for the dropout, it wasn't giving me a fore/aft or angle (sideway or up/down) reference. Maybe I can build that into the beam next time.
In the end, I got one stay too far into the BB while getting its angle set and pinned. So the left stay is about 2mm shorter than the right. I have horizontal stays so this can be adjusted for, but it bugs me. I'm going to be thinking about pulling the right dropout, cutting the slot deeper, and reinstalling the dropout. This should solve the problem, but is probably harder to do than to say.
I can also enlarge the slot on the left side, but I'm not sure that 2mm is feasible.
This morning, after I finally woke up, it was time to start doing the next level of cleaning things up on the frame. Lots of filing and sanding trying to get result that is semi-presentable for painting. The results are coming along.
Setting on the stand, all the frame is missing is seatstays and brake cable hardware. I haven't decided on: a) bare cable from headtube to seat tube; b) cable and housing over same distance. As a result, I need to hold off brazing. DA!
Anyhow, I still have some more lug cleanup to do, and decide on how to align the rear dropouts, install seatstays, and put on the brake cable hardware. Then its off to the painter.
BTW I'm waiting on AJ to determine a decal estimate. I should have got the info to him sooner, but I still hope to get the decals in time to go under clearcoat now that the build is behind schedule.
Other news: I bought a BB tool for my FSA exo-skeleton BB. May have said this before, but I don't like the idea of external BB bearings. I'd rather have the weight of a heavier traditional solid BB axle. The wheels and all parts are here (thank you Yellow Jersey both for accommodating my eclectic parts tastes, and hand building some nice looking wheels.
Assuming that I solve the chainstay alignment shortly, I should be ready for the painter by next week. Cool!
Tuesday, June 14, 2005
Tuesday Night
I've been busy with Honey-dos and work since Sunday. I've mixed up and poured half a ton of concrete, and taken down a couple of 6 inch trees and cut them up. At least I'm getting exercise, even if I'm not riding.
Bringheli did a great job of getting my tube to me, it arrived this morning along with two other sets I ordered from him. Yea! But, I decided to finish with braze-ons before installing the tube.
After careful checking, the placement of the cable stops (slotted variety) on the lower head-lug wasn't even enough. So, off they came. Second go 'round, they got pinned. Boy does that make things easy. The trick is how to get the nail out of the cable stop. Once the nails were out, I decided to taper the front edge of the stops with a half-round file. They look nice now, and a little different. We'll see how they work in practice.
Next came water-bottle bosses. A lot of people ask a lot of questions on the list about where to place them, jigs, etc. I must be missing something. 1) use the angle iron to scribe a center line. 2) measure location (175mm c-c from the BB, then 62mm c-c to the next boss) on an old bike. 3) mark the distances on the center line. 4) drill a 1/4" hole at the marks. 5) clean up flux & drop bosses in the holes. 6) braze and clean up. Afterwards, an old cage made a good test of the locations - seemed fine. What's difficult is drilling the lower hole (close to the BB) on each tube. There isn't really room for the drill. An AHA moment. Next time the holes will get drilled before seat tube is brazed to the BB. :)
Then it was time to tackle the front derailer braze-on. I've never used one before (even on a pre-manufactured bike), so this was all new territory. After studying some threads, it seems that when using a normal 2 speed campy derailer with a compact crank, it is recommend that it be higher than with a normal chain-ring. Apparently, some people like it absolutely higher than with a normal chainring, whereas others simply like more distance between it and the compact chainring. After studying the Campy diagrams and directions, I decided to install the braze in the normal position for a full size (52-53 tooth) chainring. There's room to drop the derailer a bit, and to raise it. So, we'll see what works best. despite measuring everything twice, and pinning the braze-on, when the derailer was mounted, it wouldn't align parallel to the BB face. Time for the Channel Locks. 2 tries and it was good. I may have to re-check one more time prior to paint, but it looks good.
I've been experimenting with a slightly carborizing flame, it doesn't seem to burn the flux so easily. Also, I'm doing neater work with the filler again. It's funny what a difference thickness makes in the process. I can't get the front lugs hot enough to accept the silver without really cooking the cablestop. I don't think that a smaller tip will do. The combined lug, headtube, and whatever cooling effect the down tube provides, net out to a need for big BTUs. However, I got good looking results this time with minimal spills - so I'm happy.
Tomorrow it will be on to the top tube. The frame must be to the painter by the 19th if I'm going to use it on the MS ride. That means, I have 5 days to install the top tube (after checking alignment one more time), install the rear triangle, put on the bridges, and build the fork. Probably, in a pinch, a different fork would do. But I want the big trail that Alex Singer designed. I have some pre-racked forks, and maybe could use a HJ crown with a 3 degree rake to achieve the effect. We'll have to see.
Until next time, ciao!
Bringheli did a great job of getting my tube to me, it arrived this morning along with two other sets I ordered from him. Yea! But, I decided to finish with braze-ons before installing the tube.
After careful checking, the placement of the cable stops (slotted variety) on the lower head-lug wasn't even enough. So, off they came. Second go 'round, they got pinned. Boy does that make things easy. The trick is how to get the nail out of the cable stop. Once the nails were out, I decided to taper the front edge of the stops with a half-round file. They look nice now, and a little different. We'll see how they work in practice.
Next came water-bottle bosses. A lot of people ask a lot of questions on the list about where to place them, jigs, etc. I must be missing something. 1) use the angle iron to scribe a center line. 2) measure location (175mm c-c from the BB, then 62mm c-c to the next boss) on an old bike. 3) mark the distances on the center line. 4) drill a 1/4" hole at the marks. 5) clean up flux & drop bosses in the holes. 6) braze and clean up. Afterwards, an old cage made a good test of the locations - seemed fine. What's difficult is drilling the lower hole (close to the BB) on each tube. There isn't really room for the drill. An AHA moment. Next time the holes will get drilled before seat tube is brazed to the BB. :)
Then it was time to tackle the front derailer braze-on. I've never used one before (even on a pre-manufactured bike), so this was all new territory. After studying some threads, it seems that when using a normal 2 speed campy derailer with a compact crank, it is recommend that it be higher than with a normal chain-ring. Apparently, some people like it absolutely higher than with a normal chainring, whereas others simply like more distance between it and the compact chainring. After studying the Campy diagrams and directions, I decided to install the braze in the normal position for a full size (52-53 tooth) chainring. There's room to drop the derailer a bit, and to raise it. So, we'll see what works best. despite measuring everything twice, and pinning the braze-on, when the derailer was mounted, it wouldn't align parallel to the BB face. Time for the Channel Locks. 2 tries and it was good. I may have to re-check one more time prior to paint, but it looks good.
I've been experimenting with a slightly carborizing flame, it doesn't seem to burn the flux so easily. Also, I'm doing neater work with the filler again. It's funny what a difference thickness makes in the process. I can't get the front lugs hot enough to accept the silver without really cooking the cablestop. I don't think that a smaller tip will do. The combined lug, headtube, and whatever cooling effect the down tube provides, net out to a need for big BTUs. However, I got good looking results this time with minimal spills - so I'm happy.
Tomorrow it will be on to the top tube. The frame must be to the painter by the 19th if I'm going to use it on the MS ride. That means, I have 5 days to install the top tube (after checking alignment one more time), install the rear triangle, put on the bridges, and build the fork. Probably, in a pinch, a different fork would do. But I want the big trail that Alex Singer designed. I have some pre-racked forks, and maybe could use a HJ crown with a 3 degree rake to achieve the effect. We'll have to see.
Until next time, ciao!
Saturday, June 11, 2005
Various things
After a long work week, I got out this morning for a couple of hours of riding. I wanted to do 3-4 hours, but have to be in the office at 11AM. Anyway, it was hot and humid. This is good practice as we haven't had much of this weather this year. It was also great therapy for the week.
I thought about using a Reynolds 28.6 downtube to replace my Deda 28.6 TT. Of course the gauges on the DT are heavier. And, it seemed like too much of a compromise in the final analysis. I got my tube order into Joe Bringheli, hopefully my replacement will be here soon.
Meanwhile, last night I put cable stops on the bottom head lug. I tried to make a holder of the Henry James model, but it was hard because of combination of angles in the joint. In the end, I went without a holder. I got pretty good positioning and symmetry, but next time I'll come up with a more elegant solution. I'm thinking of getting a cheap feeler gauge on a magnetic base. Set it on a tube at a distance from the part and use the feeler to reach over and hold the part in place. We'll see if that works.
I've largely finished my first (simple) fork. I still have a twist in one tip. I think this will be easy to fix. Meanwhile, the legs aren't twisted, the lengths are equal and right, and the wheel sits straight and centered in the fork. So, for a multi-dimensional puzzle, it came out pretty well. Still, I'm going to make a jig for my next effort (except maybe Joe will get me my new Bringheli in time to make this unnecessary.
I'm also about to build a tubing bender. Using a straight-leg crown is limiting (there aren't that many styles or widths available), plus the esthetics aren't as nice. It's possible to get Reynolds pre-raked fork blades (I have two pair from Andy Newlands at Terranova), but they don't really allow for the large rake I like from Singer and Herse designs. So I have to learn how to bend fork legs and building the form will be step one.
The likely next steps are putting on the water bottle bosses and the front derailer tab. That way any induced warps can be fixed before putting on the top tube. It's not clear to me yet the best way to route the cables under the BB. So, that will come shortly. Also, I need to draft the top view of my stays and BB for layout and jigging purposes. So, there's plenty to do while waiting for the new top tube.
This probably reads like the rush job that it is. There will be some pictures of the finished fork soon.
Cheers to all.
I thought about using a Reynolds 28.6 downtube to replace my Deda 28.6 TT. Of course the gauges on the DT are heavier. And, it seemed like too much of a compromise in the final analysis. I got my tube order into Joe Bringheli, hopefully my replacement will be here soon.
Meanwhile, last night I put cable stops on the bottom head lug. I tried to make a holder of the Henry James model, but it was hard because of combination of angles in the joint. In the end, I went without a holder. I got pretty good positioning and symmetry, but next time I'll come up with a more elegant solution. I'm thinking of getting a cheap feeler gauge on a magnetic base. Set it on a tube at a distance from the part and use the feeler to reach over and hold the part in place. We'll see if that works.
I've largely finished my first (simple) fork. I still have a twist in one tip. I think this will be easy to fix. Meanwhile, the legs aren't twisted, the lengths are equal and right, and the wheel sits straight and centered in the fork. So, for a multi-dimensional puzzle, it came out pretty well. Still, I'm going to make a jig for my next effort (except maybe Joe will get me my new Bringheli in time to make this unnecessary.
I'm also about to build a tubing bender. Using a straight-leg crown is limiting (there aren't that many styles or widths available), plus the esthetics aren't as nice. It's possible to get Reynolds pre-raked fork blades (I have two pair from Andy Newlands at Terranova), but they don't really allow for the large rake I like from Singer and Herse designs. So I have to learn how to bend fork legs and building the form will be step one.
The likely next steps are putting on the water bottle bosses and the front derailer tab. That way any induced warps can be fixed before putting on the top tube. It's not clear to me yet the best way to route the cables under the BB. So, that will come shortly. Also, I need to draft the top view of my stays and BB for layout and jigging purposes. So, there's plenty to do while waiting for the new top tube.
This probably reads like the rush job that it is. There will be some pictures of the finished fork soon.
Cheers to all.
Thursday, June 09, 2005
Finally, pictures
I've promised these for some time, so here are some pictures. Only one picture for now of Sarah's bike.
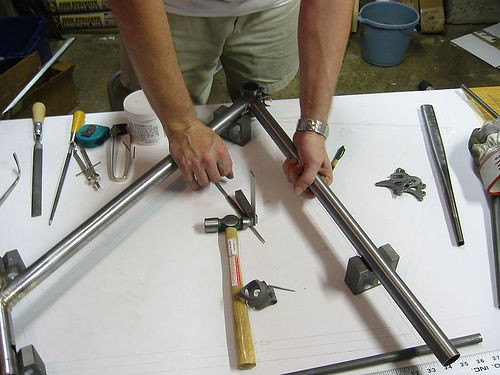
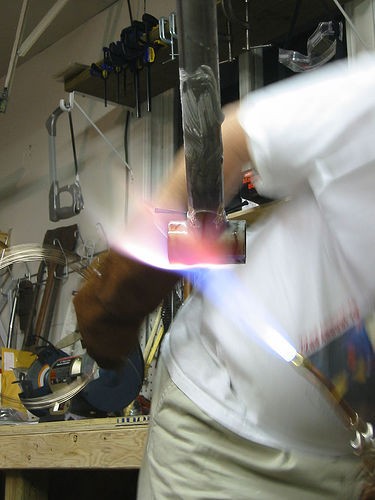
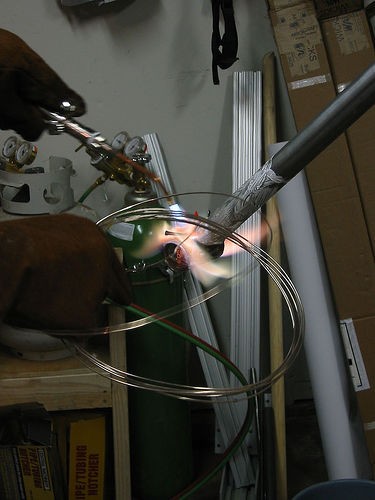
The rest are of my new bike based on a design by Alex Singer. I've been trying to do one joint a day (except when its no joint a day). The front triangle is done except for the top tube. I made a boo boo and have to order a new one. Ergh!!!! One more learning experience.
Anyhow, enjoy the pictures.
The rest are of my new bike based on a design by Alex Singer. I've been trying to do one joint a day (except when its no joint a day). The front triangle is done except for the top tube. I made a boo boo and have to order a new one. Ergh!!!! One more learning experience.
Anyhow, enjoy the pictures.

Subscribe to:
Posts (Atom)